Advertisement
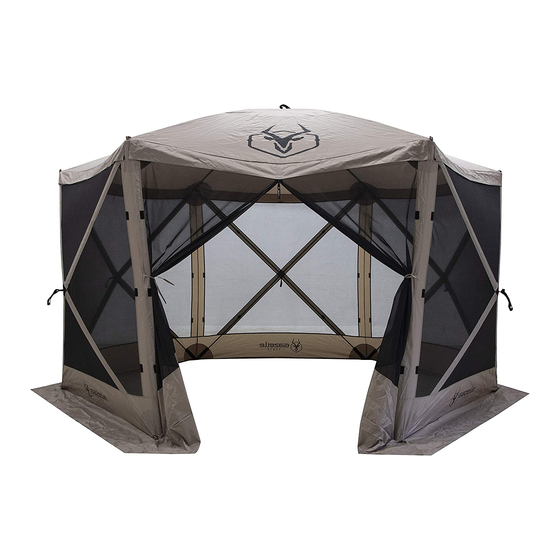
PORTABLE GAZEBO
ASSEMBLY AND USE INSTRUCTIONS
WARNING
READ AND UNDERSTAND ALL ASSEMBLY, INSPECTION, & USE
INSTRUCTIONS PROVIDED BEFORE EACH USE. FAILURE TO FOLLOW
INSTRUCTIONS COULD RESULT IN SERIOUS INJURY OR DEATH.
NEVER ALLOW CHILDREN TO PLAY IN THIS PRODUCT UNATTENDED.
KEEP ALL FLAME AND HEAT SOURCES AWAY FROM THIS TENT FABRIC.
THIS TENT IS MADE WITH FLAME RESISTANT FABRIC WHICH MEETS
CPAI-84 SPECIFICATIONS. IT IS NOT FIREPROOF. THE FABRIC WILL
BURN IF LEFT IN CONTINUOUS CONTACT WITH ANY FLAME SOURCE.
THE APPLICATION OF ANY FOREIGN SUBSTANCE NOT THE TENT FAB-
RIC MAY RENDER THE FLAME RESISTANT PROPERTIES INEFFECTIVE.
THE USE OF ELECTRICAL DEVICES IS NOT RECOMMENDED INSIDE THE
GAZELLE CAMPING TENT.
WARNING
THE GAZEBO WILL COME OUT OF THE BAG APPEARING INSIDE OUT, THIS IS NORMAL. YOU MUST UN-
FOLD THE GAZEBO PER THE INSTRUCTIONS TO AVOID SETTING IT UP INCORRECTLY. WHEN SET UP
PROPERLY, THE POLES/FRAMEWORK OF THE GAZEBO SHOULD BE ON THE INSIDE OF THE GAZEBO.
FOR MORE INFORMATION ON SET-UP & TAKE DOWN VISIT OUR WEBSITE
SET-UP INSTRUCTIONS
1. Remove the gazebo from the carrying bag. Remove the tie strap from around the top of the gazebo. [ SEE FIGURE 1 ]
2. Lay the gazebo flat on the ground and check that there is no material twisted or overlapping the ends of any poles. DO NOT force
gazebo when folding or unfolding. Watch for the entanglement of poles. [ SEE FIGURE 2 ]
NOTE: When unfolding, check that a Gazelle logo is visible and locate the webbing loops located in center of wall panel. This is the
OUTSIDE portion of the shelter. The poles and hubs are the INTERIOR of the gazebo.
TIE STRAP
FIGURE 1
|
|
19068
REV3 09/29/2020
© Copyright 2020 Ardisam, Inc.
WWW.GAZELLETENTS.COM
|
All Rights Reserved.
WHAT'S INCLUDED IN THE BAG
• Gazelle™ Portable Gazebo
• Ground stakes/storage bag
• Tie-down ropes
BEFORE YOU BEGIN
• Locate a level site clear of all debris and sharp objects to
prevent tears while setting up your gazebo.
• For easy set-up in windy conditions, make sure to posi-
tion one of the corners of the gazebo into the wind.
• Do not set up your gazebo under any overhead obstruc-
tions in case of falling objects or lightning strikes in in-
clement weather.
FIGURE 2
SIDE WALL
GAZELLE
LOGO
Advertisement
Table of Contents

Related Manuals for Gazelle Portable Gazebo


Summary of Contents for Gazelle Portable Gazebo
- Page 1 Watch for the entanglement of poles. [ SEE FIGURE 2 ] NOTE: When unfolding, check that a Gazelle logo is visible and locate the webbing loops located in center of wall panel. This is the OUTSIDE portion of the shelter.
- Page 2 3. Find the webbing loop handle located on the exterior of each hub, centered on each wall (and roof ). Proceed to pull outward until the wall pops open. Do this to all SIDE WALLS first. [ SEE FIGURE 3 ] NOTE: For added assistance, grasp the top seam of the panel and place your foot on the bottom edge when popping open a side wall panel to help hold the gazebo in place.
- Page 3 • Never put the gazebo away wet. Always put away dry and clean to avoid mildew and other problems. LONG TERM STORAGE Make sure your Gazelle™ gazebo is completely dry and clean before storing for long periods of time. Store your gazebo in a cool, dry place away from rodents.
- Page 4 Gazelle™ Tents, Phone: 800-345-6007 A Division of Ardisam, Inc. Fax: 715-822-2124 1160 Eighth Avenue, PO Box 755 www.gazelletents.com Cumberland, WI 54829 *All weights, specifications and features are approximate and are subject to change without notice. Due to continuous product improvements, product images may not be exact. Warning labels in some product...
Need help?
Do you have a question about the Portable Gazebo and is the answer not in the manual?
Questions and answers