
Related Manuals for TP-Link Deco X20-DSL


Summary of Contents for TP-Link Deco X20-DSL
- Page 1 Deco X20-DSL AX1800 VDSL Whole Home Mesh Wi-Fi 6 System User Guide VDSL Mesh Wi-Fi 6 System 1910013005 REV1.0.0 © 2021 TP-Link...
-
Page 2: Table Of Contents
Contents About This Guide ·························································· 1 Guest Network ···························································· 23 Appearance ····································································· 2 Blacklist ··········································································· 24 Before You Start ··························································· 3 Upgrade Your Deco ·················································· 25 Set Up Your Deco as A DSL Modem Router ·· 4 WPS ··················································································· 26 Set Up Your Deco as A Wireless Router ···········... -
Page 3: About This Guide
• A Technical Community is provided for you to discuss our products at https://community.tp-link.com. • Our Technical Support contact information can be found at the Help center of the Deco app and the Contact Technical Support page at https://www.tp-link.com/support. -
Page 4: Appearance
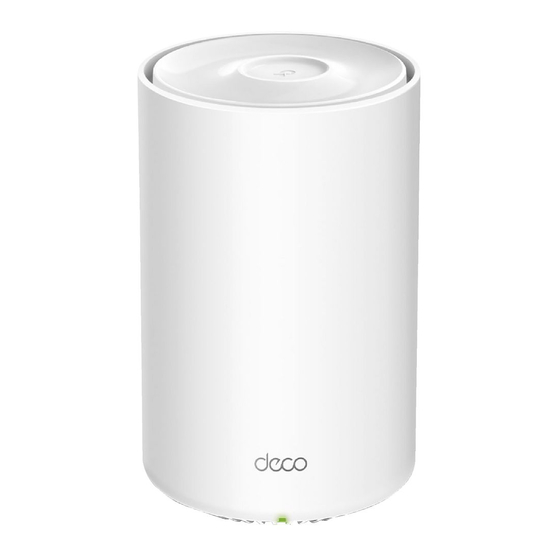
Appearance Each Deco has an LED that changes color according to its status, a DSL LED that indicates the DSL synchronization process and the connection status, four RJ-45 Ethernet ports, one DSL port, a power slot, and a Reset button. See the explanation below: Tip: The product label can be found at the bottom of the product. -
Page 5: Before You Start
Before You Start You can set up your Deco as a DSL modem router or a wireless router, meeting your needs in different networking scenarios. DSL Modem Router Mode When working in DSL Modem Router mode, Deco connects to the internet via a phone cable. Follow Set Up Your Deco as A DSL Modem Router to set up your Deco. -
Page 6: Set Up Your Deco As A Dsl Modem Router
2. Log in with TP-Link ID 3. Identify your Deco Scan the QR code below or go to Google Open the app. Use your TP-Link ID to log in. If Choose your Deco model. Play or the App Store to download the Deco you don’t have a TP-Link ID, sign up first. - Page 7 4. Choose an operation mode 5. Plug in and power on Deco 6. Connect to the Deco's Wi-Fi Choose DSL Modem Router. Connect your Deco to the splitter or directly Wait until the Wi-Fi Signal LED pulses blue, to the phone jack with the provided phone then connect to the Deco's Wi-Fi using the cable.
- Page 8 7. Select a location 8. Select your ISP 9. Set up internet connection Select a location for this Deco. If its location Choose your current region and ISP (Internet Select the internet connection type and enter is not listed, you can create a new one by Service Provider).
- Page 9 10. Create your Wi-Fi network 11. Connect to your Wi-Fi network 12. Setup complete Set a network name and a password. These Connect your phone/tablet to the Deco's new Your Deco network is now up. Connect all will be the name and password you use to Wi-Fi.
-
Page 10: Set Up Your Deco As A Wireless Router
2. Log in with TP-Link ID 3. Identify your Deco Scan the QR code below or go to Google Open the app. Use your TP-Link ID to log in. If Choose your Deco model. Play or the App Store to download the Deco you don’t have a TP-Link ID, sign up first. - Page 11 4. Choose an operation mode 5. Plug in and power on Deco 6. Connect to the Deco's Wi-Fi Choose Wireless Router. Power off your modem. Connect your Deco to Wait until the Wi-Fi Signal LED pulses blue, the modem and power them both on. then connect to the Deco's Wi-Fi using the default SSID printed on the product label.
- Page 12 7. Select a location 8. Set up internet connection 9. Create your Wi-Fi network Select a location for this Deco. If its location Select the internet connection type and enter Set a network name and a password. These is not listed, you can create a new one by the information.
- Page 13 10. Connect to your Wi-Fi network 11. Setup complete Connect your phone/tablet to the Deco's new Your Deco network is now up. Connect all Wi-Fi. devices to the Deco network. You can also add more Deco units to expand the Wi-Fi coverage.
-
Page 14: Add More Decos
Add More Decos After created a Deco network, you can add more Deco units to the network to expand the Wi-Fi coverage and manage them conveniently on your Deco app. In Overview, tap . Select the Deco model you want to add, and follow After the setup, you can find the added Deco units by tapping app instructions to complete the setup. -
Page 15: Dashboard
After you successfully set up your Deco network, you will see the dashboard of the Deco app. Here you can get an overview of the network status, customize your home network with enhanced security using a kit of features built to TP-Link HomeShield and set up various advanced features. -
Page 16: Check Deco Status
Check Deco Status In Overview, you can check the working status of all the Decos, check the details of each Deco unit, change the Deco's location/name, and more. Tap a Deco unit to check the details. Change or customize the location/name of the Deco. to check all Decos' status. -
Page 17: Set Main Deco
Set Main Deco After setup, you can replace the main Deco with any satellite Deco without resetting and reconfigure the whole network. 3. Choose a satellite Deco and follow app 1. In Overview, tap 2. Tap > Set Main Deco. instructions to complete the settings. -
Page 18: Manage Connected Devices
Manage Connected Devices In Overview, you can check the working status of all the connected devices, view the device details, and change the device settings. Tap a client to check the details. Belongs to to add a unique profile for the device and manage its to manage the device online activities. -
Page 19: Remove/Reboot Deco
Remove/Reboot Deco You can remove or reboot your Deco easily in the Deco app. Follow the steps below. Note: Removing a Deco will reset it to factory default settings. You can also press the Reset button at the bottom of Deco for 1 second and release to quickly reset your Deco to factory default settings. 2. -
Page 20: Create A New Network
Create A New Network In the Deco app, you can create different Deco networks linked with your TP-Link ID and manage them conveniently from the Deco app with one account. You can also help family or friends manage their network on your Deco app. Two methods are provided as below to create a new network: Method 1. - Page 21 Method 2. Create a new network from the Menu page 1. Tap to open the Menu. 2. Tap > CREATE NEW NETWORK. 3. Follow app instruction to complete the setup.
-
Page 22: Delete A Network
Delete A Network You can delete a Deco network if you don't need it anymore. Deleting a Deco network will reset all Decos in this network to factory default settings. 1. In Overview, tap 2. Tap > Delete. -
Page 23: Homeshield
Whether protecting your network from malicious attacks, managing your family's online activities, or prioritizing devices to get better performance, TP-Link HomeShield provides you a kit of basic (free) and Pro (charged) features to enhance your whole home network with enhanced security. -
Page 24: Wi-Fi Settings
Wi-Fi Settings You can change the network name and password of your main network at any time and share the network easily with family and friends. > Wi-Fi. Manage main network (eg. change your main network's Wi-Fi name and Share your network with others. password). -
Page 25: Guest Network
Guest Network You can create and share a separate network for guests to guarantee the security and privacy of your main network. > Wi-Fi and enable Guest Network. Set a Wi-Fi name and password for Share your guest network with others. the guest network. -
Page 26: Blacklist
Blacklist Compile a blacklist to avoid devices added on the blacklist to access to your network, ensuring the safety of your personal information shared in the network. 1. Tap > Blacklist. 2. Tap on the top right corner and add clients or other devices to the blacklist. -
Page 27: Upgrade Your Deco
Upgrade Your Deco TP-Link is dedicated to improving product features and providing a better customer experience. An up-to-date firmware provides better and more stable network performance. Always update your Deco to the latest firmware version when prompted in the Deco app. -
Page 28: Wps
WPS (Wi-Fi Protected Setup) helps you to quickly and securely connect a client to a network with a tap without entering any password. 2. Tap the icon in the Deco app and 3. Your client has connected to the network 1. -
Page 29: Managers
Add friends and family members to help manage your network. Each manager should have their own TP-Link ID. > Managers, and follow app instructions to add other TP-Link ID account as manager. Then the manager can start to manage the network. -
Page 30: Advanced Features
Advanced Features Additional features are available under the Advanced menu. The features vary with the working mode of Deco. When Deco works in a mode, the relevant features supported by this mode will appear on the Menu for use. For example, you can configure the DSL settings only when your Deco works in DSL Modem Router mode. - Page 31 Enable IPv6 to set up an IPv6 Add IPv6 firewall rules to allow Modify LAN IP to avoid IP address Change DHCP server settings. internet connection. specific devices to access the confict. Note: This feature is not available when your Deco specified services.
- Page 32 Note: This feature is not available when your Deco works in Tip: For more about MAC Clone, refer to Access Point mode. prevent ADSL data rate interference caused https://www.tp-link.com/support/faq/2925/ Note: This feature is not available when your Deco works in by the cross-talk between telephone lines. Access Point mode.
- Page 33 Reserve IP addresses for specific Set up port forwarding rules to Register a TP-Link DDNS domain Enable SIP ALG to communicate devices to recognize and manage enable devices in your network name to access your router and with SIP (Session Initiation Protocol) the device more easily.
- Page 34 Enable UPNP to allow your local Enable Fast Roaming to allow Enable Beamforming Toggle off to turn off the light network to dynamically open ports your wireless devices to switch concentrate Wi-Fi signal towards on Deco. Configure the Night Mode for applications like gaming.
- Page 35 Set connection alerts to receive Set notifications to receive alerts in Change the operation mode. notifications once the clients the notification bar. connect to or disconnect from Deco.
-
Page 36: Faq
Solutions to common problems during setup or use are provided here for reference. Follow the steps in the provided link to solve your problem. If problems still exist, contact us: https://www.tp-link.com/support Q1. What should I do if I fail to configure the main Deco and get stuck on “We couldn't find Deco”? Refer to the guide https://www.tp-link.com/support/faq/2239/... -
Page 37: Authentication
5150MHz—5250MHz (23dBm) EU declaration of conformity TP-Link hereby declares that the device is in compliance with the essential requirements and other relevant provisions of directives 2014/53/EU, 2009/125/EC, 2011/65/EU and (EU)2015/863. The original EU declaration of conformity may be found at http://www.tp-link.com/en/ce RF Exposure Information This device meets the EU requirements (2014/53/EU Article 3.1a) on the limitation of exposure of the general public to electromagnetic fields by way... - Page 38 AT BE BG CH CY CZ DE EE EL ES FR HR HU LT LU LV MT NO PL PT RO SE SI SK UK(NI) Canadian Compliance Statement This device complies with Industry Canada license-exempt RSS standard(s). Operation is subject to the following two conditions: 1.
- Page 39 Radiation Exposure Statement: This equipment complies with IC radiation exposure limits set forth for an uncontrolled environment. This equipment should be installed and operated with minimum distance 20cm between the radiator & your body. Déclaration d’exposition aux radiations: Cet équipement est conforme aux limites d’exposition aux rayonnements IC établies pour un environnement non contrôlé. Cet équipement doit être installé...
- Page 40 • 插槽與開口供通風使用,以確保本產品的操作可靠並防止過熱,請勿堵塞或覆蓋開口。 • 請勿將本產品置放於靠近熱源的地方。除非有正常的通風,否則不可放在密閉位置中。 • 不要私自拆開機殼或自行維修,如產品有故障請與原廠或代理商聯繫。 限用物質含有情況標示聲明書 設備名稱: 型號(型式): Equipment name: Type designation (Type) AX1800 VDSL Whole Home Mesh Wi-Fi 6 Deco X20-DSL System 限用物質及其化學符號 Restricted substances and its chemical symbols 單元 鉛 汞 鎘 六價鉻 多溴聯苯 多溴二苯醚 Unit Lead...
- Page 41 Продукт сертифіковано згідно с правилами системи УкрСЕПРО на відповідність вимогам нормативних документів та вимогам, що передбачені чинними законодавчими актами України. Safety Information • Keep the device away from water, fire, humidity or hot environments. • Do not attempt to disassemble, repair, or modify the device. If you need service, please contact us. •...
- Page 42 Symbol Explanation RECYCLING This product bears the selective sorting symbol for Waste electrical and electronic equipment (WEEE). This means that this product must be handled pursuant to European directive 2012/19/EU in order to be recycled or dismantled to minimize its impact on the environment. User has the choice to give his product to a competent recycling organization or to the retailer when he buys a new electrical or electronic equipment.
Need help?
Do you have a question about the Deco X20-DSL and is the answer not in the manual?
Questions and answers