
Related Manuals for GHL Doser 2.1

Summary of Contents for GHL Doser 2.1
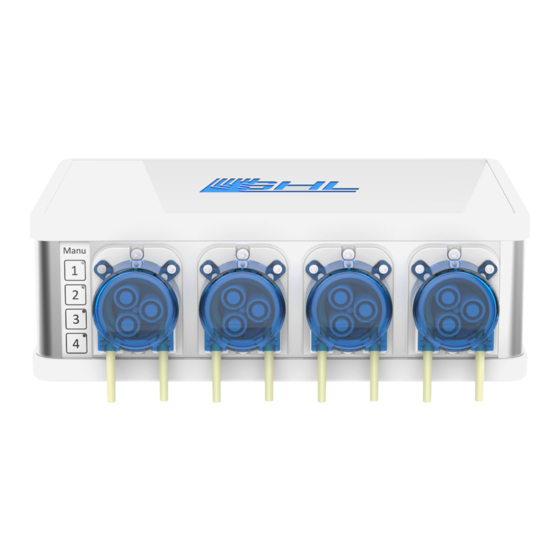
- Page 1 GHL Doser Resource Guide Step-by-step resource guide for GHL Doser 2.1 and Doser Maxi Written by V. Altamirano...
-
Page 2: Table Of Contents
USBVCOM driver not shown in device manager during update Error Code 28 pops up when connected via GHL Control Center Firmware update failed - No response from GHL Doser 2.1 SA Firmware update failed - No response from GHL Doser 2.1 Slave... -
Page 3: Getting Started
This guide is a supplement to our existing GHL Doser 2.1 / Doser Maxi manual. This guide will assist you with getting both slave and standalone versions of the GHL Doser 2.1 / Doser Maxi up and running. -
Page 4: Ghl Doser Sa Connectivity Options
● myGHL Cloud* Direct USB Connection to a PC Allows you to connect to the standalone GHL Doser by using the USB cable included in the box. LAN Connection Allows you to connect to the standalone GHL Doser when an Ethernet cable is connected to the LAN port of the doser and an available LAN port on your wireless router. -
Page 5: Ghl Control Center Startup Screen Explained
GHL Doser Resource Guide GHL Control Center Startup Screen Explained Before even connecting to your device, this section will explain what GHL Control Center is used for and the important options displayed in the GHL Control Center (GCC) startup screen. -
Page 6: Gcc Overview For Ghl Doser Sa
GHL Doser Resource Guide GCC Overview for GHL Doser SA GHL Control Center gives you the flexibility to program the Doser SA in multiple ways. We have included multiple screenshots to show the general features and an overview of our PC software. - Page 7 GHL Doser Resource Guide (Timer Settings Page) 1. Set your timer functions for AWC and ATO functions here. 2. Control how you want the timers to function here. Release 07/2018...
- Page 8 GHL Doser Resource Guide (Dosing Pump Programming Page) 1. GHL Doser SA will monitor your fluid levels and display it here. Once the specific dosing pump has been programmed, the doser will automatically calculate the approximate amount of days remaining before you run out of fluid for that pump. Container capacity and remaining fluid is also displayed here.
- Page 9 10ml per dose will dose 50ml per day. Once the amount has been set, the GHL Doser will evenly dose the total specified amount evenly throughout the day. Up to 150 doses per day and 200ml at a time is the maximum amount.
- Page 10 GHL Doser Resource Guide (Level Sensor Page) 1. Program your ATO and AWC settings here. 2. Check on status of each level sensor here. 3. Adjust sensor reaction times and invert the functions if necessary. Release 07/2018...
- Page 11 3. PAB devices can be assigned here. This feature is used to expand the number of dosing pumps you want to use. If you purchased a slave GHL Doser 2.1 or Doser Maxi to add to your dosing system, you would assign pump numbering here.
-
Page 12: Reading The Ghl Doser Status Led
GHL Doser Resource Guide Reading the GHL Doser Status LED The GHL Doser status LED will flash certain colors to indicate the current condition of the doser. Here’s what each color means: LED Color Information Action Violet (Blinking) Device booting... -
Page 13: How To Connect Via Usb
How to Connect via USB When you connect your standalone GHL Doser to the PC for the first time, a driver will begin to install itself. This driver is needed to connect to the GHL Doser 2. If the driver does not... -
Page 14: Wi-Fi Connection Setup
GHL Doser Resource Guide 3. Click “Connect” 4. Your GHL Doser SA will now connect. Wi-Fi Connection Setup The standalone doser’s built-in Wi-Fi can be setup in two ways; Direct Wi-Fi Connection or Standard Wi-Fi Connection. You can: ● Connect directly to the Doser’s Wi-Fi hotspot using your smartphone or tablet;... - Page 15 2. With GHL Control downloaded, go to your device’s Wi-Fi settings and search for available Wi-Fi networks. You should see “GHL Doser 2.1” or “GHL Doser Maxi” listed. 3. Select your doser and wait for your device to successfully connect to the GHL Doser’s Wi-Fi hotspot.
- Page 16 GHL Doser Resource Guide 5. Under “WiFi/LAN Settings”, click “Client Mode”, then “Search WiFi”. Your doser will now search for available WiFi networks, select the network that belongs to you. If your network does not show up, disconnect from your doser and try again. You may also enter the Wi-Fi settings manually.
- Page 17 GHL Doser Resource Guide 6. Once you have selected your network, the SSID, Encryption, etc. boxes, will be automatically filled in for you. 7. Click on “Setup Wizard” 8. In this screen, you are asked to select a number between a range. You will see that the first three boxes have already been filled in for you.
-
Page 18: How To Connect Via Wi-Fi To Ghl Control Center
GHL Doser Resource Guide How to Connect via Wi-Fi to GHL Control Center Connection to GHL Control Center via Wi-Fi is only available when the Standalone GHL Doser is connected to your existing Wi-Fi network. To connect to the GHL Doser via Wi-Fi over GHL Control Center, please follow these steps: 1. - Page 19 GHL Doser Resource Guide 4. Select “Network (TCP/IP)” 5. Enter the assigned IP address into the “Host Name” box. This is the IP address you assigned to the GHL Doser 2.1 / Maxi during the Standard Wi-Fi Connection setup. Release 07/2018...
-
Page 20: Lan Connection Setup
LAN Connection Setup 1. Using the USB cable included in the box, connect it to the Standalone GHL Doser and 2. Open “GHL Control Center” and connect to the GHL Doser via USB. 3. Click on “System”... -
Page 21: How To Connect Via Our Ghl Smartphone App
1. Go to your device’s Wi-Fi settings and search for available Wi-Fi networks. You should see “GHL Doser 2.1” or “GHL Doser Maxi” listed. 2. Select “GHL Doser 2.1” and wait for your device to successfully connect to the doser’s Wi-Fi hotspot. -
Page 22: How To Setup Myghl
5. Type in the myGHL ID number that was displayed in the system settings page of GHL Control Center and click “Verify”. 6. Go back to GHL Control Center and click on “Update view”. A security key should pop up in the system settings page. -
Page 23: How To Program A Dosing Pump
NOTE: Once the device has been added, you can connect by clicking on the icon. How to Program a Dosing Pump Before programing a dosing pump via GHL Control Center or the smartphone app, please make sure you have done the following: ● Connected the clear plastic tubing adapters to each pump ●... - Page 24 GHL Doser Resource Guide 3. Enter the capacity of the dosing container you are using for the selected pump. For example, if you have a 1000ml container, enter 1000ml in the “Capacity” box. You can also enter the minimum fluid level; the Doser 2 will notify you when the fluid has reached this set number.
- Page 25 6. Select how you want to run this doser pump; Auto Dosing or Manual Dosing. Details for each setting can be found in GCC Overview for GHL Doser 7. Auto Dosing a. Select the days of the week you want this pump to dose or set the dose intervals.
-
Page 26: How To Calibrate A Dosing Pump
How to Calibrate a Dosing Pump A dosing pump must be calibrated every time the selected doser’s pump speed is changed. It should also be calibrated before the GHL Doser is used for the first time. Before calibrating be sure to have the following ready: ●... -
Page 27: How To Program For Awc Function
6. Tap “SAVE”. myGHL 1. Follow steps shown in “Smartphone app” How to Program for AWC Function Be sure to have the following items before programming the GHL Doser for Automatic Water Changes: ● 2 Level Sensors and 1 splitter Release 07/2018... - Page 28 Index refers to the Control Circuit used. If you use Control Circuit 1, use Index “1”. To program the GHL Doser SA for AWC, please do the following: 1. Go to “Dose Overview” and select the first doser pump you wish to use for AWC.
- Page 29 GHL Doser Resource Guide 6. Click “New” and set the time you want this timer to begin. 7. Go to “Level” settings. Control circuit Operation mode maximum- 8. Select 1 and set to “Water Change”. Set the on time also.
-
Page 30: How To Program For Ato Function
11. Click “OK” and save your settings. How to Program for ATO Function Be sure to have the following items before programming the GHL Doser for Auto Top Off: ● 1 Level Sensor ○ (PL-0077) Level-Sensor, Floater or (PL-0082) Level-Sensor, Optical... - Page 31 GHL Doser Resource Guide Index Function 2. Change this pump setting to “Level Control”, set to “1”, and to “Fill Water” 3. Go to “Level” settings. Control circuit Operation mode maximum-on 4. Select 1 and set to “Auto Top Off”. Set the time also.
-
Page 32: How To Program Magnetic Stirrers
2-Sensor ATO Setup: https://youtu.be/o1QCYxK-usI How to Program Magnetic Stirrers Each GHL Doser supports 4 magnetic stirrers per station, allowing up to 16 total stirrers and 16 dosing pumps. Here is how to program a Magnetic Stirrer: 1. Click on “Extras” drop-down box and select “Magnetic Stirrers”. -
Page 33: How To Update Ghl Doser Sa Firmware
GHL Magnetic Stirrer Setup: https://youtu.be/CGQnZyvxeik How to Update GHL Doser SA Firmware A firmware update will allow you to utilize the GHL Doser’s newest features. If you wish to update the GHL Doser’s firmware, please do the following: NOTE: These steps apply ONLY to the GHL Doser 2.1 / Maxi Standalone version! - Page 34 GHL Doser Resource Guide 5. Follow the on-screen prompts and click next. 6. The doser’s status LED will turn off. (The GHL Logo) a. If it does not, disconnect from the doser and repeat the steps above. b. If this is your first firmware update, there will be a driver (USBVCOM) that will automatically be installed during this step.
- Page 35 GHL Doser Resource Guide 10. You are then asked to select the firmware file to use on the GHL Doser SA. GCC will automatically take you to the firmware file folder. If the firmware file does not show up, you will find the firmware in the GHL Control Center folder under “Firmware” and “GHL Doser Standalone”.
-
Page 36: How To Add A Slave Doser To A Sa Doser Or Profilux
Maxi. The slave Doser 2.1 can also be connected to a Profilux 3 or 4 controller. A slave doser can be daisy chained via a PAB cable; a GHL Doser 2 SA or 2.1 SA or Profilux 3 or 4 must be present. Please note that a PAB cable is not included with the slave doser and will therefore be needed before continuing with this setup. - Page 37 GHL Doser Resource Guide 6. Select the Slave Doser and click “OK”. 7. You will then be asked if you would like to assign the PAB-device. Click “Yes” Release 07/2018...
- Page 38 You will see that your Slave Doser 2 is now assigned. Numbering of the slave Doser must now be assigned. 9. Select the correct GHL Doser Slave and click on “Configuration”. 10. If you are adding your first slave Doser to a standalone Doser, select “5” and click “OK”.
-
Page 39: How To Convert A Standalone Doser To Slave Mode
GHL Doser Resource Guide 11. Calibrate and program the new dosing pumps. Need a visual? You can see how-to add a SLAVE dosing pump by clicking the link below. How to add PAB-devices: https://youtu.be/dT9_JfY3qH8 How to Convert a Standalone Doser to Slave Mode With the release of firmware 1.19, it is now possible to convert a standalone Doser into a slave... -
Page 40: How To Update Ghl Doser Slave Firmware
GHL Doser Resource Guide To convert a GHL Doser SA to operate as a slave, please follow these steps: 1. Connect to the Doser SA via USB which will become the slave. 2. Once connected, look at the bottom of the “General” settings page and select “Slave”... - Page 41 GHL Doser Resource Guide 3. Read the notes and click on the “I have read…” box before clicking on “Confirm” Release 07/2018...
- Page 42 5. You will then be asked if you want to update the selected Slave Doser. Click “Yes” and the update will begin. 6. Once the update is completed, disconnect from your GHL Doser Standalone or Profilux, restart the updated doser and reconnect all PAB-devices which may have been disconnected prior to the update.
-
Page 43: Troubleshooting
1. Go to “This PC” or “Computer” and click on your hard drive which may be labeled as “(C:)” 2. Click on “Program Files (x86)” 3. Click on “GHL ControlCenter_V1xxx” (Your current version of GCC) Release 07/2018... - Page 44 GHL Doser Resource Guide 4. Click on “Driver” 5. In that folder, you will see two files. One is named, “dpinst_x64” and the other is “dpinst_x86” Release 07/2018...
- Page 45 6. Click on one of them and follow the install command prompts. 7. After the driver has installed, you should restart the computer and try to connect again to the Doser 2. NOTE: Remember to have the correct GHL Doser selected before you click “Connect” Need a visual?
- Page 46 GHL Doser Resource Guide 3. Click on “Browse my computer for driver software” 4. Click on the “Browse” button and navigate to the driver by following these steps: a. Click on “(C:)” b. Then “Program Files(x86)” c. “GHLControlCenter_Vxxxx” (Your current version of GCC) d.
- Page 47 Perform emergency firmware update If during a firmware update, the process was interrupted, it is possible that the previous firmware was lost. This would result in no response from the GHL Doser 2.1 SA; the GHL logo light would also be off.
-
Page 48: Tips And Information
If during a firmware update, the process was interrupted, it is possible that the previous firmware was lost. This would result in no response from the GHL Doser 2.1 / Maxi Slave; the GHL logo light would also be off. - Page 49 ○ For example, if your doser’s IP address is 192.168.1.150, to ping it, type in “Ping 192.168.1.150” 3. Successful communication to your network will result in the outcome below. 4. If this does not show, you may want to assign a new IP address to your GHL Doser 2.1. Release 07/2018...
-
Page 50: Doser Sa And Slave Faq
Q: What is the difference between using GHL Control Center and the GHL Connect app? A: GHL Control Center gives you complete access to the Doser SA pump settings, network settings, magnetic stirrer settings, etc. The GHL Connect app provides primary pump control, no access to network settings, and myGHL setup. -
Page 51: Does The Dosing Pump Require Regular Maintenance
A: 2 years from date of purchase. Q: What does the warranty cover? A: Internal components. The GHL Doser will not be covered under warranty if we determine that the issue was caused from mishandling or water damage. Refer to our primary manual for more information on warranty.
Need help?
Do you have a question about the Doser 2.1 and is the answer not in the manual?
Questions and answers