Table of Contents
Advertisement
Advertisement
Chapters
Table of Contents

Related Manuals for Puloon Eagle Eye 7

Summary of Contents for Puloon Eagle Eye 7
- Page 1 Eagle Eye 7 - User Manual REV. : 0.14 DATE : 2019.02.12...
-
Page 2: Table Of Contents
Contents Safety Instructions General Instructions Operation Environment Banknotes To be Avoided Caution for Operators Installation Guide Installation Overview Operation Summary of Operation Currency Selection Reject Reason Add Up Details Function & Setting Function Display Setting... - Page 3 Count Mode Count Mode Daily Maintenance Maintenance Guidelines for major components Installation of Hopper Guide Error & Trouble Shooting When Errors Occur Error Code List Appendix A Product Specification Products Contents Appendix B Count Mode for AT type...
-
Page 4: Safety Instructions
Safety Instructions General Instructions Do not place the product near heat sources such as a stove or a heater. Do not use gas sprays and etc. which may easily catch fire, for cleaning. Do not try to disassemble or repair the product if you are not trained and authorized. -
Page 5: Operation Environment
Safety Instructions Operation Environment Do not expose the product to the direct sunlight for normal operation and life cycle. Avoid dusty location and place the product on the stable and non- vibrating desk. Keep and use the product under the optimal conditions as follows: -Temperature: 5℃~45℃(41F~113F) -Humidity: 0%~85%(no condensation) Do not press the LCD screen or control keys with sharp objects such as a... -
Page 6: Banknotes To Be Avoided
Safety Instructions Banknotes to be avoided Do not count the following banknotes as it may cause jam or error. 1) Banknotes with a hole or tear 2) Folded or crumpled banknotes 3) Wet banknotes 4) Worn banknotes 5) Banknotes polluted with foreign substance or oil Damaged Banknotes Curled Banknotes Folded or Partial Banknotes... -
Page 7: Caution For Operators
Safety Instructions Caution for Operators During operation, never put anything like clips or any other stuff except banknotes on the hopper. Surely be careful that the operator’s hair, clothes or necktie would not be picked and absorbed into machine. Straighten the folds or corners of banknotes before placing on the hopper. Banknotes should be properly arranged and then put on the hopper as shown below for efficient operation. -
Page 8: Installation Guide
Installation Guide Installation For proper installation, contact to the designated sales agent near the location of installation. · The product is allowed only for indoor use. Do not install outdoors. · The product should be installed in the stable place enough to endure the weight and operation. -
Page 9: Overview
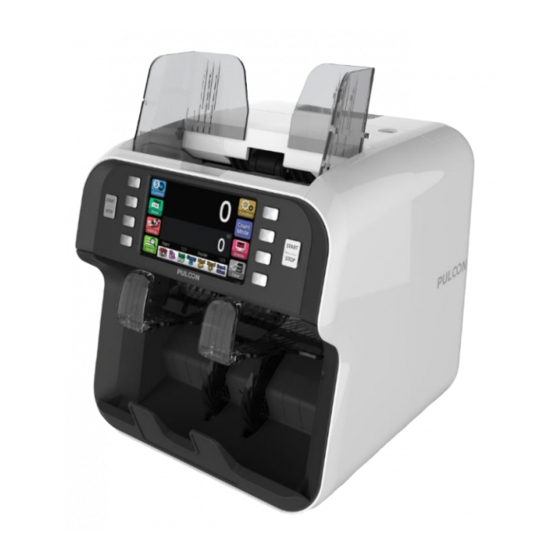
Installation Guide Overview Name of Each Part (Front View) Hopper Space for Loading Notes Direct U/I by Full Color Touch Screen Display Panel Stacker Space for Counted Notes Hopper guide Adjustable Guides to Note Size Pick-up Roller to Feed Notes for Counting Pickup Roller Operation buttons Start/Stop Keys for Operation... - Page 10 Installation Guide Name of Each Part (Rear View) Feed Gap Adjustment Adjustment screw for feed gap size Pocket for Colleting Dusts on Operation Dust Pocket Hopper Guide Adjustable Guides to Note Size Upper Cover Lever Latch Handle to open Upper Cover Latch Handle to open Lower Cover Lower Cover Lever Power Switch...
- Page 11 Installation Guide Adjustment of Hopper Guide & Feed Gap 132.0 140.0 148.0 156.0 164.0 172.0 182.0 GAP - GAP + Unit : mm * For stable operation, it is recommended to adjust the Hopper Guide to leave the space within 5% of the length of the banknote to be processed.
- Page 12 Installation Guide Description on Control Panel Start/Stop Button To Start/Stop To select the menu (equal to using Function Keys touch key) Status Band To show current settings To show the menu available Menu Icons LCD Screen To show the number and the amount of notes -11-...
- Page 13 Installation Guide Description on I/O PORT Port CON6 CON4 CON5 CON3 CON2 CON1 Input Power Spec. USB2.0 USB2.0 Serial communication 100~240V AC Device Host Ethernet Printer Display Display2 -12-...
- Page 14 Installation Guide External Display (optional) Display Panel Full color graphical display. Micro SD port Micro SD to save icon & background data Port to connect with the product(Eagle Eye 7) EE7 interface port -13-...
-
Page 15: Operation
Operation Summary of Operation Description of each menu can be found on the following pages Menu page Currency Reject Reason Add up Detail -14-... -
Page 16: Currency Selection
Operation Currency Selection Selection of Currency for Counting A range of currencies registered within the EE7 firmware is displayed and the selected currency will be counted and evaluated. 1)Press the button below to enter the currency selection menu. 2)Press national symbol to select currency. *The currency name and icon will be shown in the Status Band to indicate the selected currency *Multi-Currency mode is available when selecting Multi auto or Multi mix in the Count Mode menu. -
Page 17: Reject Reason
Operation Reject Reason Display of Reject Reason for the rejected banknotes The information on the rejected banknotes is displayed with the reject codes, reject reasons, and the number of the rejected notes. 1) Press the button below to enter the reject reason menu. 2) After completion of checking the reject reason, press button to exit. -
Page 18: Add Up
Operation Add Up Selection of Add Up mode When Add Up (Accumulative count mode) is activated, the current amount and number of banknotes are added up to the total counting. Even though the banknotes are removed from the pocket, it is still accumulated until the button is pressed. -
Page 19: Details
Operation Details Check the detailed counting results The table shows the denomination, the number of each denominations and the amount of the summation value of each denominations as well. 1) Press the button below to confirm the detail of counting results. 2) After completion of checking the detail, press the button to exit. -
Page 20: Function & Setting
Function & Setting Function Description of each menu can be found on the following pages Menu page Serial Number Black list Count Log Sort up/down Total Sub Total Grand Total Batch Setting Auto/Manual -19-... - Page 21 Function & Setting How to set the function Each functions have to be set before using. 1) Press the button below to enter the function menu 2) Select a function among 3) After choosing the function, press button to exit the function selection mode. -20-...
- Page 22 Function & Setting List of Function -21-...
- Page 23 Function & Setting Description of Function A. Display Setting Refer to “Display setting” on page 24. B. Batch The number of notes could be counted by specifying the batch size. 1) Press button. 2) Set the batch size by putting the number you want. 3) Press button to exit the batch setting menu.
- Page 24 Function & Setting D. Service You can check the status of Eagle Eye 7. E. Auto / Manual Automatic counting gets started when the notes are loaded in the hopper at Auto mode. In case of Manual mode, it starts counting only after you press START button.
-
Page 25: Display
Function & Setting Display How to set Display Each functions have to be set before using. 1) Press the button below to enter the display setting 2) Press button to set the mode of display. 3) Press button to exit the display menu. -24-... - Page 26 Function & Setting List of Display Setting -25-...
- Page 27 Function & Setting Description of Display Setting 1. Serial Number Displays the denominations and the time when the serial number is acquired and can be sorted by time, denomination and serial numbers. 1) Press button to select serial number information. Press button to select whether to use the serial number capture function.
- Page 28 Function & Setting 2. Black List This table shows the information of Black List saved. If the scanned serial number of banknote is in black list, the machine will send the banknote to the reject hopper. Press the Black List button to select the black list To search the black list, press button.
- Page 29 Function & Setting 3. Counter Log 1) Press button. 2) Set a period of time that you want to get the count log . *Touch the screen to see details of the count result. 4. Sort up/down Chose the method of sorting . 1) Press button to select a method of sorting -28-...
- Page 30 Function & Setting 5. Total To show the number of banknotes & amount by denominations and the total numbers and amount of the banknotes counted. 1) Press button to select setting. 6. Sub Total To show the numbers of banknotes & amount by denominations and the total amount of the banknotes which are transferred from TOTAL.
- Page 31 Function & Setting 7. Grand Total To show the numbers of banknotes & amount by denominations and the total amount of the banknotes which are transferred from Sub Total. 1) Press button * Press button to transfer the values of Sub Total to Grand Total. -30-...
-
Page 32: Setting
Function & Setting Setting How to change Setting Each functions have to be set before using. 1) Press the button below to enter the password. 2) Press button after pressing the pass word. 3) Press a button among 4) After setting of function , press button to exit the setting. - Page 33 Function & Setting Description of setting 1. Language Select a language for display between English and another local language registered. 1) Press button to select a language 2. Digit Mark Select the digit mark to display the amount of money. 1) Press button to select an option for digit mark .
- Page 34 Function & Setting 3. Beep You can turn Beep on or off . If Beep sets ON, the beep sound will be generated when button is pressed. 1) Press button to turn it on or off. 4. Time You can set Date and Time. 1) Press the date and time buttons in the middle.
- Page 35 Function & Setting 5. Old/New Counts separately by the edition. The edition, which is not selected, will be delivered to Reject Pocket. 1) Press button to select the edition you want to count. * Edition is to scan the first banknote and place all other notes in the same edition in the stacker. Any other banknotes in the different edition will go to the reject pocket .
- Page 36 Function & Setting 7. Corner Detection Corner Detection enables to detect the status of corner and send the cut or curled banknotes to Reject Pocket. 8. Speed The EE7 offers three options of speed; 800 / 1000 / 1200 NPM (Notes per Minute) 1) Press button to select counting speed.
- Page 37 Function & Setting Setting Menu Sub Menu Touch Button Only Set to work with buttons only. Touch+ Button Set it to work with touch keys and buttons. 2’nd Fitness Turn on the 2’nd fitness function of the fitness sort mode. Turn off the 2’nd fitness function of the fitness sort mode.
-
Page 38: Count Mode
Count Mode Summary of Count Mode Description of each setting can be found on the following pages Default page Multi Auto/Mix Count / Value Face / Orient Value Front & Orient Fitness Sort Serial Number Single / Mix Notice for AT Type ! Please refer to the appendix B at page 62 &... - Page 39 Count Mode Count Mode How to Select a Count Mode Each counting mode has to be set prior to use 1) Press the button below to enter the count mode menu 2) Press button to set the each setting. 3) Press button to exit after setting -38-...
- Page 40 Count Mode List of Count Modes -39-...
-
Page 41: Multi Auto/Mix
Count Mode Count Mode A. Multi Auto Count the first detected currency and display the result . 1) Press button to chose Multi Auto Mode. *Multi Auto will be displayed at the status band. *Single/Mix function is set as Mix at the mode of Multi Auto. *The available currencies are chosen at up to 10. -
Page 42: Count / Value
Count Mode Description of Count Mode B. Count To count all of the banknotes regardless of currency . 1)Press button to select Free Count Mode. * Free Count Mode will be displayed at the status band. * Count Mode doesn’t support Detail menu. B1. -
Page 43: Face / Orient Value
Count Mode C. Face To scan the first banknote and place all other notes of the same side( face/back) in the stacker. Any other banknotes in the different side will go to the reject pocket. 1)Press button to select face mode. * Face Mode will be displayed at the status band. -
Page 44: Front & Orient
Count Mode D. Face & Orient To count by same side(face/back) and same direction(up/down) of the banknote which is initially counted. If the note is not the same side and direction, the machine will send the banknote to the reject pocket. 1)Press button to select Face &... -
Page 45: Serial Number
Count Mode E.1. Fitness Second Sort If Counterfeit notes are detected at fitness mode, Second Sort Mode will get started automatically. 1)Press button to Run Second Sorting function at the pop-up window. 2)Remove the banknotes at Stacker & Reject Pocket and place the banknotes at the hopper again. *To Stop Second Sorting, Press at the pop-up window. -
Page 46: Single / Mix
Count Mode G. Single / Mix Single mode is to count a specific denomination of banknote which is detected first and send others to the reject pocket. Mix Mode is to count all of the denominations if it’s the same currency. 1) Press button to chose Single or Mix. -
Page 47: Daily Maintenance
Daily Maintenance Maintenance Maintenance Method Check Point Maintenance Method Cycle Remarks Hopper Sensor and Rollers Cleaning Daily 47 Page Counterfeit Detection Cleaning Daily 48 Page sensors Stacker sensor and Reject Cleaning Daily 49 Page Pocket sensor Diverter sensor Cleaning Daily 50 Page Dust Pocket Clean and empty the dust... -
Page 48: Guidelines For Major Components
Daily Maintenance Turn power off before cleaning to avoid the risk of electric shock or injury. CAUTION Do not clean the machine with benzene or paint thinner to avoid the risk of color change or damage. Guidelines for major components Hopper Sensor &... - Page 49 Daily Maintenance Counterfeit Detection Sensors Open the upper cover by pulling the lever and clean the sensors as shown in the photo below with a soft cotton towel or a brush. < MR and Upper CIS > <Lower CIS> -48-...
- Page 50 Daily Maintenance The stacker sensors and reject pocket sensors Clean the sensors as shown in the photo below with a soft cotton towel or a brush. <Stacker Sensor> <Reject Pocket Sensor> -49-...
- Page 51 Daily Maintenance Diverter sensor Open the lower cover by pulling the lever and clean the sensors as shown in the photo below with a soft cotton towel or a brush. <Diverter Sensor> Dust Container Pull out a dust container and clean it <...
- Page 52 Daily Maintenance How to clean a dust container ② Insert the finger into the hole of cap. ① Take out a dust container. Hold the dust container with another hand and pull out the cap ④ Put the cap back into the container. ③...
-
Page 53: Installation Of Hopper Guide
Daily Maintenance Installation of Hopper Guides HOPPER GUIDE ① Left Hopper Guide Fixing Position ② Right Hopper Guide Fixing Position -52-... - Page 54 Daily Maintenance How to install hopper guides ① Before Installment Slide both sides from side to side as much as possible. Fixing Position Fixing Position ② Left Hopper Guide put the hopper in a downward direction. -53-...
- Page 55 Daily Maintenance ③ Right Hopper Guide put the hopper in a downward direction. ④ After Installment -54-...
- Page 56 Daily Maintenance How to take the hopper guides out ① How to take out the hopper guides - Easy to take out the hopper guides when you apply force in the opposite direction of assembly. Pull out the hopper guides in an upward direction. -55-...
-
Page 57: Error & Trouble Shooting
Error & Trouble Shooting When Errors Occur If an error occurs during using, an error code is displayed on the LCD display. Find the cause of the error by the error code and follow the instructions to release the error. *Press the button, after cleared error. -
Page 58: Error Code List
Error & Trouble Shooting Error Code List Code Reason Releasing Method 1. Turn the power switch off and on. 01~05, Communication error 2. If the error continues, please contact a local service Center. 1. Open the cover. Initial Inlet Sensor Fail 2. - Page 59 Error & Trouble Shooting Code Description TROUBLESHOOTING 1. Open the upper cover and remove the notes. Pickup JAM 2. Press auto clear button. 1. Open the upper cover and lower part, remove the Path JAM notes. 2. Press auto clear button. Diverter Out JAM 1.
- Page 60 Error & Trouble Shooting Code Description TROUBLESHOOTING 1. Turn the power off and on again. UI failure Driver Board failure Communication failure betwee n UI and another board Count Mismatch 1. Try to count the banknotes again. Exceed the limit of available 1.
-
Page 61: Product Specification
APPENDIX A Product Specifications Count, Value, Single, Mixed, Multi Auto, Multi Mixed, Mode Face/Orient, Fitness Sort, Serial Number Recognition 2 Pockets Pocket number 273(W) x 275(D) x 293(H) mm Outside Dimensions 8.6kg Weight Value Counting, 1000 Note/min Fitness Sorting (EE7-FS) Counting Speed Serial Number Recognition 800 Note/min... -
Page 62: Products Contents
APPENDIX A PRODUCT CONTENTS STANDARD PACKING POWER CORD QUICK MANUAL OPTIONAL ACCESSORIES EXTERNAL DISPLAY EXTERNAL DISPLAY CABLE -61-... -
Page 63: Count Mode For At Type
APPENDIX B Count Mode for AT type How to Select a Count Mode Each counting mode has to be set prior to use 1) Press the button below to enter the count mode menu 2) Press button to set the each setting. 3) Press button to exit after setting -62-... - Page 64 APPENDIX B List of Count Modes Description of Ticket Mode 1) Press button to select Ticket mode. * Ticket Mode will be displayed at the status band. * Ticket Mode doesn’t support Detail menu. -63-...
Need help?
Do you have a question about the Eagle Eye 7 and is the answer not in the manual?
Questions and answers