Table of Contents

Summary of Contents for Solid HDS2-1740
- Page 1 USER MANUAL USER MANUAL SS601BM ENGLISH USER MANUAL HD DIGITAL SET-TOP BOX HDS2-1740 HDS2-1740 High Definition Digital Satellite Recorder High Definition Digital Satellite Recorder Personal Video Recorder Personal Video Recorder DIGITAL...
-
Page 2: Table Of Contents
CONTENTS SAFETY PRECAUTION ................... 4 ENVIRONMENT PROTECTION............... 5 FRONT PANEL ....................6 REAR PANEL ....................6 DEVICES CONNECTION ................. 7 REMOTE CONTROL ..................8 BASIC OPERATIONS ................9 1.1 T STB ..................9 URN ON 1.2 P ....................9 OWER 1.3 C .............. - Page 3 2.1.3 S ..................18 YSTEM ETUP 2.1.4 USB ....................20 UPGRADE .................... 21 STORAGE MANAGE ................21 EPG ...................... 21 NETWORK SETTING ................22 ADV TIMER ..................22 RADIO ....................23 PHOTO ....................23 MUSIC ....................23 MOVIE ....................24 NET APP ....................
-
Page 4: Safety Precaution
SAFETY PRECAUTION CAUTION: The exclamation point within an The lightning flash with Warning: equilateral triangle is intended to arrowhead symbol, within an To reduce the risk of electric alert the user to important equilateral triangle, is intended shock, don't open the cabinet. operating and maintenance to alert the user to "dangerous Refer servicing to qualified... -
Page 5: Environment Protection
Object and Liquid Entry: Never put objects of any kind into this STB through openings, as they may touch dangerous voltage points or short-out parts that could result in a fire or electric shock. Never spill any liquid on the STB. Note: Moisture may be formed on the lens In the following conditions: ... -
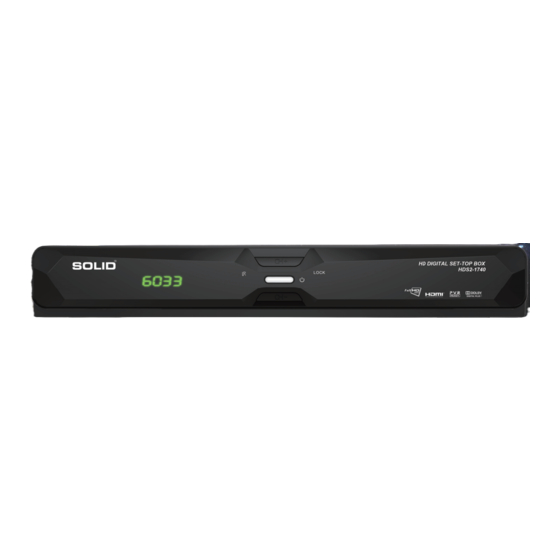
Page 6: Front Panel
Front Panel Rear Panel NOTICE: The pictures are for references only; please make the object as the standard. -
Page 7: Devices Connection
Devices Connection As shown, connect the interfaces on the television with the corresponding interfaces on the product (such as connect the product with TV sets through the HDMI cable), then after the power is connected, turn on the switch and you can use the product. -
Page 8: Remote Control
Remote control This is the remote control of the product. Please note that he picture is for references only, please make the object as the standard. 1. POWER: To switch ON/OFF the receiver power supply. 2. MUTE: To mute or restore the sound. 3.... -
Page 9: Basic Operations
1. Basic Operations 1.1 Turn on STB First, press the Power to turn on the unit. When the STB is first used, there will play the first channel from the default Channel List. If the STB is not first used, STB will play the same channel as last time before turning off. 1.2 Power Press [Power] Key can enter the Standby state In Standby state, press [Power] Key again can call back the unit and go on play the previous... -
Page 10: Information
1.11 Information In full screen, press [INFO] key can open information screen, in the window shows the parameters of current channel. 1.12 EPG The STB has an Electronic Program Guide (EPG) to help you navigate channels through all the possible viewing options. -
Page 11: Page Up
1.15 Page Up/Page Down In Channel list, press [Page +/-] key to move up the cursor to the next or previous page in the menu or channel list. 1.16 Teletext Press [TTX] key in full screen, you can open teletext page on the channel which has teletext information. -
Page 12: Zoom
1.19 Zoom The [ZOOM] key allows you to magnify a certain area on the images Press [ZOOM] key again, the image will enlarge rotate as x2, x4, x6 In “x2 ~ x6” image, using [Up/ Down/ Up/ Down] keys to move the image center area you want to see. - Page 13 Press RED Button to display different SORT Group, you can list up the channels by 4 kinds of sorting ways. Press Green Button to display the fast find channel menu Press Yellow Button to display previous list with all channel Press Blue Button to display Satellite list with all channel...
-
Page 14: Main Menu
2. Main Menu When pressing the [MENU] on the RCU, the 16 icons will appear on your TV screen where you can configure all your settings :Main Menu, Upgrade, Storage Manage, EPG, CAS, Network Setting, Radio, Photo, Music, Movie, PVR, Weather, You tube, Game, Tool. When the focus on the main menu, press ok key will display four items like below Channel:Radio channel editor, TV channel editor Installation :Satellite Find, Automatic SAT Scan, Manual Scan, SAT/TP Manager, Satellite Find... -
Page 15: Installation
2.1.2 Installation By pressing [Menu] and press [Vol+/-] to move Installation the highlight on the When the highlight on the satellite setting, press OK key to satellite setting menu When the focus on the satellite list, you can press OK key to setting which satellite will be select with LNB You can press RED key to set SAT/tp Manager Press Green key to start channel search... - Page 16 Motor Antenna Motor Type: DiSEqC1.2/USALS Motor Setting: If you select “DiSEqC1.2”, “Local Longitude / Local Latitude” is not available. It will show the screen like below: When the highlight on the mode item,You can use [Volume Up/ Volume Down] key to set Motor function Automatic SAT Scan you can find sub-menus for Satellite,...
- Page 17 SAT/TP Manager You can select the satellite(s) what you want to search the channel. If you select the satellite(s), the selected satellite(s) on the list is marked. And you can you the color keys for the following purpose. - [Red] key: To edit satellite name and longitude.
-
Page 18: System Setup
2.1.3 System Setup By pressing [Menu] and selecting “system” item, and move the UP/Down key to select Language, OSD setting, time, TV setup, Parental Lock, Update & Backup Factory setting Language When you enter to “Language” menu, you can select OSD Language, Audio language, Subtitle Language OSD Language: To select menu languages, the selections of languages... - Page 19 TV setup When you enter to “TV System” menu, you can set TV saturation, TV contrast, TV brightness, Auto switch off, Power on at, digital audio output, TV Resolution, TV Mode, TV Format TV Format: You can switch the screen aspect ratio mode.
-
Page 20: Usb
When you want to backup software, you can make sure the USB memory device is connected and build the new file first. The software will be backup to this new file Factory setting When you press [OK] key in the “Factory Setting”... -
Page 21: Upgrade
3. Upgrade Press to enter USB upgrading menu when the USB is connected. When the cursor on the Image upgrade,press OK key to set image upgrade Move the cursor on the Upgrade Menu, the upgrade file will display on the left menu, you must select the correct file(the format like *SSU),when the cursor on the upgrade file,press OK key to start USB upgrade 4. -
Page 22: Network Setting
6. Network setting When you enter “Network Local Setting” menu, You can select wired network or wireless network mode, when the cursor on the network interface and press Vol +/- key to switch When the network status display connected, you can select DHCP or input the IP address manually. -
Page 23: Radio
8. Radio Basically, the operation of “Radio Channel List” is same as “TV Channel List”, but there is one point different: In “Radio Channel List” mode, there is no video information. 9. Photo If you want to view Photo files which are stored in your USB device, select Photo icon in the main menu. -
Page 24: Movie
When the current on the music file, press ok key to start play this file 11. Movie If you want to enjoy watching Movie contents, which are stored in your USB device, select each item in the Multimedia menu. The screen shows up the supported Movie files stored in your USB device Note: If no USB Memory Device (like HDD or... -
Page 25: Net App
12. Net App When you entry to the Net App menu, please make sure the network is connected When you select weather menu Press Left/Right key to switch city Press YELLOW key to setting the city information... -
Page 26: Youtube
13. Youtube When the current on the YOUTUBE icon, press OK key entry to the YOUTUBE menu, please make sure the network is connected Press Blue key to switch video file and Group list Press Yellow key to display option menu 14. -
Page 27: Specifications
16. Specifications Hardware Chipset NOVATEK NT78326SEFG-ABGF DDR 128MB Flash Flash 8MB Tuner DVB-S2 Tuner DVB-S2 Demodulator Mode QPSK,8PSK,16APSK,32APSK Frequency Range 950~2150MHz RF Input Connector F-Female Video Video Decoding Two video decoding,1HD +1SD H.264MP and HP@L4.1 Optional:VC-1 SP, MP, and AP MPEG-2 MP@ML and MP@HL MPEG-4 P2 ASP H.263 P3... - Page 28 Power Consumption Max.24W Interface Front Panel 3 Buttons Rear Panel Tuner, RS232 Port, HDMI Port, USB Port ,AV OUT, COAXIAL Port , DC IN, Accessories IR RC3 (38kHz) NEC Batteries 2 xAAA type User’s Manual English AV Cable HDMI Cable Optional Physical Specification Operating Temperature...
Need help?
Do you have a question about the HDS2-1740 and is the answer not in the manual?
Questions and answers