Advertisement
Quick Links
Please check contents before assembly. If any items are missing or damaged, do not take the unit back to the
store. Call 1-800-427-5136 for customer service and we will save you time by correcting any problems directly
for you.
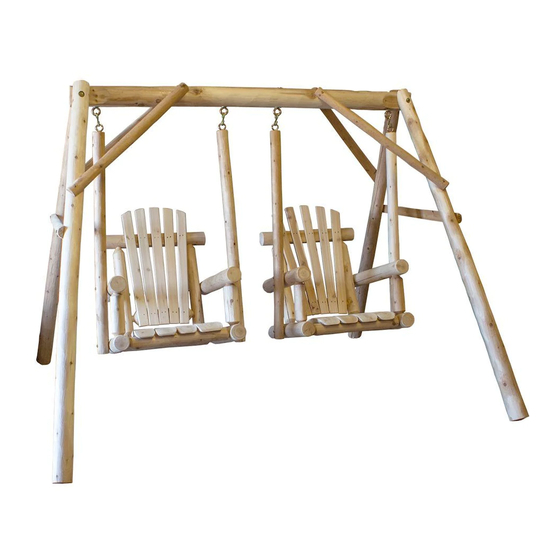
YARD SWING COMPONENTS
2-Preassembled Swing Backs
2-Preassembled Swing Seats
1 - Top Rail
4 - Legs
6 - 34 3/4" Braces
4 - 24" Arms
NOTE: Cracks or Checks in logs are part of the natural
beauty of cedar logs and should not be considered de-
fects.
NOTE:
Read all instructions before start-
ing.
To start hex washer head screws, hammer into
wood about 1/2" then use wrench or socket to
tighten.
Do not completely tighten any screws until the
unit is fully assembled and setting on a level
surface.
Use a rubber mallet (or a block of wood be-
tween the hammer and the unit) to drive dow-
eled ends into holes as far as possible.
A battery or power drill makes assembly faster
and easier.
CF2626 DOUBLE CHAIR LOG SWING
4 - 45"
Swing Bars
4 - Seat
Ends
4- 12"
Arm Supports
YARD SWING HARDWARE
(Shown smaller than actual size)
Eight 3/8"
Two
Washers
3/8" x 8"
Bolts
Four1/2" x 6"
Eye Bolts
Hex Washer
Head Screw*
Four S
Hooks
Rubber
Block of
Mallet
Wood
& Hammer
or
Pencil
Tape Measure
Twenty
Eight 1/2"
Screws
Washers
Four Barrel
Four 1/2"
Nylock Nuts
Two 3/8"
Nuts
Eight
Four3/8" x 5"
1/4" x 5"
Eye Bolts
Twelve
1/4" x 3"
Hex Washer
Head Screws*
* Hex Washer
Head Screws may
be substituted
with Lag Screws
and Washers.
TOOLS REQUIRED
Regular
3/4" deep well
socket
Screwdriver
9/16" deep well
socket
9/16" wrench
7/16" socket or
wrench
3/8" socket or
#2
Optional
Philips
Screwdriver
Nuts
Advertisement

Related Manuals for Lakeland Mills CF2626

Summary of Contents for Lakeland Mills CF2626
- Page 1 CF2626 DOUBLE CHAIR LOG SWING Please check contents before assembly. If any items are missing or damaged, do not take the unit back to the store. Call 1-800-427-5136 for customer service and we will save you time by correcting any problems directly for you.
- Page 2 22 1/2” 24”...
- Page 3 SEAT ASSEMBLY STEP 4a Install seat end onto seat. Align holes in seat end with dowels on seat as shown in picture below. Repeat on figure 4 other side. Secure with screws perpendicular to dowel. (See circle figure ). IMPORTANT: The single hole must be placed toward the front of the seat.
- Page 4 Use a good quality penetrating oil or wood deck sealer with a UV inhibitor. If staining or finishing before assembly, tape off all dowel ends. (Finishes will cause dowels to swell, making Lakeland Mills recommends: assembly difficult.) WeatherSeal Premium Oil-Based Exterior Wood Stain & Sealant www.ContinentalProd.com...
Need help?
Do you have a question about the CF2626 and is the answer not in the manual?
Questions and answers