Table of Contents
Advertisement
Quick Links
Advertisement
Table of Contents

Subscribe to Our Youtube Channel
Related Manuals for MAD Marble Machine 1


Summary of Contents for MAD Marble Machine 1
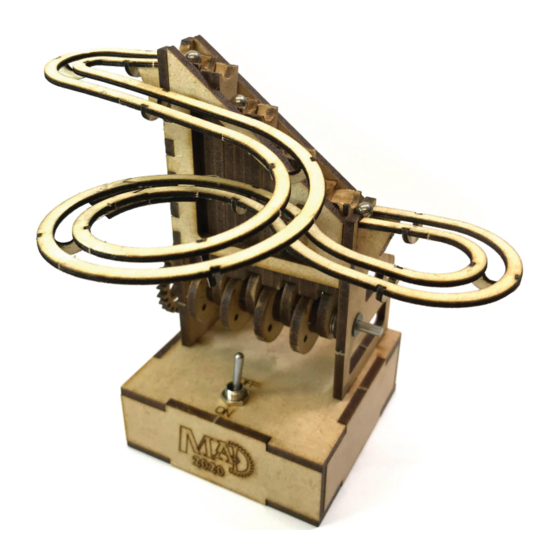
- Page 1 Marble Machine No 1 Motorised Assembly Instructions...
- Page 2 Marble Machine No 1 Motorised Assembly Instructions Required for assembly: Wood glue (PVA or aliphatic resin recommended) and/or Cyanoacrylate (CA) glue Clamps or weights, rubber bands Sandpaper Soldering iron, solder Please note: It is recommended that you apply varnish or sealer to the finished marble machine, especially if you live in areas with high humidity. Polyurethane varnish is a good choice.
- Page 3 Marble Machine No 1 Motorised Assembly Instructions Parts...
-
Page 4: Camshaft Assembly
Marble Machine No 1 Motorised Assembly Instructions Camshaft Assembly 1 You will need the pieces highlighted in red in the pictures. First you must sand the pips off the cam wheels. Place them on the 3 mm rods and use one of the 2 mm rod to hold them aligned so you can sand them pips off in one go as pictured. - Page 5 Marble Machine No 1 Motorised Assembly Instructions Camshaft Assembly 2 Layer the cams and spacers with the application of wood glue between each part. The rod should protrude 15 mm from both ends as shown. Use the supplied jigs and 2mm rods to ensure the cams are properly aligned on the 3mm axle. Use rubber bands to hold the assembly together while the glue sets and make sure the jig is on a level surface.
-
Page 6: Base Assembly
Marble Machine No 1 Motorised Assembly Instructions Base Assembly The parts can be glued together in one go and the parts held in place with rubber bands The bottom should not be glued but can be used to hold parts aligned while the glue dries. The bottom is left loose for access to switch and batteries. If you don’t want the text to be visible, simply turn the part so it face inwards. -
Page 7: Frame Assembly
Marble Machine No 1 Motorised Assembly Instructions Frame Assembly 1 Use glue sparingly – you don’t want a lot of glue to go inside the frame as this can interfere with the movement of the steps. Any excess glue can be wiped off with a damp rag. - Page 8 Marble Machine No 1 Motorised Assembly Instructions Frame Assembly 2 Place 2 washers on each end of the camshaft and slide it in place between the frame ends. Before you glue the the right frame upright, fit in place and see if the are any gaps between the washer and the uprights (picture 3). If so go to the next page otherwise move on to ‘Track Supports’...
- Page 9 Marble Machine No 1 Motorised Assembly Instructions Frame Assembly 2a ‘fixing the gaps’ If you have a gap on the camshaft use the spacers highlighted in the picture to close the gap. If they need to be thinner sand as necessary. Place as many of the spacers as you need after the washers to close the gap but make sure the camshaft still turns easily.
- Page 10 Marble Machine No 1 Motorised Assembly Instructions Frame Assembly 3 Now glue the right, front and rear frame pieces in place. The tabs/slot differ in size on the front and back frame pieces so you cannot attach them the wrong way round. Hold the frame pieces together with rubber bands while the glue sets.
- Page 11 Marble Machine No 1 Motorised Assembly Instructions Track Supports Glue the top, front and bottom track supports to the frame. IMPORTANT the two supports at the top angle downwards and the two at the bottom angle upwards (see pictures)
- Page 12 Marble Machine No 1 Motorised Assembly Instructions Steps Assembly 1 Each step consists of two parts. One half of each step has a small line engraved on it. Make sure this line is on the outside as shown in the photo. Apply wood glue sparingly and assemble each step using the 2 mm rods to ensure good alignment.
- Page 13 Marble Machine No 1 Motorised Assembly Instructions Steps Assembly 2 If you have a Dremel type tool with a small diameter sanding drum use that but be careful not to remove too much material from a step so it cannot reach above the next step up.
- Page 14 Marble Machine No 1 Motorised Assembly Instructions Steps Assembly 3 Next place the steps into the frame making sure the angle on each step angles down away from the smaller previous step. If the steps are too loose in the frame glue a spacer step to one the steps, repeating as necessary to close the gap in the frame but make sure the steps are loose enough to still move up and down.
-
Page 15: Track Assembly
Marble Machine No 1 Motorised Assembly Instructions Track Assembly 1 DO NOT remove the tracks from the retaining sheet at this stage. They should be left in place until the track joiners are glued in place. The track spreaders should be mounted on the opposite side of the side with the “O” engraved so put the “O” face down when you glue the spreaders on. - Page 16 Marble Machine No 1 Motorised Assembly Instructions Track Assembly 2 The track should be glued to the frame in two stages. If you use CA glue you can simply hold the parts in place while the glue sets. If using wood glue you will need a scrap of MDF and some rubber bands to hold the track in place while the glue dries.
- Page 17 Marble Machine No 1 Motorised Assembly Instructions Track Assembly 2 The track should be glued to the frame in two stages. If you use CA glue you can simply hold the parts in place while the glue sets. If using wood glue you will need to clamp the track in place while the glue dries.
- Page 18 Marble Machine No 1 Motorised Assembly Instructions Track Assembly 3 When the track is glued in place, sand the tops of the uprights at an angle so the balls run smoothly off the steps and onto the steps.
- Page 19 Marble Machine No 1 Motorised Assembly Instructions Attach Gears & Motor 1 Push the gear-motor into the frame so it sits flush with the frame. Glue gear and doubler together and slide onto the motor axle.
- Page 20 Marble Machine No 1 Motorised Assembly Instructions Attach Gears & Motor 2 This goes on the motor Place a washer on the protruding crankshaft. Fit the gear and doubler onto the motor shaft and camshaft. A tiny drop of glue between the gear and doubler will suffice to keep the gear in place on the shaft.
- Page 21 Marble Machine No 1 Motorised Assembly Instructions Wiring 1 The circuit should be as per the picture below. Solder the leads to the switch but do not solder the leads onto the motor until it is mounted in the frame. Use a 25-40W soldering iron with a small tip and flux cored electronics solder.
- Page 22 Marble Machine No 1 Motorised Assembly Instructions Wiring 1 Unscrew the nut from the switch and insert the switch through the hole from underneath the base.
- Page 23 Marble Machine No 1 Motorised Assembly Instructions Wiring 2 Push the two black wires through the small hole behind the Solder the black wires to the motor it doesn’t matter how it it is motor. wired.
-
Page 24: Final Assembly
Marble Machine No 1 Motorised Assembly Instructions Final Assembly Insert 2 AA batteries in the battery holder and put inside You may need to sand the steps and track to the base. Fit the bottom of the base in place. Place 6-8 ensure the balls go around smoothly.
Need help?
Do you have a question about the Marble Machine 1 and is the answer not in the manual?
Questions and answers