Table of Contents
Advertisement
Quick Links
Advertisement
Table of Contents

Subscribe to Our Youtube Channel
Summary of Contents for iRay Technology Tube Series
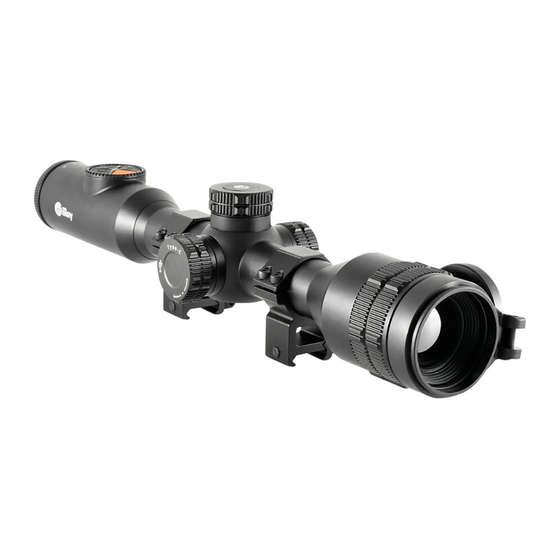
- Page 1 Tube Series User Manual V1.0 IRay Technology Co. Ltd.
-
Page 2: Specification
Specification: Model TL35 Microbolometer Type Uncooled Resolution, pixels 384x288 Pixel Size, um NETD, mk ≤50 Frame Rate, Hz Optical Characteristics Objective Lens, mm Field of View, º 7.5x5.6 Magnification, x 3.0-12.0 E-zoom, x 1.0~ 4.0 Eye Relief, mm -4~+4 Diopter Adjustment, D Detection Range, m 1816 (Target size:1.7m×0.5m, P(n)=99%) -
Page 3: Package List
⚫ Certificate 2. Introduction Tube series thermal imaging riflescopes are designed for use with hunting weapons no matter it’s day or night, or at adverse weather conditions (rain, smog, fog, and etc.). Base on the principle of thermal imaging, thermal imaging riflescopes do not require external light source and are resistant to high-illumination level. - Page 4 ⚫ Stadia-metric rangefinder ⚫ Long detection range ⚫ High frame frequency: 50Hz ⚫ Build-in storage, supports photographing and video recording ⚫ Build-in WIFI module for connecting App ⚫ Digital compass and gravity sensor ⚫ Picture in Picture (PIP) ⚫ Defect pixel correction ⚫...
-
Page 5: Functions Of Buttons
5. Functions of buttons Status/Current Long Button Operation Short Press Rotation Press mode Switch on Switched off —— —— Switch Home screen calibration —— off/Standby Wake up the —— Standby mode —— device Power button Exit to the Main menu previous menu ——... -
Page 6: Charging Battery
Screen move right/up 6. Charging Battery Tube series have double power supply solutions: built-in rechargeable li-ion battery pack and a replaceable 18500 battery, the whole system supports standard working time: 15 hours. Please ensure the battery is fully charged before first time using. - Page 7 Installing 18500 battery ⚫ Turn the battery cover (11) counterclockwise and remove it. ⚫ Install one 18500 battery (12) into the battery comportment following the sign inside battery compartment, as anode electrode inward and negative electrode outward. ⚫ Close the battery compartment cover (11) by turning it clockwise. Precautions ⚫...
-
Page 8: External Power Supply
Switching Battery Power Supply Tube series support double power supply system: Built-in li-ion battery pack and replaceable 18500 battery, also support USB port charging. ⚫ If there are two batteries in Tube, two battery icons are displayed in the status bar ( the replaceable battery on the left while built-in battery on the right ). -
Page 9: Installation
For accuracy of shooting, please properly mount the Tube series on the weapon. ⚫ The Tube series riflescope is fixed using the mount, such as the Picatinny rail mount included in the package. Tube series is designed with 30mm diameter pipe, also suits 30mm standard mount, such as mounts for the daylight scope. - Page 10 Rotate the diopter adjustment ring (2) of the eyepiece to adjust the clarity of icons on the display. ⚫ Rotate the lens focus ring (13) to focus on the object being observed. ⚫ Set image mode in the home screen with a short press the Palette Button (6): White Hot, Black Hot, Pseudo Color, Red Hot and Target Highlight.
- Page 11 9. Zeroing Tube series feature to use the “Freeze” zeroing method. Zeroing is recommended to be done at the temperature close to the riflescope operating temperature. ⚫ Mount the weapon with the riflescope. ⚫ Set a target at a certain distance, such as 100m,200m etc.;...
- Page 12 symbol of freeze appears on the left of the screen, and the image is frozen. ⚫ Move the reticle by rotating the controller ring (7) until the reticle matches the point of impact. Rotate clockwise to move the reticle left or down and counter clockwise to move the reticle right or up.
-
Page 13: Digital Zoom
12. Photography and Video Recording Tube series is equipped with a function for video recording and photography of the observed image which is saved on the built-in 16GB memory storage. The photo and video files are named with time, so it is suggested to reset the date and... -
Page 14: Memory Access
⚫ When the video recording starts, the icon and the video recording timer displayed in the HH:MM:SS (hour: minute: second) format will appear on the upper right of the screen. ⚫ When recording, short press Photography Button (3) to take a photograph. ⚫... -
Page 15: Status Bar
make copies of pictures and videos. ⚫ Turn on the riflescope and connect it with the computer via Type-C cable. ⚫ Double click “my computer” on the desktop - double click to open the device named “Infiray” - double click and open the device named ‘Internal Storage’ to access built-in memory. - Page 16 8. Video output (when it is on) 9. Wi-Fi connect ( : Wi-Fi off; : Wi-Fi on) 10. Clock (in the Main Menu or InfiRay Outdoor application to set time) 11. Replaceable battery power indicator 12. Built-in battery pack discharge level Notice: when icon is green , it means the battery level is more than 20%;...
-
Page 17: Main Menu Functions
15. Main Menu Functions ⚫ Enter the main menu with a long press of the controller button (7) in the home screen. ⚫ Rotate the controller ring (7) to move among the main menu items. ⚫ Main menu navigation is cyclical: when the cursor reaches the last menu item of the first page, it will continue from the first menu item on the second page. - Page 18 Page 1 of the main menu Page 2 of the main menu Main Menu Contents and Description Menu Item Submenu Turn on/off Ultraclear mode Ultraclear ⚫ Press and hold the controller button (7) to enter the main menu. Mode ⚫ Rotate the controller ring (7) to select the Ultraclear menu item. ⚫...
- Page 19 Bar section). ⚫ Press and hold the controller button (7) to enter the main menu. ⚫ Rotate the controller ring (7) to select the Calibration Mode menu item. ⚫ Press the controller button (7) briefly to enter the Calibration Mode submenu.
- Page 20 ⚫ Briefly press controller button (7) to turn the gravity sensor on/off. ⚫ Two scales are displayed on the both sides of the screen when the gravity sensor is on. ⚫ The left scale shows tilt angle, and the right one shows pitch angle. Select zeroing profile ⚫...
- Page 21 To zero your riflescope, you need to set a zeroing profile and zeroing distance first. Tube series support the zeroing distance in the range of 1 to 999 m. ⚫ Press and hold the controller button (7) to enter the main menu.
- Page 22 and the image is frozen. ⚫ Adjust the reticle position by rotating the controller ring (7) until the reticle matches the point of impact. For a detailed description of the reticle adjusting, refer to the Zeroing section. If the zeroing distance is not same as the preset object, you can set the distance here.
- Page 23 bar at the top of the display. Set standby status and time ⚫ Press and hold the controller button (7) to enter the main menu. ⚫ Rotate the controller ring (7) to select the Standby Settings menu item. ⚫ Press the controller button (7) briefly to enter the Standby Settings submenu.
- Page 24 Defect pixels are pixels that do not change brightness compare with others on the image, they are either brighter or darker than surrounding pixels. Tube series offer the possibility of removing any defective pixels on the sensor using software, as well as to cancel any deletion.
- Page 25 When the pixel has been successful deleted, the Add message will appear on the PIP window for a short time. ⚫ Then, delete the next defective pixel by moving the cursor across the display. ⚫ Press the Power Button (5) briefly in the same position as the calibrated defective pixel to cancel the pixel correction, and the Del message will appear on the PIP window for a short time.
- Page 26 Calibrate the digital compass ⚫ Press and hold the controller button (7) to enter the main menu. ⚫ Rotate the controller ring (7) to select the Compass Calibration menu item. ⚫ Press the controller button (7) briefly to enter the Compass Calibration interface.
- Page 27 Date setting ⚫ Press the controller button (7) briefly to enter the Date submenu. The date is displayed in yy/mm/dd format. ⚫ Rotate the controller ring (7) to select the desired year, month and day. ⚫ Press the controller button (7) briefly to switch between digits.
- Page 28 minute value. ⚫ Press the controller button (7) briefly to switch between hour and minute. ⚫ Press and hold down the controller button (7) to save your selected date and exit from the submenu. Language selection ⚫ Press the controller button (7) briefly to enter the Language submenu.
- Page 29 ⚫ Rotate the controller ring (7) to select the unit of measurement -meters or yards. ⚫ Confirm your selection with a short press of the controller button (7). ⚫ Return to submenu will happen automatically. Turn status auto hiding on/off ⚫...
- Page 30 ⚫ Press the controller button (7) briefly to enter the Factory Rese submenu. ⚫ Rotate the controller ring (7) to select “Yes” to reset to the factory settings or “No” to cancel the action. ⚫ Confirm your selection with a short press of the controller button (7).
-
Page 31: Pip Function
Show device information ⚫ Rotate the controller ring (7) to select Info menu item. ⚫ The relevant information of rifle will be shown by a short press of the controller button (7). ⚫ This item allows the user to view the following information about the riflescope: the product model, GUI version, SYS Info, Boot version, Info... - Page 32 PIP image will be enlarged 2 times synchronously. 17. Stadiametric Rangefinder Tube series is equipped with a stadiametric rangefinder, which allows you to estimate the approximate distance to an object, if its size is known. ⚫ In the home screen, press and hold the Brightness Button (4) to switch the stadiametric rangefinder function on/off.
- Page 33 ⚫ The GUI information will be displayed again with the press of any button. ⚫ Only after the GUI is displayed, the button and menu can be manipulated. 19. Wi-Fi Function Tube series has a function for wireless communication with mobile device (smartphone or tablet) via Wi-Fi. ⚫...
- Page 34 Launch InfiRay Outdoor application on your mobile device (see Update and APP section)。 Set Wi-Fi name and password The Wi-Fi name and password of Tube series can be reset in the InfiRay Outdoor application. ⚫ After connected with the mobile device, find and click the "setting"...
-
Page 35: Technical Inspection
⚫ You can get InfiRay Outdoor application in the official website: www.xinfrared.com; or search “InfiRay Outdoor” in App store to download App; or scan the following QR code to download. ⚫ When installation completed, open InfiRay Outdoor application. ⚫ If your riflescope is already connected with mobile device, please switch on the mobile data in mobile device. -
Page 36: Maintenance
⚫ The controls/buttons should be in working order. 22. Maintenance The maintenance should be carried out at least twice a year and includes the following steps: ⚫ Wipe the external surface of metal and plastic parts off dust with a cotton cloth. Silicone grease may be used for cleaning process. - Page 37 The Image is too Brightness level is too Adjust brightness of screen. dark. low. Adjust the image sharpness by The lens is not focused. rotating the lens adjuster. The GUI is clear, but There is dust or Wipe off the outside optical the image is fuzzy.
- Page 38 connect with Too many Wi-Fi signals Move the device to an area with no smartphone and around the riflescope. or fewer Wi-Fi signals. tablet. Smartphone or tablet is out of range of a strong Wi-Fi signal. There are Wi-Fi signal is Relocate the device until Wi-Fi obstacles between the missing or interrupted...
Need help?
Do you have a question about the Tube Series and is the answer not in the manual?
Questions and answers