Summary of Contents for Intech Instruments ezeio-STD
- Page 1 io™ Controller and the 2400-A16 input expansion. Important Supplementary Manual.
-
Page 2: Table Of Contents
ezeio Controller and the 2400-A16 input expansion Manual Index. Product Liability. Page 2 Description. Page 3 Ordering Information. Page 3 ezeio Controller Compatibility. Page 3 Section 1 - ezeio Controller. Page 4 Configuring the ezeio Controller local inputs. Page 4 Getting started with configuration. -
Page 3: Description
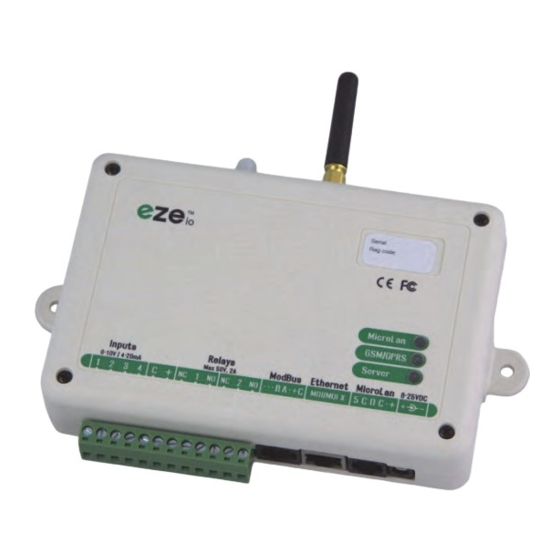
Controller and the 2400-A16 input expansion. Ordering Information. ezeio-STD ezeio Controller with Ethernet port, 4 analogue inputs and Modbus-RTU RS-485 Comms. ezeio-GSM ezeio Controller with GSM/3G transceiver, Ethernet port, 4 analogue inputs and Modbus-RTU RS-485 Comms. -
Page 4: Section 1 - Ezeio Controller
ezeio Section 1 covers the Controller 4 local inputs, and Section 2 covers adding the power of the 2400-A16, to expand the inputs up to 40, plus adding more outputs. ezeio Section 1 - Controller. ezeio Configuring the Controller local inputs. ezeio ™... -
Page 5: Easy Steps For Calibration
Easy steps for Calibration. ezeio 1. As an example: on the Controller Input 2, the analogue input is set to 0~10Vdc. Apply an accurate 10Vdc signal to this input and on the ‘Status Page’, note the ‘Raw’ reading on channel 2. In this example below the Raw reading = 9798. - Page 6 5. The Status screen now displays input 2 at exactly 10.00 (or whatever value you have entered). 6. If you require good accuracy at a particular point of the span, then calibrate at that point instead of the full span point. 7.
-
Page 7: Section 2 - 2400-A16
Section 2 - 2400-A16. Intech Micro 2400-A16 Station. The 2400-A16 is a high quality, high accuracy I/O station (input/output expansion station), designed for a wide variety of applications. Up to 16 Isolated Universal Analogue Inputs, with Plug In Terminals. Each Input is fully Isolated and Individually Selected & Scaled. RTD, T/C, mA, mV, V &... -
Page 8: Getting Started With Configuration
Getting started with configuration. The first task is to configure the 2400-A16. Connect the 2400-A16 to a computer as covered bottom of page 16 in the ‘2400-A16 Installation Guide’. If you do not already have a copy of the ‘Intech Micro Station Programmer Software’, download and install from this link: www.intech.co.nz/downloads/Install-StationProgrammer.html Run the ‘Intech Micro Station Programmer Software’. -
Page 9: Configuring The Ezeio Controller
Remember that if two or more 2400-A16’s are connected to the ezeio Controller, the 2400-A16 ‘Address’ and corresponding eze ‘Polling address’ on the additional unit(s) must be set to a different number. Never use the same number twice. For example, the 2 2400-A16 ‘Address’... -
Page 10: Example 1: Eze Temperature Input Scaling For Rtd's And Thermocouples
Next, click on ‘System’. Set the ‘Modbus speed’ (i.e. Baud rate) to the same as that of the 2400-A16 (as shown). It is recommended to also tick the ‘Use slow polling’ box. Note: Not all the options are shown. ezeio Next task is to add the 2400-A16 inputs onto the Controller: Click on ‘Inputs’... -
Page 11: Example 2: For All Other Analogue Values The 2400-A16 Outputs To Eze
Click on ‘Save changes’. Click on the ‘Status’ tab to see the Temperature. Example 2: For all other analogue values the 2400-A16 outputs to , 0~100% over the range selected on the 2400-A16 as per the table shown, which makes configuration very easy. ezeio controller displays input values from the selected range. -
Page 12: Example 2.2: Analogue Pressure Sensor
Click on ‘Save changes’. Click on the ‘Status’ tab to see the flow meter reading. Example 2.2: This next example is a compound range such as a pressure transmitter that has a span of -1~9Bar. Select ‘Custom’. Click on ‘Linear analog’. Point 1 is the zero point. -
Page 13: Example 2.3: Digital Flow Meter
Example 2.3: This example is a pulse output from a flow meter or energy meter. In this example, the water flow meter has a range of 0~80Hz = 0~1000 l/sec (litres per second), and this signal is wired into one of the 16 analogue inputs on the 2400-A16. The closest range on the 2400-A16 is 0~100Hz. -
Page 14: Example 2.4: State On/Off
With a Laptop or Tablet running Windows 7/8/8.1/Vista or XP, connect to the 2400-A16 using the XU-USB programming key available from an Intech Instruments Ltd distributor. You will also need to install the “Station Programmer” software (free to download) from the following link: www.intech.co.nz/downloads/Install-StationProgrammer.html... -
Page 15: Section 3 - Alarms
Section 3 - Alarms. The eze system ezeio provides a powerful mix of alarm outputs including: alarm relay actuation on the controller and 2400-A16 relay outputs, email alarm messages, SMS text messages. All of this is covered in the User Manual starting on page 35. -
Page 16: Using A Data Gsm/3G Sim In The Ezeio-Gsm Controller
Using a data GSM/3G SIM in the io-GSM Controller. This section is for the ezeio-GSM controller model only. 1. Obtain a data GSM/3G SIM with no password. (Note: the ezeio-GSM controller takes a standard size SIM card.) 2. Place SIM in a mobile phone to activate as per the providers instructions, or get the provider to do this at the time of purchase.


Need help?
Do you have a question about the ezeio-STD and is the answer not in the manual?
Questions and answers