Table of Contents
Advertisement
Quick Links
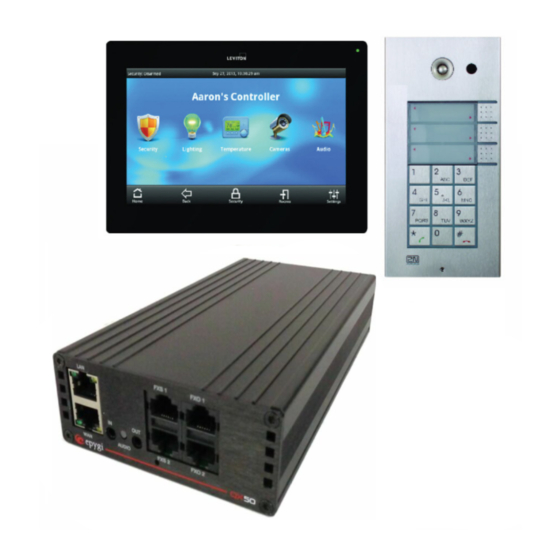
Configuring Leviton OmniTouch 7 Touchscreens
& Helios 2N door stations with the Epygi QX IP
PBX
Abstract:
This document describes how to Configure Leviton OmniTouch 7 Touchscreen & Helios 2N door
station with the Epygi QX IP PBX
Please Note:
This document contains confidential and proprietary information owned by Epygi Technologies, LTD. Any copying, use or disclosure of the document or the information
contained herein without the written permission of Epygi Technologies, LTD. is strictly prohibited.
Copyright © 2003-2015 Epygi Technologies, LTD. All Rights Reserved.
Advertisement
Table of Contents

Summary of Contents for Epygi Leviton OmniTouch 7
- Page 1 Epygi QX IP PBX Please Note: This document contains confidential and proprietary information owned by Epygi Technologies, LTD. Any copying, use or disclosure of the document or the information contained herein without the written permission of Epygi Technologies, LTD. is strictly prohibited.
-
Page 2: Table Of Contents
Configuring Leviton OmniTouch 7 Touchscreens & Helios 2N door stations with the Epygi QX IP PBX Table of Contents 1 Introduction ................................3 2 Requirements and Preparations ..........................3 3 Configuration ................................3 3.1 Configuring the Epygi IP PBX ..........................5 3.1.1 Login and configure the IP network settings. -
Page 3: Introduction
Configuration Since the Epygi has a built-in firewall and DHCP server the system has a WAN port as well as a LAN port. The WAN port can be used to connect to an existing private network or even to a public network. By default, the WAN port will receive an IP address if connected to a local network with a DHCP server. - Page 4 OmniTouch 7 Touchscreen, doorstation and IP phones The Epygi IP PBX WAN port can also be connected directly to the internet and serve as the DHCP server for the local network (Figure 2). In this case the OmniTouch 7 Touchscreen, doorstation and IP phones would be connected to the Epygi IP PBX LAN port.
-
Page 5: Configuring The Epygi Ip Pbx
Using a standard network patch cable, connect the Epygi WAN to the local network. Using a second network patch cable, connect the PC being using to configure the system to the LAN port of the Epygi. Change the PC’s ethernet adapter settings to have a static IP address (e.g. 172.30.0.100) to be in the same subnet as the Epygi. - Page 6 Configuring Leviton OmniTouch 7 Touchscreens & Helios 2N door stations with the Epygi QX IP PBX Enter the default Username (admin) and Password (19) and click Log In. Click Setup -Basic Setup and select System (LAN) to start the System Configuration Wizard.
-
Page 7: Add Extensions For Ip Phones, Touchscreens And Door Stations
Click Finish to finalize the changes. • At this point you would be able to login to the Epygi by connecting via the WAN or LAN IP address after resetting your PC adapter connection settings back to DHCP. For using the optional configuration (figure 2), go to Interfaces, IP Lines, IP Line Settings and change the setting “Configure IP phones from:”, set to LAN. - Page 8 Configuring Leviton OmniTouch 7 Touchscreens & Helios 2N door stations with the Epygi QX IP PBX Click on Codec Settings and put a check beside the modify fields, G.711u, G.729a and H.264 and press Save. Revision 1.0 31-Mar-16...
-
Page 9: Create A Ring Group
For IP phones, reset the phone to factory default to complete the configuration. Repeat the above listed steps for each IP phone, Touchscreen and door station that will be connecting to the Epygi IP PBX. Create a Ring Group From the Dashboard menu click Extensions, Extensions to go to the Extensions Management menu. -
Page 10: Create A Paging Group
Configuring Leviton OmniTouch 7 Touchscreens & Helios 2N door stations with the Epygi QX IP PBX Click Add and add a new extension number (e.g. extension 400), leave the Type set to User Extension. Press Save. In the General Settings enter the Display Name of Ring Group (or other desired name), and click Save. Press Go Back to return to the General Settings. -
Page 11: Configuring The 2N Helios Ip Force Door Station
Configuring Leviton OmniTouch 7 Touchscreens & Helios 2N door stations with the Epygi QX IP PBX Configuring the 2N Helios IP Force door station Login and configure the IP network settings. Log in to the 2N Helios IP Force device by entering the IP address in a browser. By default, DHCP is not enabled on the unit so it will not receive an IP address from the local DHCP server. - Page 12 Configuring Leviton OmniTouch 7 Touchscreens & Helios 2N door stations with the Epygi QX IP PBX Click on System and then Network. Set/Enter in the following: • Uncheck DHCP. • Click on/Expand Manual Settings. • Enter in the desired IP Address.
-
Page 13: Configure The Sip Settings To Make And Receive Calls
Display Name – recommend using the name assigned to the extension created in the Epygi. • Phone Number (ID) – this is the SIP Registration Username assigned to the door station in the Epygi IP Line Settings. • Domain – enter in the network domain. - Page 14 Configuring Leviton OmniTouch 7 Touchscreens & Helios 2N door stations with the Epygi QX IP PBX • While still on the Services tab, go to HTTP API and make the following changes: • Set the Connection Type for Camera API to "Unsecure (TCP)".
- Page 15 User Basic Information Name – Enter in the name of the door station set in the Epygi. • User Phone Numbers Number 1 Phone Number – enter in the number for the “Ring Group Extension” created in the Epygi (e.g. Extn 400).
-
Page 16: Configuring Leviton Omnitouch 7 Touchscreen
QX IP PBX At this point the door station should be registered to the Epygi. A test call can be made from the door station to any extension in the Epygi by dialing “*”, followed by the extension number (e.g. “*,00” to reach the Auto Attendant). To disconnect, press “#”. - Page 17 • SIP Page Group – this is the number created in the Epygi to page a group of extensions (e.g. extn 401). Click on OmniTouch 7 Screens and enter the following for each OmniTouch 7 (Note: only the fields required for door station integration are discussed here): •...
- Page 18 The preview is available prior to answer. • SIP User – enter the extension number in the Epygi that will be called when pressing the intercom button from the Touchscreen. Typically this will be the extension for the Ring Group.
-
Page 19: Update The Omnitouch 7 Touchscreen
Configuring Leviton OmniTouch 7 Touchscreens & Helios 2N door stations with the Epygi QX IP PBX Once all of the above fields have been completed, perform the following steps • Select Communication from the top menu, and select Write to the controller. - Page 20 Configuring Leviton OmniTouch 7 Touchscreens & Helios 2N door stations with the Epygi QX IP PBX To dial one of the SIP stations press the device name (e.g. QX200). Revision 1.0 31-Mar-16...
-
Page 21: Operating The Door Relay From The Omnitouch 7
The door station will auto answer and establish two-way audio and video will be seen from the door station. It should be noted that other SIP stations can be added to the list as well as any extensions to be called on the Epygi. -
Page 22: Calls Originating From The 2N Helios Door Station
Placing a call to a Ring Group that includes a cell phone. The Epygi can place a call to the PSTN network to reach a public number, such as a cell phone. The Epygi would need a POTS line connected to one of the FXO ports or a SIP trunk connected via the internet. Instead of using Many Extension Ringing the “Ring All”... -
Page 23: Troubleshooting And Maintenance Tips
SIP Intrusion Detection System (IDS). Any SIP device that tries to register to the Epygi but fails to provide the proper authorization parameters will result in the Epygi blocking the IP address of the device. The IP will be listed in the Firewall Blocked IP list and it can be deleted. - Page 24 Configuring Leviton OmniTouch 7 Touchscreens & Helios 2N door stations with the Epygi QX IP PBX Revision 1.0 31-Mar-16...
Need help?
Do you have a question about the Leviton OmniTouch 7 and is the answer not in the manual?
Questions and answers