Advertisement
Quick Links
Advertisement

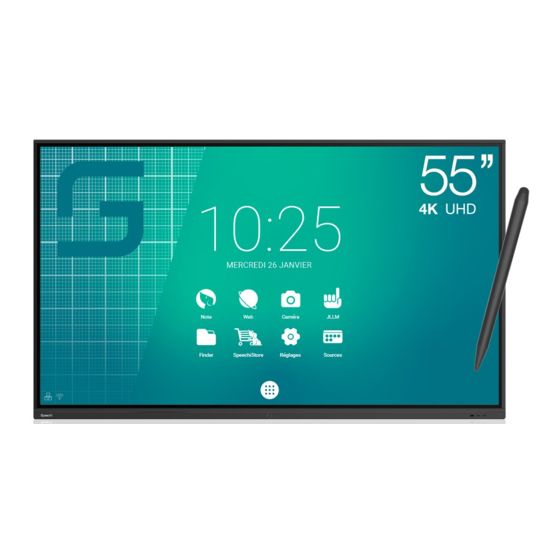
Summary of Contents for Speechi ST-55-UHD-AND-L-004
- Page 1 Safety Warning...
-
Page 2: Table Of Contents
Safety Warning Contents Safety Warning ....................3 Control Panel ....................3 Connection and Setting ..................7 Menu Operation ..................... 10 Simple Troubleshooting ................. 14 Maintenance ....................16... - Page 3 Safety Warning Safety Warning Before operating, please read this manual thoroughly, and keep it for future reference. Image shown in this manual is indicative only. There may be differences between the pictures and the actual product, please prevail in kind. Placement Do not put heavy objects on top of the unit.
- Page 4 Safety Warning Ventilation Please put the unit in a well-ventilated place, so the heating can be released easily. Ensure that the unit has enough space for ventilation. Space requirement: left, right and back >10cm, top> 20cm. Earphone Before using earphone, please turn down the volume in advance. Using the earphone to listen loud sound for a long time might affect the hearing.
-
Page 5: Safety Warning
Control Panel Control Panel 1. Prepare to Install Number Items Function description Magnetic zone Area for placing the adsorptive magnetic pen Tap to enter Energy Saving Function. Press at least 2 seconds to enter standby mode Power Indicator Open the power supply when the power indicator light is always Light normal Remote control... - Page 6 Control Panel External computer image input Connecting RJ45 terminals High-definition multimedia interface signal input, connect to devices HDMI IN with HDMI output interface (personal computer with HDMI output, set-top box, or another video device) Connect USB devices such as mobile hard disk, U disk, USB keyboard and mouse, USB drives, etc.
- Page 7 Control Panel 2) Detailed Function Description :Power on/off : Mute switch Start:Built-in computer Windows key Space:Built-in computer Space key Alt + Tab :Built-in computer space bar Alt + Tab Alt + F4 : Built-in computer program window close button Numeric keys: Numeric input keys Display:Display channel information :Non-function 10.
- Page 8 Control Panel 3) Remote Control Instruction Install Batteries Open back cover of battery component on the back of remote control. Install AAA type battery according to the corresponding electrode, make sure battery positive and negative pole are correct ("+"to"+", "-" to "-"), please do not mix using old and new batteries. After having installed battery, close the back cover of battery components, and make the following clip buckled to the bottom.
-
Page 9: Connection And Setting
Connection and Setting Connection and Setting For the safety of you and the machine, please do not connect any power plug before connection. 1. External Computer and Touch Connection Use VGA cable to connect to VGA output port of external computer, and meanwhile use headphone audio cable to connect to external computer audio output interface. - Page 10 Connection and Setting 2. Audio and Video Equipment Use HDMI cable to connect audio and video equipment with HDMI output. After cable connection, plug in power cord, and switch power on. Press to turn equipment on. Press INPUT key to switch to HDMI port. 3.
- Page 11 Connection and Setting After cable connection, plug in power cord, and switch power on. Press to turn equipment on. Press INPUT key to switch to AV port. 6. RS232 Connection After using serial port cable to connect central control equipment and machine, certain function of the machine can be controlled via central control equipment, such as: machine ON/OFF, and adjustment of sound volume, etc.
-
Page 12: Menu Operation
Menu Operation Menu Operation Touch Menu Operation Call up Method Take middle point position on the bottom of display screen as starting point, use touch pen to drag towards screen center position to call up touch menu, as shown below. Note: "Touch A Method"... - Page 13 Menu Operation ⚫ Press the Enter button on remote control or directly click with touch pen to confirm selected input channel. ⚫ Press return key on remote control or click blank area outside menu with touch pen to exit menu. ⚫...
- Page 14 Menu Operation Screen ⚫ Press button on remote control to select Screen setting menu. ⚫ Press on remote control or directly click with touch pen to select the option. ⚫ Press Enter on remote control or directly click with touch pen to enter the selected mode. Press Back on remote control or click blank area outside menu with touch pen to exit menu.
- Page 15 Menu Operation ⚫ Press Enter on remote control to enter adjustment mode, and press button or directly click with touch pen to adjust each option. Press Enter/Back to exit adjustment. ⚫ Press Back on remote control or click blank area outside menu with touch pen to exit menu. Adjust ⚫...
-
Page 16: Simple Troubleshooting
Simple Troubleshooting Simple Troubleshooting Machine Fails to Work Normally Remote control failure Check whether there are other objects between remote control and equipment control receiving window, thus leading to failure of remote control. Check whether the battery electrode in the remote control is correct. Check whether remote control needs to replace battery. - Page 17 Simple Troubleshooting With horizontal or Check whether other electronic equipment or power tools are placed vertical stripes or image around the machine. dithering No color, color is weak, Adjust chromaticity and brightness or contrast in menu. or image is weak Check whether signal wire is well connected.
-
Page 18: Maintenance
Maintenance Maintenance Proper maintenance can avoid many early faults and regular careful cleaning can make machine brand new. Please unplug power plug before cleaning and maintenance, to prevent electric shock. Clean Screen Please mix and stir even a little fabric softener or tableware detergent with alcohol. Please use a soft cloth to be completely soaked in the mixture.


Need help?
Do you have a question about the ST-55-UHD-AND-L-004 and is the answer not in the manual?
Questions and answers