Table of Contents
Advertisement
EN
Owner's Manual
Original Owner's Manual – English
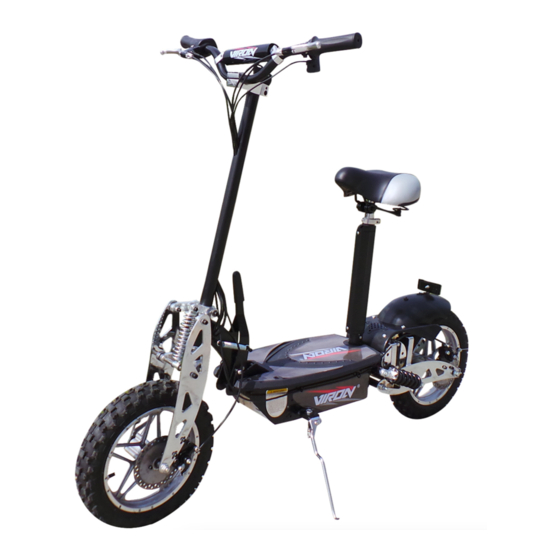
Electric- Scooter 1000W
Vehicle with electric engine
PRIOR TO FIRST USE, READ THIS MANUAL COMPLETELY AND ATTENTIVELY!
IMPERATIVELY FOLLOW THE SAFETY INSTRUCTIONS!
NONOBSERVANCE CAN LEAD TO PERILOUS INJURIES!
KEEP THIS MANUAL CAREFULLY!
The operating instructions in digital form can be found at:
http://eve-motion.com/support/ES-1000.htm
1
EN
Advertisement
Table of Contents

Summary of Contents for EveMotion HB-ES1000A
- Page 1 Owner’s Manual Original Owner’s Manual – English Electric- Scooter 1000W Vehicle with electric engine PRIOR TO FIRST USE, READ THIS MANUAL COMPLETELY AND ATTENTIVELY! IMPERATIVELY FOLLOW THE SAFETY INSTRUCTIONS! NONOBSERVANCE CAN LEAD TO PERILOUS INJURIES! KEEP THIS MANUAL CAREFULLY! The operating instructions in digital form can be found at: http://eve-motion.com/support/ES-1000.htm...
-
Page 2: Table Of Contents
We congratulate you on your new vehicle. In order to avoid damages to the scooter as well as injuries due to inappropriate use, please read this manual attentively before operating. It is important that you understand and follow the instructions of this owner’s manual. Have fun with your new and innovative item! Your EveMotion Team... -
Page 3: Scope Of Delivery
2. Scope of delivery 1. 1x Electric scooter 2. 1x 36V battery package 3. 1x Cradle (adjustable) 4. 1x Seat (height adjustable) 5. 2x Ignition key 6. 1x Tool kit 7. 1x Charger 8. 1x Owner’s manual 3. Technical data Engine: 1000 Watt Cooling system:... -
Page 4: Safety Instructions
4. Safety instructions 4.1 Intended use Driving is prohibited in public areas, roads, bicycle lanes or sidewalks. Use your item only in private areas, which are not accessible to public. Only drive with permission of the estate owner. Disregarding these instructions may lead to perilous injuries. Residual risk remains even when you are using this item properly. -
Page 5: How To Use The Charging Device
4. Safety instructions 4.3 How to use the charging device WARNING! Electric shock hazard. Always use and charge your scooter in a dry environment. Never use the scooter in a wet or moisty environment. Depose the item properly. Use the charger only for charging your scooter’s battery. A specific charging device should only be used ... -
Page 6: Part Names
5. Part names Carton 1 Carton 2 Tool Set handlebar handlebar clamp seat steering column one fold clamping seat pole fixation engine cover footboard suspension fork engine rear wheel front wheel rear shock absorber battery box lateral upright brake lever left brake lever right engine throttle rotary gas handle... -
Page 7: Assembly
6. Assembly Aligning the front wheel fork Remove the retention bolt from the shock absorber holder on the front shock absorber (fig.1). Fold the suspension fork in the direction of the shock absorber holder (fig.2). Ensure that the suspension fig.1 fig.2 fork joints are aligned upwards (fig.3, fig.4). - Page 8 6. Assembly Handlebar Place the handlebar clamp [M] on the steering column (fig.15). Alternately tighten the Allen screws on the left and right of the handlebar clamp until it is firmly attached to the steering column (fig.16). fig.15 fig.16 Remove the cover of the clamp by loosening the 4 Allen screws.
- Page 9 6. Assembly Rear mudguard / reflector Mount the mudguard [B] to the mudguard bracket using 4 screws (fig.27, fig.28, fig.29). Insert the reflector [N] through the reflector holder on the mudguard and fasten it with a nut (fig.30). fig.27 fig.28 fig.29 fig.30 Mounting the seat / saddle...
-
Page 10: Adjustments
7. Adjustments Brake lever Loosen the hexagon socket screw to adjust the brake lever (fig.1). The brake lever should be easily accessible for the driver and should neither be too high nor too low adjusted (fig.2). fig.2 fig.1 Brake calliper Loosen the screw nut at the brake calliper (fig.3). -
Page 11: Battery
8. Battery ATTENTION! Prior to each charging process, you need to check if charger and battery are in good condition. In case of a defect you must not use the any longer and you need to dispose these correctly. 8.1 Charging of the battery The ignition switch has to be turned “off”... -
Page 12: Operation
9. Operation Before every ride, check the vehicle for deficiencies and loose screw connections. The vehicle may only be started after a positive check-up. When starting, always pull the brake lever. The lateral upright has to be folded up as it can cause accident if it has contact to the ground. 1. -
Page 13: Driving
10. Driving Gas handle - throttle Please get familiar with the gas handle. Turn the gas handle slowly to the back (fig.1). The vehicle now starts to drive slowly. As soon as you release the gas handle, it will rebound fig.1 fig.2 and the vehicle will slow down (fig.2). -
Page 14: Service And Maintenance
11. Service and maintenance Drive chain Regularly verify the chain tension and adjust it if nece- ssary (fig.1). Lubricate the driving chain – according to the use of the vehicle – once a week with chain spray (fig.2). fig.1 fig.2 Brake pads The brake pads have to show a thickness of min. -
Page 15: Storage
12. Storage ATTENTION! If you don’t use the vehicle over a longer period of time, you should follow the next steps: Remove battery The ignition switch should be turned “off” (fig.1). Open the battery box (fig.2). Now, disconnect the battery from the cable tree of the vehicle (fig.3). -
Page 16: Packaging
The legal warranty is valid for two years from the date of purchase. Save your payment document, it enables you to make use of an eventual warranty service. For any request regarding warranty, spare parts or replacement devices do not hesitate to contact us by mail or E-Mail. EveMotion GmbH Marzahner Chaussee 213 12681 Berlin Germany E-Mail: info@eve-motion.com... -
Page 17: Eu-Declaration Of Conformity
In case of alteration of the product, not agreed upon by us, this declaration will cease to be valid. Bezeichnung des Produktes: Elektro-Scooter Product Description: Electric Scooter Modell-Nr.: HB-ES1000A, HB-ES1000B Model No.: Einschlägige EG-Richtlinien: EG Maschinenrichtlinie 2006/42/EG Applicable EC Directives: EC Machineray Directive 2006/42/EC...
Need help?
Do you have a question about the HB-ES1000A and is the answer not in the manual?
Questions and answers