Advertisement
Available languages
Available languages
Quick Links
Advertisement

Summary of Contents for MacAllister LL6A
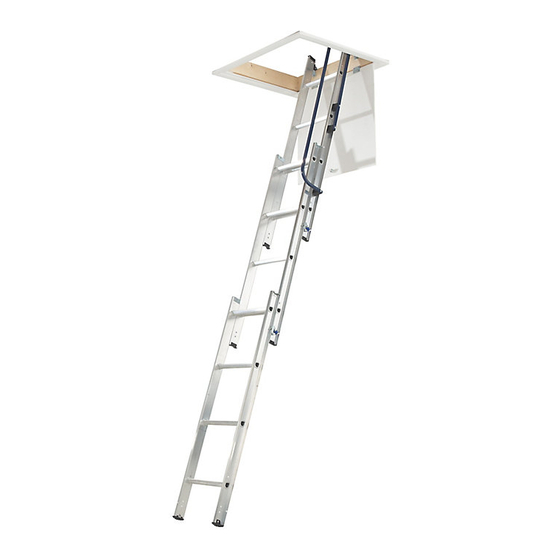
- Page 1 EASY STORE ALUMINIUM LOFT LADDER - 3 SECTION ÉCHELLE ESCAMOTABLE À FAIBLE ENCOMBREMENT, 3 PLANS LL6A EAN 3663602910626 WARNING : Please read the instructions before using the loft ladder. AVERTISSEMENT : Lisez les consignes avant d’utiliser l’échelle.
- Page 3 Let’s get started... These instructions are for your safety. Please read through them thoroughly before use and retain them for future reference. started Getting Safety Safety instructions Your product more detail Installation and operating instructions Commençons … Ces instructions sont pour réalisées votre sécurité. Nous vous remercions de prendre le temps de les lire attentivement avant l’utilisation du produit.
- Page 4 Ensure installation is Avoid electrical hazards. in accordance with the Check clearances at top and manufacturer’s instructions. access. Ensure you have read all Éviter tout danger instructions and safety labels électrique. Veillez à ce qu’il and use ladder in accordance y ait assez d’espace en haut with these.
-
Page 5: Safety Instructions
Safety Instructions Safety Instructions Before commencing the installation or operation of this product, read these instructions carefully and Before commencing the installation or operation of this product, read these instructions carefully and completely, noting in particular the instructions regarding safety (below). completely, noting in particular the instructions regarding safety (below). - Page 6 Safety Instructions Safety Instructions Please check you have all components listed (tick boxes) Please check you have all components listed (tick boxes) Before commencing the installation or operation of this product, read these instructions carefully and Before commencing the installation or operation of this product, read these instructions carefully and completely, noting in particular the instructions regarding safety (below).
- Page 7 Adapting the trapdoor Adapting the trapdoor firmly shut. If the trapdoor does not hinge downwards, firmly shut. If the trapdoor does not hinge downwards, The loft ladder is suitable for a loft opening let flush The loft ladder is suitable for a loft opening flush with or is not hinged at all, you will need to adapt or replace or is not hinged at all, you will need to adapt or replace into the ceiling, having a hinged trapdoor opening...
- Page 8 Secure the travel stop ring (A2) using screw Secure the travel stop ring (A2) using screw (A7). (A7). Secure the catch assembly with M12 nut (A4) Secure the catch assembly with M12 nut (A4) 45° 45° ensuring the nut is tightened sufficiently to allow the ensuring the nut is tightened sufficiently to allow the catch to rotate freely without any looseness.
-
Page 9: Fitting Bottom Stops
Slide the hinge guides (B1 & B2) onto the rear Slide the hinge guides (B1 & B2) onto the rear frame stiles. The brackets should be positioned frame stiles. The brackets should be positioned outwards, with the double holed half uppermost (see outwards, with the double holed half uppermost (see diagram). -
Page 10: Installing The Ladder
Installing the Ladder Installing the Ladder N.B. The ladder should be installed on the same side of the trap as the trapdoor hinges. of the trap as the trapdoor hinges. With the ladder preferably centred in the opening, and the trapdoor hanging down, locate the hinge guide bracket arms (B1 &... -
Page 11: Handrail Assembly
Position the ladder in its fully stowed (closed) Position the ladder in its fully stowed (closed) position carefully in the loft. position carefully in the loft. Remove the stud and plastic top tip from the Remove the stud and plastic top tip from the top of the required side stile of the rear ladder frame top of the required side stile of the rear ladder frame and discard. - Page 12 10.3 10.3 Locate the stowing hook/key (G3) over and at Locate the stowing hook/key (E3) over and at the centre of the REAR ladder section bottom rung and the centre of the REAR ladder section bottom rung and steadily pull the ladder outward and downward until steadily pull the ladder outward and downward until both top stops reach and make contact with the hinge both top stops reach and make contact with the hinge...
- Page 13 Consignes de sécurité Please check you have all components listed (tick boxes) Please check you have all components listed (tick boxes) Avant de commencer l’installation et l’utilisation de ce produit, lisez cette notice attentivement et intégralement, soyez particulièrement attentif aux consignes de sécurité (ci-dessous). Cet escalier ne doit jamais être utilisé...
- Page 14 Consignes de sécurité Consignes de sécurité Vérifiez qu’il ne manque aucune pièce (cochez les cases) Vérifiez qu’il ne manque aucune pièce (cochez les cases) Avant de commencer l’installation et l’utilisation de ce produit, lisez cette notice attentivement et Avant de commencer l’installation et l’utilisation de ce produit, lisez cette notice attentivement et intégralement, soyez particulièrement attentif aux consignes de sécurité...
- Page 15 Adapter la trappe Adapter la trappe L’escalier escamotable convient pour une ouverture L’escalier escamotable convient pour une ouverture charnière ne s’ouvre pas vers le bas ou si elle ne comporte charnière ne s’ouvre pas vers le bas ou si elle ne comporte d’accès à...
- Page 16 Fixez la bague de butée (A2) avec la vis (A7). Fixez la bague de butée (A2) avec la vis (A7). Fixez le loquet avec l’écrou M12 (A4) en veillant à ce Fixez le loquet avec l’écrou M12 (A4) en veillant à ce que l’écrou soit suffisamment serré...
- Page 17 Insérez les guides de charnière (B1 et B2) sur les Insérez les guides de charnière (B1 et B2) sur les montants du plan arrière. Les pattes de fixation doivent être montants du plan arrière. Les pattes de fixation doivent être positionnées vers l’extérieur avec les pattes à...
- Page 18 Fixer l’escalier Fixer l’escalier Remarque : L’escalier doit être fixé du même côté de la Remarque : L’escalier doit être fixé du même côté de la trappe que les charnières de la trappe. trappe que les charnières de la trappe. Avec l’escalier centré dans la trémie et la trappe Avec l’escalier centré...
- Page 19 Placez les plaquettes d’assemblage du bras à ressort Placez les plaquettes d’assemblage du bras à ressort de chaque côté de l’extrémité de rotation (F4)/montant de de chaque côté de l’extrémité de rotation (F4)/montant de l’escalier et alignez tous les trous. l’escalier et alignez tous les trous.
- Page 20 10.3 10.3 Placez le crochet de fermeture (G3) sur le centre de Placez le crochet de fermeture (G3) sur le centre de la marche inférieure du plan ARRIÈRE de l’escalier et tirez la marche inférieure du plan ARRIÈRE de l’escalier et tirez sans à-coups l’escalier vers l’extérieur et le bas jusqu’à...
- Page 21 Product contains / Le produit contient Vérifiez qu’il ne manque aucune pièce (cochez les cases) Vérifiez qu’il ne manque aucune pièce (cochez les cases) 37093 PETE OTHER A1 Bouton d'ouverture/fermeture x 1 A1 Bouton d'ouverture/fermeture x 1 A2 Bague de butée ....... x 1 A2 Bague de butée .......
- Page 24 EU Manufacturer: 59637 Wattignies CEDEX www.bricodepot.fr Kingfisher International Products B.V. www.castorama.fr Pour consulter les manuels d’instructions Rapenburgerstraat 175E macallister@castorama.fr en ligne, rendez-vous sur le site 1011 VM Amsterdam www.kingfisher.com/products The Netherlands www.kingfisher.com/products Distributor: B&Q Limited, Chandlers Ford, Hants, SO53 3LE, United Kingdom www.diy.com...
Need help?
Do you have a question about the LL6A and is the answer not in the manual?
Questions and answers