Table of Contents
Advertisement
Available languages
Available languages
Quick Links
Advertisement
Chapters
Table of Contents

Related Manuals for auna multimedia 10007166


Summary of Contents for auna multimedia 10007166
- Page 1 Autoradio 10007166...
-
Page 2: Table Of Contents
Installation und Demontage 6 Anschlüsse und Kabelverbindungen 7 Bluetooth Funktionen 8 RDS Funktionen 8 Fehlersuche und Fehlerbehebung 9 Hinweise zur Entsorgung 9 Konformitätserklärung 9 Technische Daten Artikelnummer 10007166 Radio Frequenzbereich 87.5~108 MHz Mittelfrequenz 10.7 MHz Signal/Rausch-Verhältnis 40 dB Empfindlichkeit (S/N = 30 dB) ≤... - Page 3 • Bohren Sie bei der Installation nur an Stellen, an denen sich keine Kabel und Leitungen befi nden. • Schließen Sie Kabel nicht über oder in der Nähe von heißen Oberfl ächen an. Das gilt besonders für die Kabel, die mit den Maschinenteilen verbunden sind. •...
-
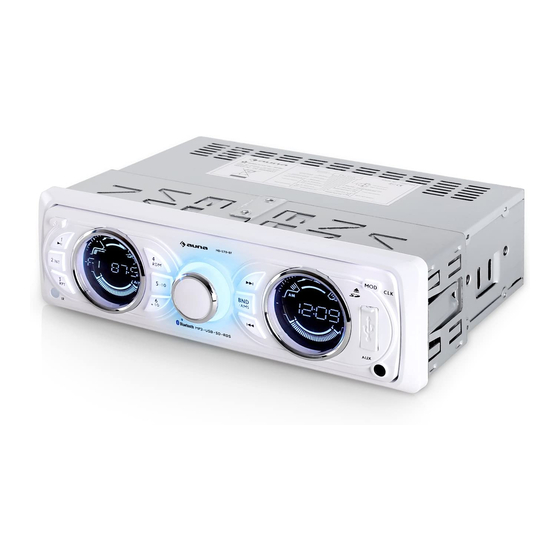
Page 4: Geräteübersicht Und Funktionstasten
Geräteübersicht und Funktionstasten Frontblende 1 Taste zum Lösen der Front- blende 2 Display 3 Power/MODE/Auflegen 4 AUX Eingang 5 USB-Port 6 Titel/Senderauswahl 7 BAND (Frequenzbereich)/ Automatische Sendersiche- rung/Telefonanruf anneh- 8 SEL/Laustärke/Tonauswahl/ RDS Funktionen/Farbige Beleuchtung 9 Bluetooth Mikrofon 10 Numerische Funktionstasten 11 Sensor für die Fernbedie- nung 12 SD/MMC Kartenhalter... -
Page 5: Grundfunktionen Der Tasten
Grundfunktionen der Tasten Tastenbelegung Frontblende: Frontblende entfernen (1): Drücken Sie auf die Taste, um die Fronblende zur sicheren Verwah- rung zu entfernen. Display (2): Zeigt die Radiofrequenz und die aktuelle eingestellten Funktionen an. Power/MODE/Auflegen (3): Drücken Sie auf die Power Taste, um das Radio anzuschalten. Halten Sie die Taste gedrückt, um das Radio wieder auszuschalten. -
Page 6: Installation Und Demontage
Numerische Funktionstasten: : Wenn Sie die automatische Suche nach Radiosendern beendet haben, drücken Sie diese Tas- te, um vorhandene Sender zu hören. Halten Sie die Taste gedrückt, um Sender zu speichern. Falls Sie MP3 abspielen, drücken Sie auf diese Taste um den Titel anzuhalten. Drücken Sie die Taste er- neut, um mit dem Titel fortzufahren. -
Page 7: Anschlüsse Und Kabelverbindungen
Anschlüsse und Kabelverbindungen Anschlussdiagramm Hinweise zum Anschluss • Das Gerät wird mit einem 12 V Netzteil betrieben, das über den Minuspol der Batterie geerdet ist. • Halten Sie genau an die Anschlussdiagramme, um Schäden durch falsche Anschlüsse vorzubeu- gen. • Bevor Sie das Radio anschließen, entfernen Sie 5 mm der Isolationsschicht an beiden Enden des Kabels. -
Page 8: Bluetooth Funktionen
Bluetooth Funktionen Verbindung mit dem Telefon aufbauen Befestigen Sie Ihr Telefon möglichst nah am Gerät. Aktivieren Sie Bluetooth auf Ihrem Telefon. Starten Sie eine Suche nach vorhandenen Geräten und wählen Sie das Autoradio aus. Falls Sie nach einem Passwort gefragt werden, geben Sie „0000“ ein. Rufnummern wählen via Bluetooth Sobald die Geräte miteinander verbunden sind, drücken Sie die MODE Taste, um in den „BTREADY“... -
Page 9: Fehlersuche Und Fehlerbehebung
Fehlersuche und Fehlerbehebung Fehler Mögliche Ursache Lösung Gerät geht nicht an Die Sicherung ist kaputt. Ersetzen Sie die Sicherung durch eine neue Sicherung gleichen Typs. Funktionsstörung Der Prozessor erkennt aus irgendei- Schalten Sie das Gerät aus und nem Grund Fehlfunktionen. warten Sie 1 Minute, bevor Sie es wieder anschalten. -
Page 10: Frequenzbereich
Connections and Wiring 15 Bluetooth Operations 16 RDS Operations 16 Troubleshooting 17 Environment Concerns 17 Declaration of Conformity 17 Technical Data Item number 10007166 FM Radio Frequency scope 87.5~108 MHz Intermediate Frequency 10.7 MHz Signal-to-noise ratio 40 dB Noise-limited sensitivity (S/N = 30 dB) ≤... - Page 11 • Try not to connect wires over or near any hot surface, especially those wires connected to the engine accessories; • It is forbidden to dismantle the power cable of the said product and meanwhile, use such cable to power other products of different model. Over-current is likely to lead to fi re disaster; •...
-
Page 12: Product Description And Controls
Product Description and Controls Front Panel Buttons 1 Front panel detaching button 2 Display 3 Power/Function mode/ hang-up button 4 AUX-in port 5 USB slot 6 Track/station selector 7 Brand switch/Automatic station locking/Answer the phone 8 Volume knob/Tone selector/ RDS function control/8 color illumination 9 Bluetooth mic 10 Numerical (1-6) -
Page 13: Basic Operations
Basic Operations Front Panel Buttons: Front panel detaching button (1) Press to remove the front panel for savekeeping Display (2) Display radio frequency or current operation status. Power button/Function mode/Hang up (3) In turn off station, short press to turn on. In turn on station, press and hold to turn off. -
Page 14: Installation And Dismantling
Numerical function buttons: When completed searching radio stations automatically, press this button to listen to available sta- tions, press and hold the same button to save such stations manually; In the MP3 mode, press this button to pause playback, and press the same button again to resume. 2/INT When completed searching radio stations automatically, press this button to listen to available sta- tions, press and hold the same button to save such stations manually;... -
Page 15: Connections And Wiring
Connections and Wiring Wiring Diagram Cautions • The said product is powered by means of a 12VAC accumulator which is grounded via the negative electrode; • Please connect as per the wiring diagram so as to avoid any device damage; •... -
Page 16: Bluetooth Operations
Bluetooth Operations Pair with cell phone First of all, move a cell phone close enough to the said product and then turn on the Bluetooth device in such cell phone. Search the said product (code: 0000) for match-up. Dial via Bluetooth Once connected, press the Mode button to switch to “BTREADY”... -
Page 17: Troubleshooting
Troubleshooting Trouble Cause Solutions Unable to turn on The fuse is broken. Replace the fuse with a new one having the same specifi cations. Malfunction The processor experiences faulty Shut down and wait for 1 minute situations due to other reasons. before reboot.
Need help?
Do you have a question about the 10007166 and is the answer not in the manual?
Questions and answers