Table of Contents
Advertisement
Precautions........................................................................................................................................2
Product introduction..........................................................................................................................3
Product features ................................................................................................................................3
Performance and Parameters.............................................................................................................4
Application Scope .............................................................................................................................5
Industrial Tests ..........................................................................................................................5
School and Household Education .............................................................................................5
Digital Amateurs .......................................................................................................................6
Recommended configuration ............................................................................................................7
Appearance and Sizes .......................................................................................................................8
Installation.......................................................................................................................................12
Install Drivers..........................................................................................................................12
Install Software .......................................................................................................................14
Connection ......................................................................................................................................15
Operation.........................................................................................................................................16
Interface of Capture ................................................................................................................17
Image Adjustment ...........................................................................................................18
Image Capture .................................................................................................................22
Image Measurement................................................................................................................23
Setup ...............................................................................................................................24
Measurement...................................................................................................................25
Measurement Examples ..................................................................................................27
A List of Shortcut Keys...................................................................................................................29
FAQ.................................................................................................................................................30
Comparison between GE-5 Digital Microscope and Traditional Microscope ................................32
A List of Product Components in Package .....................................................错误!未定义书签。
Contents
1
Advertisement
Table of Contents

Summary of Contents for Aigo GE5
-
Page 1: Table Of Contents
Interface of Capture ...17 Image Adjustment ...18 Image Capture ...22 Image Measurement...23 Setup ...24 Measurement...25 Measurement Examples ...27 A List of Shortcut Keys...29 FAQ...30 Comparison between GE-5 Digital Microscope and Traditional Microscope ...32 A List of Product Components in Package ...错误!未定义书签。 Contents... -
Page 2: Precautions
Precautions 1. Strictly prohibit disassembly Don’t disassemble the device except the knock-down part mentioned in this specification. Otherwise it may reduce the performance of the instrument, lead to electric shock, injury or equipment damaged. 2. Digital Viewer GE-5 need Moisture-proof and anti-foreign body. In order to prevent Failure of Digital Viewer GE-5, don’t plant it in the moist surfaces. -
Page 3: Product Introduction
GE5 has various innovative functions, so it is the optimal upgraded selection for traditional industry microscope, stereomicroscope, biological microscope and image measuring apparatus, and has extensive application field. -
Page 4: Performance And Parameters
White Balance Exposal Control Image Output Power Supply Dynamic Range Programmable Control Illumination Control Working Temperature Magnifications Aigo GE-5 Digital Microscope 1.3 mega pixels 1/2” Colorful CMOS 5.2μm×5.2μm 400nm~1000nm 1Lux Progressive Scanning Electronic Rolling Shutter (ERS) 1280×1024 16f/s@1280×1024 30f/s@640×480 30f/s@320×240... -
Page 5: Application Scope
It can neither get all the information from the entire surface of object nor permits observation at any angle. GE5 digital microscope has large depth of field and permits observation at all angles. It can also inspect the thick object conveniently because of its super long working distance (6cm). -
Page 6: Digital Amateurs
Digital Amateurs Everything in the nature is attractive for us. In our spare time, we could observe the small creatures around us and explore mysteries of the nature with GE5, the best assistant of amateurs in observing the microcosmic world. -
Page 7: Recommended Configuration
Monitor: A resolutio n of 1024*768 or better Operation System: Windows 2000 or Window The recommended configuration is just a reference, a computer with lower configuration ote: may also operate GE-5 digital microscope. Hornet 60X : 64M or more s XP... -
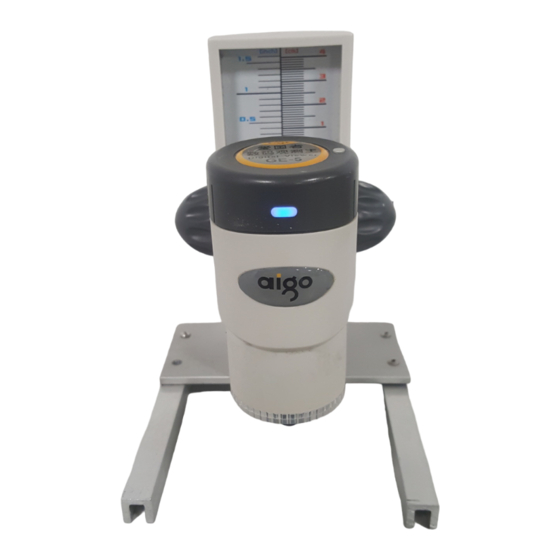
Page 8: Appearance And Sizes
Appearance and Sizes Appearance Sizes (Side) - Page 9 Sizes (Fa cade) Sizes (Top)
- Page 10 E5 with a Side L ight GE5 High Magnification state...
- Page 11 GE5 Lengthened state GE5 Portable state...
-
Page 12: Installation
After reading the agreement, please click “I Agree” to start the installation. Make sure that GE5 has to be connected with the computer when the drivers are installed, or the installation may end in failure. - Page 13 The installation program is in operation, please waiting. The system reminds that the program hasn’t passed the Windows Logo Test (which would not influence the regular operation of software), and please click “Continue”. After the installation is completed, please click “Close”.
-
Page 14: Install Software
Install Software Click “Install Software” to enter the interface of installation, and after reading the agreement, click “I Agree” to start the installation. Choose the items to be installed and click “Next”. Choose an installation route and click “Install” to start the installation process. -
Page 15: Connection
Click “Close” after the installation is finished. After the installation is completed, a shortcut double clicks could lead to the operation of this software. Connection Lay Digital Viewer GE-5 on the table and insert the USB plugs into the USB2.0 interfaces of PC. -
Page 16: Operation
“start” to enter the interface of capture. Click “Demo” to play the promotion videos; click “Image” to demonstrate the real images made with GE5, and click right to exit; and the Help documentation would pop up when “Help” is clicked. -
Page 17: Interface Of Capture
Interface of Capture The interface of capture contains the menu, the toolbar, the video window and the status bar. With this interface, the user could preview the videos of objects observed and adjust image parameters through various windows of features to obtain the satisfying effect. Before the use, the user should firstly adjust the focusing knob to obtain clear images, and then adjust color, exposal and other parameters for observation. -
Page 18: Image Adjustment
Image Adjustment Laser positioning Owing to the high magnification of this instrument, sometimes it is not so easy to find the observation points of the object on the screen, and the user could find them by means of laser positioning. Place the object on the stage and adjust the focus to get a clear image. Click “Laser” among the video light sources frame on the right, and the user would find a clear red poi object, which means the position displayed on the screen. - Page 19 Image overturn Images could be overturned horizontally or vertically when the box of horizontal overturn or that of vertical overturn is ticked. Exposal The exposal volume could be adjusted when the exposal value bar above “Automatic White Balance” is dragged back and forth; and the exposal volume could also be adjusted precisely when the mouse trolley is moved or the keys “←”...
- Page 20 11. Lock up the curr ent image Click “ ” (or the shortcut key “E”) to lock up the current image, which would make it impossible to adjust the image. Click the image again to cancel the lockup. AOI function AOI provides the user with a function of high-speed, regional and consecutive video display in real time.
- Page 21 Displaced Image Image Whose Displacement has been eliminated 13. Dynamic Depth of Field Those thick objects of multiple layers could be observed by means of dynamic depth of field. Click the button “ ” in the Toolbar (or the shortcut key “J”) and the software would start recording the video and timing in the status bar at the right lower corner, then the user could adjust the focusing knob to change the focalizing point of the image among various depths.
-
Page 22: Image Capture
later, the recording could be concluded and the video recorded would be automatically replayed. At last, click the button “ Image Capture Click the item “S etting-〉 setup box of capture would appear in the right side of the interface. Image Capture Three means of capture are available: Capture an image and save it in the disk... -
Page 23: Image Measurement
Set up “Capture Intervals” and “Capture Times Restricted” within the box of timing capture, and then click the button “ automatically capture one image after each “Capture Interval” until the amounts of images captured reach the “Captu re Times Restricted”. If no restriction is made on the capture times, the capture would last. -
Page 24: Setup
Setup Open file Click the item “File-〉Open” in Menu or the button “ “O”) The file types inc lude: Bmp---Bitmap files; Mea---Measurable and editable files; Save file Click the item “File-〉Save” in Menu or the image “ “S”). Return to the video w lick the item “Window-〉Video preview”... -
Page 25: Measurement
Setup of ruler Click the item “Setting-〉 Ruler” in Menu or the button “ of ru ler would appear in the right of the interface. Within the ruler setup box, the user could set up “Ruler”, “Measurement Units”, “Measurement Precision” and “ hether to Conceal Descriptors”. Select “R uler60X”... - Page 26 Draw figures Click the corresponding images a (the shortcut key “L”): Beeline Circle: : Define a circle through its diameter. (the shortcut key “C”): Define a circle through its center and any one point on it. : Define a circle through three points on it. Ellipse: : Define an ellipse through any two vertexes o ellipse.
-
Page 27: Measurement Examples
Characters Click the item “Operation-〉Text” in Menu or the button “ and select an area in the image by clicking to enter characters. Object selection Click the button “ ” in Toolbar, select an object in the image with the left key of mouse and change the color of the object selected to “Selection Status”. - Page 28 After that, the radius of the hole should be measured. Click the button “ in To olbar and define a circle with three points. Define three points with the left key of mouse on the circumference of the hole to be measured in the image, and the software would draw a circle with the three points a nd pr ovide its parameters beside it.
-
Page 29: A List Of Shortcut Keys
A List of Shortcut Keys Interfaces Video Preview Image Measurement Shortcut Keys AOI Function Image measurement interface) High-speed/Low-speed Shift Image measurement interface) Recording Automatic White Balance Lighting Video Feature Parameters Video Sizes Zoom Display Dynamic depth o recording Dynamic depth of field composite withdraw Lock up the Current Image +... -
Page 30: Faq
How to do when it is reminded that “open interface fail” GE5 has not been connected with PC, which makes it im equipment. Please get them connected before running the so How to do in case that no response is made after GE5 is Maybe the program rem... - Page 31 2 Set up the current environment (such as select 50Hz in an indoor environment) within the lighting box of software, and then run the program of automatic white balance. ow to cope with too large files generated by GE5 recording? The reason is that no appropriate compression code has been selected. Since...
-
Page 32: Comparison Between Ge-5 Digital Microscope And Traditional Microscope
Microscope and Traditional Micros GE-5 Digital Microscope of Even if an object has a great depth, Depth GE5, with its superior depth of field, where Field could still make images in which every part of the objects observed could be clearly iden tified.
Need help?
Do you have a question about the GE5 and is the answer not in the manual?
Questions and answers