Table of Contents
Advertisement
Advertisement
Table of Contents

Related Manuals for Black ATB

Summary of Contents for Black ATB
- Page 1 ELECTRIC BIKE MANUAL All Terrain Bike (ATB)
-
Page 2: Table Of Contents
CONTENTS 1. Attention 2. Check before use 3. Bike Parts 4. Adjustments 4.1 Adjusting the Handlebar Position 4.2 Adjusting the Saddle Position 4.3 Adjusting the Wheels 4.4 Adjusting and Maintaining the Brakes 4.5 Adjusting the Derailleur 5. How to use the Bike Display 5.1 Bike Display &... -
Page 3: Attention
1. Attention Illustrations in this manual are for demonstration purposes only and may not reflect the exact appearance of the actual product. Specifications are subject to change. Do not operate the electric bike without fully reading and understanding this manual. Before each ride, ensure that all parts are in good working order. -
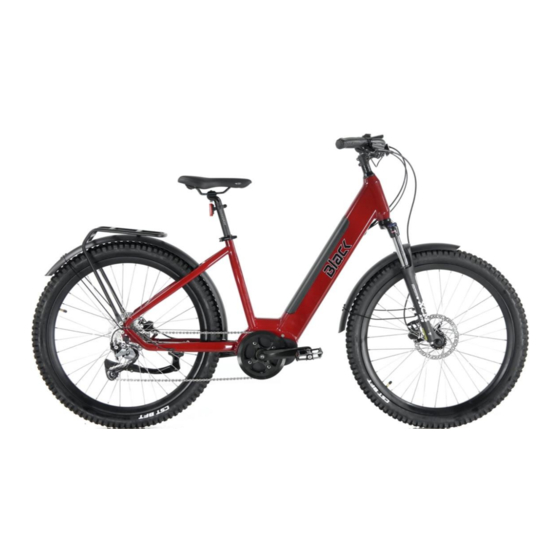
Page 4: Bike Parts
3. Bike Parts Handlebar Saddle Handlebar Stem Frame Seat Post Quick Release Seat Post Front Disc Brake Battery Rear Disc Brake 9 Speed Freewheel Pedal Crankset Rear Derailleur Display Handlebar Grips Brake levers... -
Page 5: Adjustments
4. Adjustments 4.1 Adjusting the Handlebar Position a) Place the handlebar onto the handlebar stem, place the cover on and fix the 4 b) To align the handlebar, face your bike and hold the front wheel between your legs. screws with an Allen Key, torque should not be less than 5Nm. Turn the handlebar so it is perpendicular to the front wheel. -
Page 6: Adjusting The Saddle Position
4.2 Adjusting the Saddle Position a) To ensure comfort and safe handling, adjust the saddle to suit your body size. The b) The saddle can be also be inclined and adjusted forwards and rearwards for best saddle height is correct if when seated your leg is not quite fully extended at the fit. -
Page 7: Adjusting The Wheels
4.3 Adjusting the Wheels The quick-release skewers consists of two handling components (see diagram on right): 1) The closing lever located on one end of the hub exerts a clamping force through a cam. 2) The pre-tension of the axle is adjusted with the clamping nut located on the opposite side of the hub. For the correct use of the quick-release skewer, follow these steps: To open, move the lever towards the ‘Closed’... -
Page 8: Adjusting The Derailleur
Make sure the rotors are true. Spin the wheel and sight against the brake pads, watching for wobbles in the rotor. If the rotor clears the pads and caliper, the rotor is true enough even if there are slight wobbles. If you spot a warp in the rotor, straighten it by clamping a clean adjustable wrench along the rotor and bending gently toward true. Make sure everything that touches the rotor is perfectly clean. -
Page 9: How To Use The Bike Display
5. How to use the Bike Display 5.1 Bike Display & Thumb Control at a Glance speed mode Increase speed display assistance Thumb control Battery level indicator brake prompt Headlight indication Power on/off Troubleshooting tips Decrease assistance Assistance level Odometer & trip information 5.2 Turning the Bike On/Off and illuminating the display Push and hold the Power on/off button on the thumb control for 2 seconds to switch the bike on or off. -
Page 10: Odometer & Trip Information
therefore reduce the distance you can travel (range) before running out of battery power. To increase the range select a lower gear and lower assist level, to reduce the amount of battery power being used. You can use your bike in any combination of assistance and gear selection. It is recommended you start with a low level of assist to get used to the effect of the motor until you become confident in its use. -
Page 11: Walk Mode
5.5 Walk Mode Stand at the side of bike with both hands on the handlebar and make sure the way in front of you is clear. Press and hold the ‘-‘button on the thumb controller to start walk assist status. Walk assist will start after 2-3 seconds of pressing the ‘-‘... -
Page 12: Battery
36E - Motor hall sensor error. Contact your dealer. 33E - Inner protection of controller error. Check whether the plug between the motor and the controller is loose or damaged, and whether any connector pins are bent. Contact your dealer. 37E - Brake error: Check the connection of the brake handle switch plug and whether any connector pins are bent. -
Page 13: Charger Precautions
Protect the bike from water and moisture. Protect the discharge and charge terminals of the battery from rain or water logging. Keep the battery away from children. Never disassemble the bike or its battery. If the battery shows any signs of damage, DO NOT charge it or use it in the bike and return it to your dealer asap for assessment. If you have any questions about the bike’s battery or its usage, contact your dealer. -
Page 14: Bicycle Inspection And Care
Check whether the battery plug is properly installed, and whether the positive and negative electrodes are installed correctly. If no fault is found, take the bike to your dealer to check if the display and/or controller and/or harness are faulty. 8. - Page 15 Where possible, we recommend using non-petroleum based environmentally friendly cleaners and lubricants; ask your dealer for advice. Component to lubricate Frequency* Recommended Lubricant Front fork attachment Once a year Lightly Coat (lithium base grease) Front and back axles Once a year Lightly Coat (lithium base grease) Middle axle Once a year...
Need help?
Do you have a question about the ATB and is the answer not in the manual?
Questions and answers