Advertisement
Quick Links
H H
UTTO
UTTO
garden and landscaping products
List of parts in fixings pack
20 x M8 95 Bolts
16 x M8 60 Bolts
28 x M8 25 Caps
2 x Allen Keys
When assembling, loosely
bolt together until fully
assembled then tighten all
the bolts.
During the treatment process, some
grain may be raised - you can
enhance your table by a little fine
sanding of the edges.
N N
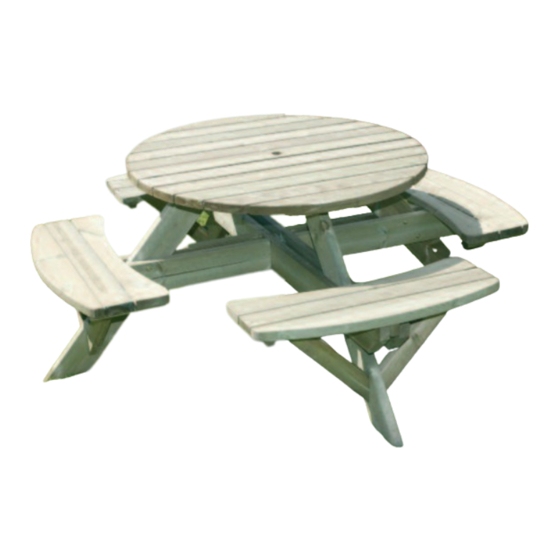
Assembly Instructions
WYC – Circular Picnic Table
1. Please allow enough time and be patient when assembling
your table.
2. Sort out all components as sketch before you start.
3. Place the table top upside down on a flat surface, taking care
to protect the top from scratching.
4. Take each leg in turn and assemble to top as shown on sketch,
push caps into the leg, passing bolt through block and screw
into leg. Do not tighten completely at this stage.
5. Repeat for all four legs.
6. Take the two cross rails (Type A) and fit to legs as shown in
sketch.
7. Repeat for other two cross rails (Type B). Pass bolts through
cross rails and legs into cap in outside of cross rail. Do not
tighten completely at this stage. Note: Small rebates face
inwards to support parasol.
8. Slot seats, face down, between cross rails and pass long bolts
through rails and seat battens and screw into rail caps. Do
not fully tighten at this stage.
9. Repeat for all four seats.
10. Select two braces and position as sketch. Pass a 60mm bolt
through brace and screw into insert on seat.
continued overleaf
Advertisement

Summary of Contents for HUTTON WYC
- Page 1 UTTO UTTO Assembly Instructions WYC – Circular Picnic Table garden and landscaping products List of parts in fixings pack 20 x M8 95 Bolts 16 x M8 60 Bolts 28 x M8 25 Caps 2 x Allen Keys 1. Please allow enough time and be patient when assembling When assembling, loosely your table.
- Page 2 12. Repeat for other three seats. 13. With all components now assembled, go round and fully tighten all 36 bolts with Allen keys provided. Hutton Garden and Landscaping Products Church Lane, Northwood Green, Westbury-0n-Severn, Gloucestershire GL14 1ND www.svw2000.co.uk/hutton Tel: 01452 762089 Fax: 01452 760993 sales@hutton-ltd.co.uk...
Need help?
Do you have a question about the WYC and is the answer not in the manual?
Questions and answers