
Subscribe to Our Youtube Channel
Related Manuals for GESTRA UNA 45 MAX


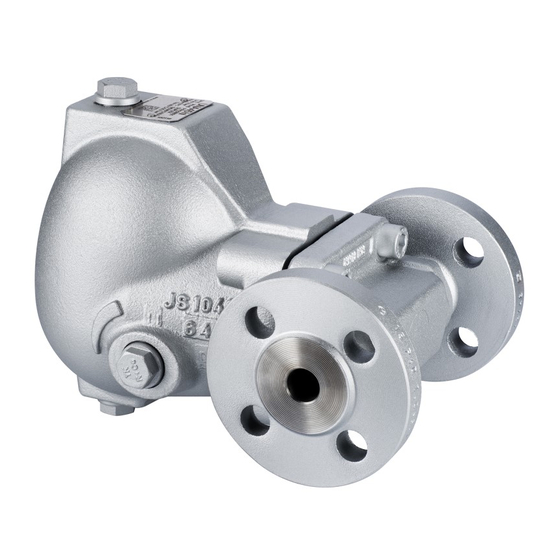
Summary of Contents for GESTRA UNA 45 MAX
- Page 1 Ball Float Steam Trap UNA 45 MAX UNA 46 MAX UNA 46A MAX Original Installation Instructions 819401-02...
-
Page 2: Table Of Contents
Contents Foreword ............................3 Availability ............................. 3 Formatting features in the document ...................... 3 Safety ..............................3 Use for the intended purpose ......................... 3 Basic safety notes ..........................4 Information on property damage or malfunctions ..................4 Qualification of personnel ........................4 Protective gear ............................ -
Page 3: Foreword
UNA 46A MAX operating manual helps avoiding danger and increases the reliability and service life of the Equipment type UNA 45 MAX can also be used for equipment. Please note that in addition to the removing condensate from compressed air instructions given in this installation &... -
Page 4: Basic Safety Notes
Basic safety notes temperature ratings see name plate and the Technical Data section " ". Risk of severe injuries Risk of minor injuries The equipment is under pressure during operation and may be hot. Before carrying out Sharp edges on internals present the danger of any work on the equipment make sure that the cuts to hands. -
Page 5: Protective Gear
Protective gear Typographic features of warning notes The operator must ensure that anyone working on the equipment must wear the required protective clothing and safety gear stipulated for the site of DANGER installation. The protective clothing must be suitable for the used media and must protect the wearer Notes with the heading DANGER warn against safety and health hazards associated with a against imminent dangerous situations that... -
Page 6: Description
Description Scope of supply and equipment specification Scope of supply Our equipment is delivered packed and ready for assembly. Equipment specification Item Designation Item Designation Direction of flow arrow Control unit Body Name plate Body gasket Cover (shown here: standard cover) Capsule support with membrane Drain with sealing plug regulator capsule... - Page 7 Optional extras The following items are available as optional extra: Item Designation Item Designation Sealing plug Gasket Hand-vent valve with socket spanner Float-lifting lever with socket spanner (socket spanner not shown) Adaptor with control unit SIMPLEX The vent hole in the cover for the hand- Cover with connections for electrodes vent valve can also be used for NRG 16-19 or NRG 16-27...
- Page 8 The different equipment versions allow you to adjust End connections the flow direction of the equipment to the flow The equipment is available with the following end pattern of your installation. The flow arrow must connections: correspond to the direction of the fluid flow. The ...
- Page 9 Pressure Equipment Directive The equipment conforms to this directive (see "Manufacturer's Declaration" section) and can be used for the following media: UNA 45 MAX Fluids of group 2 UNA 46 MAX and UNA 46A MAX Fluids of group 1 ...
-
Page 10: Task And Function
Task and function Purpose UNA 45 MAX, UNA 46 MAX and UNA 46A MAX are items of equipment for the steam process designed for the effective removal of condensate from steam. Equipment type UNA 45 MAX can also be used for removing condensate from compressed air systems. -
Page 11: Storing And Transporting The Equipment
Transporting the equipment Storing and transporting the equipment CAUTION Attention! Do not drop the equipment. If it falls down it may cause bruises and injuries. Equipment can be damaged if stored or transported improperly. To transport and mount the equipment safely use suitable lifting gear. -
Page 12: Mounting And Connecting The Equipment
Mounting and connecting the DANGER equipment Personnel working on pipes are exposed to Preparing installation safety risks and may suffer severe injuries, poisoning or even loss of life. Take the equipment out of the transport packaging. Make sure that no hot or hazardous fluid is in the equipment or the pipes. -
Page 13: Orientation Of The Equipment
Orientation of the equipment Remove the adapter gasket (22). For the disposal of the adapter gasket observe The different equipment versions allow you to adjust the pertinent on-site regulations concerning the flow direction of the equipment to the flow waste disposal. -
Page 14: Connecting The Equipment
Replace all gaskets with new ones of the same Specialist personnel must be highly qualified and type. fully experienced in making pipe connections for the respective type of end connection. Turn the adapter (5) by 90° or 180° into the desired position of installation. - Page 15 If necessary, connect the air balance pipe to the Some applications require that the equipment as shown in the following drawing. equipment is fitted with an air-balance pipe: Equipment with control unit SIMPLEX MAX, float traps for compressed air line drainage and equipment installed in plants where condensate is lifted upstream of the equipment.
- Page 16 Mounting the measuring electrode Tighten the measuring electrode with a torque of 75 Nm. If the equipment has a cover with electrode connections you can attach one or two measuring Connect the body to the pipework as described electrodes of the following type: in the previous section.
-
Page 17: Operation
To close the orifice turn the socket spanner Operation from the end of the arrow towards the tip of the arrow. WARNING Hot liquids and steam can cause scalding. After operation Wear protective clothing that is suitable for the fluid and, if necessary, DANGER wear protective gear. -
Page 18: Removing External Dirt Deposits
For more information on suitable protective clothing and safety gear refer to the safety data sheet of the fluid in question. DANGER If the equipment is used in contaminated areas there is a risk of severe injuries or death caused by harmful substances in or on the equipment. -
Page 19: Maintaining The Equipment
Maintaining the equipment The following drawings show equipment type UNA 45 MAX with standard cover. For work on the equipment you will need the following tools: Removing cover Combination spanner form B to DIN 3113, sizes Remove the measuring electrode(s) if ... - Page 20 Removing control unit Cleaning the equipment Detach the cover from the body as described on Check the equipment at regular intervals for page 19. contamination. The intervals depend on the amount of dirt in the system. The operator must determine ...
- Page 21 Cleaning and checking the membrane regulator capsule To clean the membrane regulator capsule of equipment with a DUPLEX control unit proceed as follows: Detach the cover from the body as described on page 19. Remove the control unit as described on page 20.
- Page 22 Fitting control unit in place Attention! Malfunctions may occur if the control unit is installed incorrectly. When installing the equipment make sure that the name plate points upwards and the float arm is free to move up and down. ...
- Page 23 Mounting cover Refit the cover (8) onto the body such that the name plate (7) points upwards. Attention! Tighten the hexagon-head cap screws with a torque of 140 Nm. Equipment may leak if the gasket is damaged. It is therefore essential that you always insert a new gasket before re- attaching the cover.
-
Page 24: Servicing The Equipment And Installing Spare Parts
Servicing the equipment and installing spare parts You may exchange the following component parts in case of wear or damage: UNA 45 MAX, UNA 46 MAX and UNA 46A MAX with standard cover... - Page 25 Spare parts for equipment with standard cover Item no. Designation Orifice Stock code # 3, 6, 22, 26 Control unit, cpl. with body gasket, adapter gasket and 560690 gasket for control unit 560691 560692 560693 560694 3, 29 Membrane regulator capsule 5N2, cpl. with body gasket 560687 12, 14, 30 Hand-vent valve, cpl.
- Page 26 UNA 45 MAX with cover for installing electrodes...
- Page 27 Spare parts for equipment with cover for installing electrodes Item no. Designation Orifice Stock code # 3, 6, 22, 26 Control unit, cpl. with body gasket, adapter gasket and 560690 gasket for control unit 560691 560692 560693 560694 3, 29 Membrane regulator capsule 5N2, cpl.
- Page 28 UNA 45 MAX with sightglass cover...
- Page 29 Spare parts for equipment with sightglass cover Item no. Designation Orifice Stock code # 3, 6, 22, 26 Control unit, cpl. with body gasket, adapter gasket and 560690 gasket for control unit 560691 560692 3, 29 Membrane regulator capsule 5N2, cpl. with body gasket 560687 12, 14, 30 Hand-vent valve, cpl.
- Page 30 Exchanging the control unit Replacing the sightglass of the sightglass cover Detach the cover from the body as described on page 19. Remove the socket-head cap screws (36). Remove the control unit as described on Detach the flange (32) from the sightglass cover page 20.
- Page 31 Tighten the socket-head cap screws alternately Attention! and in several steps with a torque of 12 Nm. The packing rings may get damaged. Exchanging the float-lifting lever To replace a damaged float-lifting lever proceed as Make sure you do not damage the follows: packing rings during installation and removal.
-
Page 32: Troubleshooting
Troubleshooting Problem Cause Remedy The sightglass or water level The sightglass or water level Replace the sightglass or water level gauge does not offer an gauge is dirty, worn or scratched. gauge. unambiguous evaluation of the operating condition. The equipment is blowing off The external bypass is open. - Page 33 Problem Cause Remedy The discharge capacity is too The differential pressure is too Increase the steam pressure. low. small. Lower the pressure in the condensate Insufficient thermal output of line. the user. Use equipment with a larger discharge capacity. If necessary, use a pump steam trap or a condensate return unit.
-
Page 34: Retighten The Stuffing-Box Packing
Problem Cause Remedy Fluid escapes (equipment is The equipment has been Replace the equipment with a new one. leaking). damaged by frost. When shutting down the installation make sure that all lines and the equipment are completely drained. If faults occur that are not listed above or cannot be corrected, please contact our Technical Service or authorized agency in your country. -
Page 35: Putting The Equipment Out Of Operation
Putting the equipment out of Caution operation Environmental damage may be caused by Removing harmful substances poisonous fluid residues. Before disposing of the equipment DANGER make sure that it is clean and free of fluid residues. If the equipment is used in contaminated ... -
Page 36: Re-Using Equipment After Storage
CAUTION Risk of injuries if the equipment falls down. When removing the equipment make sure the it is safely held in place and cannot fall down. Suitable measures are for instance: Equipment that is not too heavy may be supported by a second person. -
Page 37: Disposing Of The Equipment
For the disposal of all materials observe the pertinent legal regulations concerning waste disposal. The equipment is made from the following materials: Component part Type ASTM Body UNA 45 MAX, 1.0460 A105 UNA 46 MAX UNA 46A MAX 1.4404 A182-F316L Cover UNA 45 MAX, 5.3103... -
Page 38: Technical Data
Technical data Dimensions and weights The drawing shows equipment with standard cover and flanged connection for vertical downward flow. - Page 39 Equipment with flanges EN 1092-1 PN 10–40 Type of cover DN 40 DN 50 DN 65 (1½”) (2”) (2½”) L [mm (in)] 230 (9.1) 290 (11.4) B [mm (in)] Standard cover 328 (12.9) Sightglass cover 370 (14.6) Cover for 343 (13.5) mounting electrodes H1 [mm (in)]...
- Page 40 Equipment with flange ASME CL 150 Type of cover DN 40 DN 50 DN 65 (1½”) (2”) (2½”) L [mm (in)] 241 (9.5) 267 (10.5) 292 (11.5) B [mm (in)] Standard cover 328 (12.9) Sightglass cover 370 (14.6) Cover for 343 (13.5) mounting electrodes...
- Page 41 Equipment with flange ASME CL 300 Type of cover DN 40 DN 50 DN 65 (1½”) (2”) (2½”) L [mm (in)] 241 (9.5) 267 (10.5) 292 (11.5) B [mm (in)] Standard cover 328 (12.9) Cover for 343 (13.5) mounting electrodes H1 [mm (in)] 98 (3.9) H2 [mm (in)]...
- Page 42 Equipment with socket-weld ends Type of cover DN 40 DN 50 DN 65 (1½”) (2”) (2½”) L [mm (in)] 165 (6.5) 267 (10.5) 292 (11.5) B [mm (in)] Standard cover 328 (12.9) Sightglass cover 370 (14.6) Cover for 343 (13.5) mounting electrodes H1 [mm (in)]...
- Page 43 Equipment with screwed socket Type of cover DN 40 DN 50 (1½”) (2”) L [mm (in)] 165 (6.5) B [mm (in)] Standard cover 328 (12.9) Sightglass cover 370 (14.6) Cover for 343 (13.5) mounting electrodes H1 [mm (in)] 98 (3.9) H2 [mm (in)] 182 (7.2) H [mm (in)]...
- Page 44 Equipment with butt-weld end via transition pieces Type of cover DN 40 DN 50 DN 65 (1½”) (2”) (2½”) L [mm (in)] 241 (9.5) 267 (10.5) 292 (11.5) B [mm (in)] Standard cover 328 (12.9) Sightglass cover 370 (14.6) Cover for 343 (13.5) mounting electrodes...
- Page 45 Space required for servicing To remove the cover a withdrawal space S of 270 mm is required. If the supplied socket spanner is attached to the equipment an additional clearance of 100 mm is required.
-
Page 46: Pressure & Temperature Ratings
All equipment specific values are indicated on the nameplate. Limiting conditions for UNA 45 MAX with sightglass cover, flange PN 16, screwed sockets G Pressure [barg] 16.0 14.8 14.0... - Page 47 Limiting conditions for UNA 45 MAX and UNA 46 MAX: Flange PN 40, screwed sockets G Pressure [barg] 37.1 33.3 27.6 25.7 13.1 Temperature [°C] -10/20 Max. admissible differential pressure [barg] 4, 8, 13, 22, 32 ∆PMX [psi] 58, 116, 188, 320, 465...
- Page 48 Limiting conditions for UNA 45 MAX and UNA 46 MAX: Flange Class 300, screwed sockets NPT, socket-weld end, butt-weld end Pressure [barg] 51.1 46.6 43.8 39.8 37.8 28.8 Temperature [°C] -29/20 Max. admissible differential pressure [barg] 4, 8, 13, 22, 32 ∆PMX...
- Page 49 Limiting conditions for UNA 46A MAX, flange Class 150 Pressure [barg] 15.9 13.3 11.2 10.0 Temperature [°C] -29/20 Max. admissible differential [barg] 4, 8, 13, (15,9 bar with orifice 22, 32) pressure ∆PMX [psi] 58, 116, 188, (230 psi with orifice 22, 32) Admissible service Control unit DUPLEX: Saturated steam temperature plus 5 K temperature...
- Page 50 Operating data Equipment with sightglass cover: PN16: max. service temperature 240 °C at 12.3 bar service pressure Class 150: max. service temperature 240 °C at 12.4 bar service pressure. If the pH value is above 9.0 and the fluid temperature exceeds 200 °C the glass will wear down faster.
-
Page 51: Manufacturer's Declaration
Assessment according to European rules refer to our Declaration of Conformity or our Declaration by Manufacturer. To download the current Declaration of Conformity or Declaration by Manufacturer go to www.gestra.com/documents or contact: GESTRA AG Münchener Straße 77 28215 Bremen Germany... - Page 52 Agencies all over the world: www.gestra.de GESTRA AG Münchener Straße 77 28215 Bremen Germany Telefon +49 421 3503-0 Telefax +49 421 3503-393 E-Mail info@de.gestra.com www.gestra.de 819401-02/07-2016 kx_mp (808916-02) © GESTRA AG Bremen Printed in Germany...
Need help?
Do you have a question about the UNA 45 MAX and is the answer not in the manual?
Questions and answers