Table of Contents
Advertisement
Available languages
Available languages
Quick Links
Advertisement
Table of Contents

Related Manuals for RIDGID WD4070


Summary of Contents for RIDGID WD4070
- Page 1 ASSEMBLY Assemblage Montaje...
-
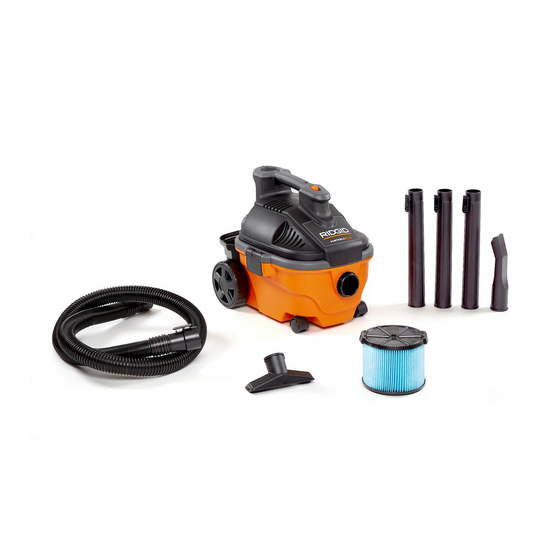
Page 2: Checking Carton Contents
Wet/Dry Vac. Checking Carton Contents Remove contents of carton.Check each item against the Carton Contents List. Contact 1-800-4-RIDGID (1-800-474-3443) from the US and Canada, 01-800-701-9811 from Mexico or www.ridgidvacs.com if any parts are damaged or missing. Carton Contents List Description 4-Gallon Wet/Dry Vac ....1... -
Page 3: Filter Removal And Installation
Filter Removal and Installation WARNING: For your own safety, Flexible Locking Tab never connect plug to power source Power outlet until all assembly steps are Head complete and you have read and understood the safety and operation instructions. Do not operate Vac with any parts damaged or missing. - Page 4 Filter Removal and Installation (con’t.) Removal and Installation Integrated Filter PUSH When Using the Qwik Lock™ DOWN Plate with Center Stud Hole PULL Filter Removal: 1. Hold the filter tabs of the Qwik Lock™ Rubber Filter Gasket at filter in each hand. Tabs (2) Bottom of 2.
-
Page 5: Comprobación Del Contenido De La Caja De Cartón
Saque todo el contenido de la caja de cartón. Asegúrese de que no falte ningún artículo utili- zando la lista del contenido de la caja. Llame al 1-800-4-RIDGID (1-800-474-3443) desde los EE.UU. y Canadá, y al 01-800-701-9811 desde México, o envíenos un correo electrónico a www.ridgidvacs.com si cualquier pieza está... -
Page 6: Remoción E Instalación Del Filtro
Remoción e instalación del filtro ADVERTENCIA: Para su propia seguridad, nunca conecte el enchufe a un tomacorriente Lengüeta de fijación flexible Flexible Locking Tab Cabezal hasta que se hayan completado todos los Power del motor pasos de ensamblaje y usted haya leído y Head entendido las instrucciones de seguridad y de funcionamiento. - Page 7 Remoción e instalación del filtro (continuación) Remoción e instalación cuando se EMPUJE Placa de filtro Integrated Filter PUSH HACIA utiliza el vástago Qwik Lock™ integrada con agujero DOWN Plate with Center ABAJO JALE central Hole Remoción del filtro: HACIA PULL ARRIBA 1.
-
Page 8: Inspection Du Contenu Du Carton
Retirez tous les éléments se trouvant dans la boîte en carton. Inspectez chaque élément en le comparant à la liste incluse dans la boîte en carton. Téléphonez au 1-800-4-RIDGID (1-800-474-3443) depuis les États-Unis et le Canada, 01-800-701-9811 depuis le Mexique, ou contactez-nous au www.ridgidvacs.com si de quelconques éléments sont absents ou... -
Page 9: Retrait Et Installation Du Filtre
Retrait et installation du filtre AVERTISSEMENT : pour votre propre sécurité, ne branchez jamais la fiche dans une Flexible Locking Tab Languette de fixation flexible prise de courant avant que toutes les étapes Power Ensemble d’assemblage ne soient terminées et que vous Head moteur ayez lu et compris les instructions relatives à... - Page 10 Retrait et installation du filtre (suite) Retrait et installation en cas Plaque de filtre Integrated Filter PUSH d’utilisation du goujon Qwik Lock™ intégrée avec trou DOWN APPUYER Plate with Center TIREZ central VERS Hole Retrait du filtre : PULL LE HAUT 1.
Need help?
Do you have a question about the WD4070 and is the answer not in the manual?
Questions and answers