Advertisement
Installation Instructions
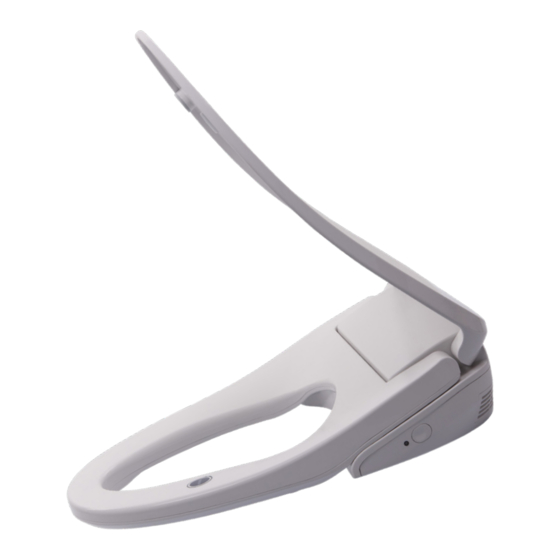
For easy installation of your Soft Spa 9500 by Fluidmaster, you will need to:
READ ALL instructions completely prior to installation and use.
READ ALL warnings, care and maintenance information.
Ensure you have all the components and tools needed for installation.
SAVE THESE INSTRUCTIONS
Advertisement

Subscribe to Our Youtube Channel
Related Manuals for Fluidmaster soft spa 9500


Summary of Contents for Fluidmaster soft spa 9500
- Page 1 Installation Instructions For easy installation of your Soft Spa 9500 by Fluidmaster, you will need to: READ ALL instructions completely prior to installation and use. READ ALL warnings, care and maintenance information. Ensure you have all the components and tools needed for installation.
-
Page 2: Table Of Contents
Contents: Safety Information ................... P. 03 Included Components & Additional Tools Required P. 08 ........Pre-Installation ....................P. 10 Installation P. 11 ....................... Bidet Function Test ..................P. 18 Remote Control Functions P. 20 ................Remote Control Technical Specifications ............P. -
Page 3: Safety Information
13. Only those who have fully read and understand the instructions, warnings, care and maintenance information should install this product. 14. Only authorized persons can repair the unit. Do not attempt to service this appliance by yourself. Call Fluidmaster Technical Service for guidance on product repair 800-631-2011. - Page 4 IMPORTANT SAFETY INFORMATION SAVE THESE INSTRUCTIONS. WARNING: PRECAUTIONS BEFORE USE. In order to avoid personal injury and property damage to users and other people, please read the following safety precautions carefully and strictly observe them. After reading, save these instructions. PROHIBITED •...
- Page 5 • Water supply should have a water pressure of 10 psi to 107 psi. • Unplug when beeping or emitting a strange odor and call Fluidmaster Technical Services. • Unplug while there is thunder or lightening.
- Page 6 Suppliers Name: Fluidmaster Inc. Suppliers Address (USA): 30800 Rancho Viejo Rd, San Juan Capistrano, CA 92675 Suppliers Website and Phone Number: www.Fluidmaster.com | 949-728-2000 FCC Warning statements in User Manual This device complies with Part 15 of the FCC Rules. Operation is subject to the following two conditions: (1) this device may not cause harmful interference, and (2) this device must accept any interference received, including interference that may cause undesired operation.
- Page 7 CAUTIONS BEFORE INSTALLATION This product is for use on a normal 120 V circuit and has a grounding plug that looks like the plug illustrated in sketch (A) in Figure 1. A temporary adapter, which looks like the adapter illustrated in sketches (B) and (C), may be used to connect this plug to a 2-pole receptacle as shown in sketch (B) if a properly grounded outlet is not available.
- Page 8 What’s In The Box: A. 1x - Soft Spa 9500 B. 1x - Remote w/ holder 2x - ¾" screws with anchors 2x - AAA Batteries C. 2x - Double bump grommets 2x - Sliding rails 2x - 2 ½" stainless steel mounting screws 2x - 2 ½"...
- Page 9 A:Rear edge of area A is not allowed A:Rear edge of area A is not allowed A:Rear edge of area A is not allowed to touch the tank; to touch the tank; to touch the tank; B:Area B must cover the edge of the B:Area B must cover the edge of the B:Area B must cover the edge of the ceramic (Ceramic is invisible)
- Page 10 Prep! Before Installing: 1. Turn off your water supply shut-off valve and drain the tank by flushing the toilet. 2. Place a towel on the floor, under the supply line connector. 3. Remove the old supply line connector. 4. Remove your existing toilet seat. 5.
- Page 11 Step 1: Install Mounting Plate Dunk grommets (C), with screws, in a cup of water before inserting them for easier installation. Insert skinny side of double bump grommets (C) with screws into the seat holes and pull from the bottom while applying pressure to the top.
- Page 12 Step 2: Bidet Alignment Place template (D) onto the bowl, fitting snuggly against the bottom edge of the mounting plate. Slide mounting plate forward or backward until the front edge of the template lines up with the front edge of the toilet rim.
- Page 13 Step 3: Attaching the Bidet Remove template and place the bidet (A) onto the bowl, aligning the channel under the bidet base with the mounting plate. Proper alignment is easiest to see while at eye-level with the mounting plate. Channel With the lid and the seat in the up position, slide the base of the bidet back onto the mounting plate until you hear a “click.”...
- Page 14 Step 4: 16" Supply Line Connection Remove the bidet using the quick-release button on the right side of the base. NOTICE Pull ONLY from the base. DO NOT pull the seat or lid, as this could damage the unit. Locate the external valve on the left side of the bidet.
- Page 15 Step 4: 16" Supply Line Connection (cont). Attach the middle opening of the T-valve (E) to the opposite end of the 16" supply line connector that you just secured to the bidet until hand tight. Place the rubber washer into the T-valve, making sure that it is flush to the opening.
- Page 16 Step 5: 20" Supply Line Connection Align threads of the plastic nut on the 20" connector (G) onto the bottom opening of the T-valve using only your hands. NOTICE DO NOT OVERTIGHTEN. DO NOT USE TOOLS ON PLASTIC NUT. Overtightening and/or the use of tools could cause damage and lead to failure of the nut.
- Page 17 Step 6: Finishing Touches Metal-to- Using a wrench, tighten all metal-to-metal connections ½ turn Metal past hand tight. NOTICE DO NOT OVERTIGHTEN. DO NOT USE TOOLS ON PLASTIC NUT OR PLASTIC FILL VALVE. Metal-to- Overtightening and/or the use of tools could cause damage and Metal lead to failure of the nut and/or fill valve.
-
Page 18: Bidet Function Test
Read carefully the following information on the seat temperature level indicator light, water temperature level indicator light and alarm functions. If any of these issue occur, please immediately cut off the power supply, and contact Fluidmaster Technical Services (800-631-2011) for further assistance. - Page 19 Congrats, You’re Finished! Welcome to the Peachy Clean Life! Happy Bum. Happy Life. YOU DID IT! We knew you could! Share your success story with friends and family! #HappyBum #PeachyCleanLife #Fluidmaster • See troubleshooting on Page 27 if needed.
-
Page 20: Remote Control Functions
Remote Control Functions: AUTOMATIC WORKING MODE/ STOP REAR/OSCILLATE FRONT/OSCILLATE Your Soft Spa 9500 will keep the last used settings until manually changed. GENTLE DEODORIZER NIGHT-LIGHT POSITION WATER PRESSURE INDICATION LIGHTS SEAT TEMPERATURE WATER TEMPERATURE DRY TEMPERATURE... - Page 21 Remote Control Functions: AUTOMATIC WORKING MODE/STOP • Same function as “AUTO/STOP” button on bidet base. • Press once to start automatic cleaning. Press once during any cleaning cycle to stop cleaning and retract the wand. • 15 seconds of rear cleaning at fixed position > 60 seconds of oscillate cleaning > 30 seconds of rear cleaning at fixed position >...
- Page 22 Remote Control Functions: WATER PRESSURE • Press to adjust the water pressure between five different levels while in the rear or front cleaning modes until you reach your desired water pressure. INDICATION LIGHTS • Indication lights will display the temperature of the seat, dryer and water. SEAT TEMPERATURE / ECO •...
- Page 23 Additional Remote Functions: REMOTE CONTROL PARING 1. With your Soft Spa 9500 unplugged, press and hold the AUTO/STOP button on the remote until the indicating light displays as: 2. Plug in and turn on your Soft Spa 9500. 3. All five lights will illuminate, letting you know pairing is complete: OVERHEATING PROTECTION Seat temperature will automatically reduce after 3 minutes to prevent overheating.
-
Page 24: Remote Control Technical Specifications
REMOTE CONTROL TECHNICAL SPECIFICATIONS: Mode Function Setting Power Power • Rear Wash/Oscillate Rated Voltage 120V • Front Wash/Oscillate Rated Frequency 60Hz • Gentle Rated Power 1250W Wash Water Pressure 5 Lever Setting Water Supply Pressure 0.07MPa ~ 0.86MPa Adjustment Water Temperature 5 Level Setting + Normal 0°C ~ 40°C Ambient Temperature... - Page 25 Remote Control Mount Installation: Option 1: Using Adhesive Strip 1. Wipe wall with rubbing alcohol. Do not use water or household cleaners. 2. Remove the liner from the adhesive strip on the back of the remote mount and press firmly to the Do not use on freshly desired position on the wall.
-
Page 26: Electrical Protection Test
When Left Unused: • If your Soft Spa 9500 goes unused for more than 72 hours, it will start self-cleaning to ensure clean water upon next use. • If your Soft Spa 9500 goes unused for more than 30 days, we recommend you run the Nozzle Cleaning function on page 11. -
Page 27: Troubleshooting
Read carefully the following information on the seat temperature level indicator light, water temperature level indicator light and alarm functions. If any of these issue occur, please immediately cut off the power supply, and contact Fluidmaster Technical Services (800-631-2011) for further assistance. - Page 28 Seat temperature sensor fault. Fluidmaster Tech Services. times in a row. The leakage protection The leakage exceeds the normal Unplug and stop using your unit. Contact Fluidmaster switch on the power plug has value. Tech Services. tripped. The product doesn’t work properly.
- Page 29 Problem Cause Solution When the front or rear wash function is activated, the nozzle The nozzle extends out too will be automatically cleaned at This is a normal occurrence. slowly. the outlet and then extended. This operation takes a few seconds. Is the water pressure set to a lower Use the remote control to reset the water pressure to mode than desired?
- Page 30 NOTES:...
- Page 31 NOTES:...
- Page 32 NOTES: 30800 Rancho Viejo Road, San Juan Capistrano, CA 92675 www.Fluidmaster.com • 800-631-2011 Contact Fluidmaster for troubleshooting help or visit www.Fluidmaster.com M-F 5:30 am - 5:00 pm PST. 52-1038 Grev. 1, 11/20...
Need help?
Do you have a question about the soft spa 9500 and is the answer not in the manual?
Questions and answers