Table of Contents
Advertisement
Quick Links
Safe Operation & Maintenance Instructions
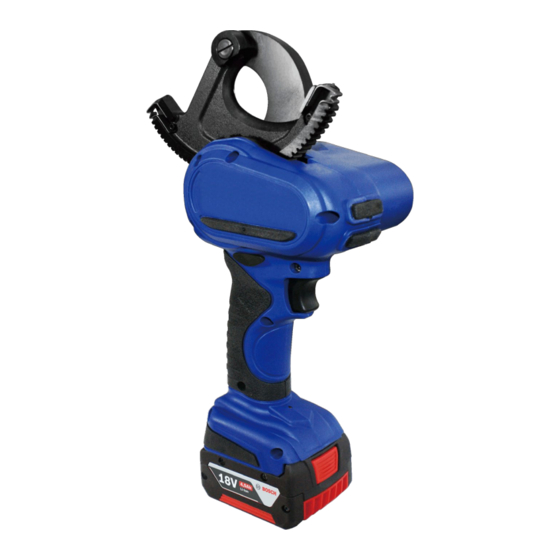
Rechargeable Cable Cutter
ATTENTION!
Safe Operation & Maintenance Instructions must be followed.
Thank you for using our products. This manual must be read carefully
prior to operating this product. Special attention should be paid to the
section "Safety Instructions". Damages and injuries caused by improper
use of this product are NOT included in our warranty. We would like to
remind you to work safely and to keep this manual on hand.
902-626
Model # :
Advertisement
Table of Contents

Summary of Contents for Eclipse 902-626
- Page 1 Safe Operation & Maintenance Instructions Rechargeable Cable Cutter 902-626 Model # : ATTENTION! Safe Operation & Maintenance Instructions must be followed. Thank you for using our products. This manual must be read carefully prior to operating this product. Special attention should be paid to the section “Safety Instructions”.
-
Page 2: Warnings
WARNINGS ■ Follow ALL instructions to ensure safety. WARNING This product is NOT an insulator and cannot be used near energized conductors. Do not use this tool on glass, plastic, wood or any other materials which could shatter. Do not exceed equipment ratings. -
Page 3: Table Of Contents
Table of Contents WARNINGS……..….…………………………………………….1 Table of Contents….…………………………………….………2 Safety Instructions…….……………………………………….3 Product Description.………………………………………...…...4 Operating Instructions..………….………………………………5 Guide Piece Replacement/Battery Charging…………..……..6 Blade Replacement………………...……….…………………...7 Maintenance...…………….…………….…………………8 Troubleshooting……………………….……….………………9 L i m i t e d Wa r r a n t y. … … … … … . … … … . … … … … … … 1 0 Table of Components………….…………….……………….11 Table of Diagram………………………...…….…….………….12... -
Page 4: Safety Instructions
Safety Instructions Work Area Safety Personal Safety 1. Keep the area around the tool 1. Stay alert while using this tool to clean and free of obstructions. prevent serious injury. Do not use under the influence of drugs, 2. Keep the area free of flammables alcohol or medicine. -
Page 5: Product Description
Product Description: 902-626 ■ Specifications: Height: 12.5 inches (H) Input voltage: Weight: 6.2 lbs (including battery) 120V Single Phase AC Drive unit: 18V DC Motor Input frequency: 50-60Hz Charger (GS/CE): Input current: 21.75 VA ■ Accessories: Plastic carrying case ■... -
Page 6: Operating Instructions
Operating Instructions 1. Install the charged battery by sliding it into the base of the tool handle until it clicks into place. The battery should be secured and unmoveable. 2. Take a look at the operation of tool switch system. There are 3 settings: Move to left (Forward), Center (Neutral), Move to right (Reverse). -
Page 7: Guide Piece Replacement/Battery Charging
Guide Piece Replacement 1. Operate the cutter either forwards or backwards until the moving blade disengages from the pinion gear and can be pulled free. 2. Remove the battery from the cutter. 3. Use a M2.5-sized Allen wrench to loosen and remove the screw which secures the gear guide to the moving blade. -
Page 8: Blade Replacement
Blade Replacement 1. Operate the cutter forwards or backwards until the moving blade disengages from the pinion gear and can be pulled free. 2. Remove the battery from the cutter. 3. Secure the lock nut with a wrench and loosen the shoulder screw with a flat screwdriver. -
Page 9: Maintenance
Maintenance ■ After use, look for burrs or dents in the blade. If burrs exist they can be removed with a flat grinding stone. Clean, sharp blades will provide better and safer performance and put less strain on the tool. ■... -
Page 10: Troubleshooting
Troubleshooting ■ The Cable cannot be cut: A. Tool Blades are worn or damaged. The blades must be replaced. Tools with worn or damaged blades might cause property damage or even personal injuries. B. Applied cable is over-specification. Please check the specification. The circuit breaker will need to be reset. - Page 11 Limited Two-Year Warranty ■ Our electronic products are warrantied against defects in materials and workmanship for two years. ■ This warranty is subject to the following exclusions and limitations: 1. This warranty does not cover damages to products which are not installed, operated, used and maintained in accordance with written instructions.
- Page 12 Limited Two-Year Warranty ■ Replace any worn or damaged parts immediately. Do not use parts not supplied by us. ■ Contact our service representatives to request parts or for problems not shown above. ■ Do NOT attempt to disassemble or repair the product. ■...
-
Page 13: Table Of Components
Table of Components Parts Description Q'ty HOUSING SEMI-ASSEMBLY SET TRIGGER & PCB SEMI-ASSEMBLY SET MOTOR GEAR BOX & BLADE SET Diagram of Components...

Need help?
Do you have a question about the 902-626 and is the answer not in the manual?
Questions and answers