Advertisement
Quick Links
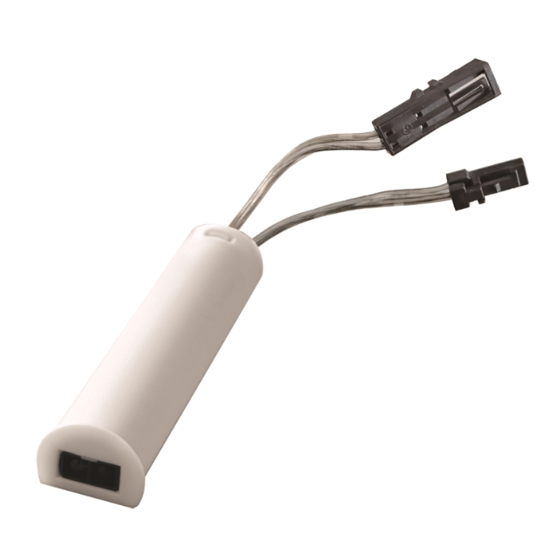
step 2
Follow these
instructions to
build and attach
your IR Control
Switch with cable
12VDC
Things you need to know
• Always read the instructions first before installation
• Not suitable for outdoor
• Cut off the power source during the installation
• Don't bend the cables
• Keep proper ventilation around the unit and don't stack any
object on it.
• Keep 10-15 cm of clearance when the device is close to a heat
source
• Please consider the total wattage of all lights being joined
together and select the LED Driver that is greater than this total,
taking the following into consideration:
• 15w = max load 13.5w
• 30w = max load 27w
• 75w = max load 67.5w
• Never fully load the circuit. Max load = 21.6W
If you are using an IR Control Switch with
the 15W or 30W Driver & Distributor, the
IR Control Switch can be connected in
between the Driver, and the Distributor.
1.
Separate the connector between the
Voltage LED Driver and the distributor
2.
Connect IR Control Switch to
connectors at end of the Driver and
the Distributor.
3.
Insert extension cable from LED panel
into Distributor
4.
Connect Driver to power source
If you are using an IR Control Switch with
the 75W Driver, the Distributor cannot be
separated.
1.
Connect IR Control Switch directly to
the Distributor.
2.
Insert extension cable from LED panel
into end of IR Control Switch
3.
Connect Driver to power source.
IR control switch with cable 12VDC
• If you have any questions, contact us on:
Australia: 1800 666 078 Monday to Friday between
8:00am and 6:00pm AEST, New Zealand: 0800 522 663
Monday to Friday between 8:00am and 5:00pm NZST
or email: info@kaboodlegroup.com.au.
Hardware included
A
4
Voltage LED
Driver
1 1
3 3
Distributor
3 3
installation guide
B
Plastic IR Control
addition
Voltage LED
Driver
1 1
2 2
3M Sticker
IR Control Switch
with Cable
Distributor
2 2
W-50563
Ver. 1
p. 1
Advertisement

Summary of Contents for Kaboodle W-50563
- Page 1 • 30w = max load 27w Plastic IR Control • 75w = max load 67.5w 3M Sticker addition • Never fully load the circuit. Max load = 21.6W If you are using an IR Control Switch with the 15W or 30W Driver & Distributor, the Voltage LED IR Control Switch Driver IR Control Switch can be connected in with Cable Voltage LED between the Driver, and the Distributor. Driver Separate the connector between the Voltage LED Driver and the distributor Connect IR Control Switch to connectors at end of the Driver and the Distributor. Insert extension cable from LED panel into Distributor Distributor Connect Driver to power source Distributor If you are using an IR Control Switch with the 75W Driver, the Distributor cannot be separated. Connect IR Control Switch directly to the Distributor. Insert extension cable from LED panel into end of IR Control Switch Connect Driver to power source. W-50563 Ver. 1 p. 1...
- Page 2 Place the sticker onto the flat section of the IR switch to stick it to a shelf or overhead cabinet. Double sided adhesive tape light sensor function 1. The light goes on when the door is opened 2. The light goes off when the door is closed step 1 Caring for your kaboodle parts and accessories Your Kaboodle Looking after your cabinets is really easy and with the right care and maintenance they cabinet is now complete. will last you for many years. Just follow these simple steps and if you need any more information you can contact us on 1800 666 078 Monday to Friday between 8:00am and 6:00pm AEST or email: info@kaboodlegroup.com.au. step 4 step 2 Hinges, runners and other parts and accessories should be kept dry at all times.
Need help?
Do you have a question about the W-50563 and is the answer not in the manual?
Questions and answers