Advertisement
Quick Links
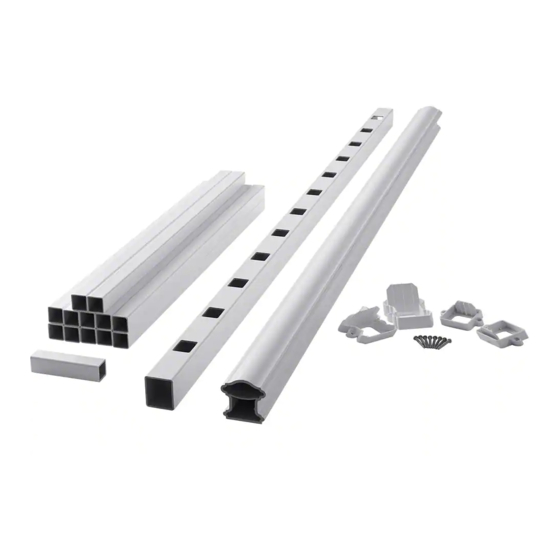
Part #SEC19 CW 6KD
SEC19 CW 8KD
SEC19 CWS 6KD HW
INSTALLATION MANUAL
ARMORGUARD
DELUXE RAILING
®
Questions, problems, missing parts? Before returning to the store,
call Fiberon Customer Service
8 a.m. - 5 p.m., EST, Monday - Friday
1-800-230-7547
FIBERONDECKING.COM
THANK YOU
We appreciate the trust and confidence you have placed in Fiberon through the purchase of this railing. We strive to continually create quality
products designed to enhance your home. Visit us online to see our full line of products available for your home improvement needs. Thank you
for choosing Fiberon!
Advertisement

Summary of Contents for fiberon ARMORGUARD SEC19 CW 6KD
- Page 1 THANK YOU We appreciate the trust and confidence you have placed in Fiberon through the purchase of this railing. We strive to continually create quality products designed to enhance your home. Visit us online to see our full line of products available for your home improvement needs. Thank you...
-
Page 2: Table Of Contents
Table of Contents Table of Contents ........2 Line Rail Installation . -
Page 3: Warranty
Warranty 20 YEAR PERFORMANCE LIMITED WARRANTY WHAT IS COVERED This railing product is covered under a Limited Residential Warranty to protect against checking, splitting, decay, rot and splintering. WHAT IS NOT COVERED In no event will the manufacturer be liable for any direct, indirect, incidental, special, consequential, punitive, exemplary, statutory, special, or other, damages based upon the manufacturer products or manufacturer fasteners or resulting, directly or indirectly, from any defect in the manufacturer products or fasteners, including but not limited to damage to, diminution in value of and/or loss of use or enjoyment of, any property or part thereof, whether based on contract, tort, strict liability, statute, regulation or otherwise, even if the manufacturer is... -
Page 4: Pre-Installation
Pre-Installation TOOLS REQUIRED Rubber Safety Tape Speed Pencil Level mallet goggles adhesive measure square Power Phillips 5/32 in. Miter Adjustable drill drill bit drill bit square RAILING HARDWARE KIT STAIR RAILING HARDWARE KIT Part Description Quantity (per kit) Top railing bracket Bottom railing bracket Flange #10 x 1 in. - Page 5 NOTE: For best results, cut post sleeves with a carbide-tipped blade, minimum 32-tooth. NOTE: Special installation requirements are needed if using metal surface mount posts. Please contact Fiberon at 1-800-573-8841 for direction.
- Page 6 Pre-Installation (continued) □ For line applications, subtract 3/8 in. from the measurement on each end to allow for rail brackets and flanges. For stair applications, subtract 1/8 in. from the measurement on each end to allow for stair brackets. Transfer the measurement to the top rail, making sure that the distance from the end of the rail to the first baluster slot is equal on both ends of the rail.
-
Page 7: Line Rail Installation
Line Rail Installation Preparing the bottom rail Tracing the bottom railing bracket □ Place the bottom railing bracket (BB) over the ends of the □ Lightly trace a line to show the location of the bottom of bottom rails. the bracket (BB). □... - Page 8 Line Rail Installation (continued) Preparing the top rail Inserting balusters □ Place top rail brackets (AA) over each end of the top rail. □ Insert a baluster into the first and last baluster holes in the bottom rail. NOTE: Baluster length may vary slightly. Make sure all balusters are cut to the correct length.
- Page 9 Line Rail Installation (continued) For installations higher than 30 in. Installing the balusters and top rail above grade □ Install all balusters into the bottom rail. □ Two additional screws are required to properly secure the □ Seat the balusters into the top rail and press down on the top rail.
-
Page 10: Stair Railing Installation
Stair Railing Installation SPECIAL NOTES ON STAIR RAILING The stair systems are designed for the typical angles created by an approximate 7 in. rise/11 in. run with allowance for accepted variation in components. The Deluxe stair system allows for a 30-36 degree stair angle. Building codes are very specific on allowable angles and widths. - Page 11 Stair Railing Installation (continued) Preparing the bottom rail installation Installing the bottom rail □ Place the lower rail and brackets in place, and locate and □ Secure the bottom rail using the #10 x 1.5 in. screws (LL). mark the screw holes. DO NOT OVERTIGHTEN THE SCREWS.
- Page 12 Stair Railing Installation (continued) Installing the top rail Installing the caps □ Fully insert all balusters and secure the top railing using □ Complete the installation by installing the post cap in place. the #10 x 1.5 in. screws (LL). DO NOT OVERTIGHTEN THE You can use a quality exterior adhesive in order to do this SCREWS.
-
Page 13: Angle Bracket Installation
Angle Bracket Installation NOTE: The angle bracket is available as a Special Order purchase, or from homedepot.com. Determining the angle of installation Making the angle cuts □ Make the angle cuts in the top and bottom rails. NOTE: Not for stair applications. NOTE: The minimum distance from post corner to the first baluster hole is 1.5 in. - Page 14 Questions, problems, missing parts? Before returning to the store, call Fiberon Customer Service 8 a.m. - 5 p.m., EST, Monday - Friday 1-800-230-7547 FIBERONDECKING.COM Retain this manual for future use. FIB-717-PKG 6/19...
Need help?
Do you have a question about the ARMORGUARD SEC19 CW 6KD and is the answer not in the manual?
Questions and answers