Table of Contents
Advertisement
Quick Links
Advertisement
Table of Contents

Related Manuals for Borkey 919 REXA 5

Summary of Contents for Borkey 919 REXA 5
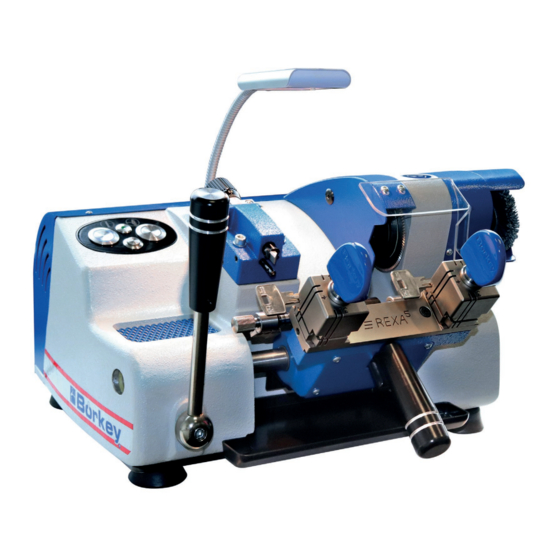
- Page 1 OPERATING MANUAL 919 REXA Stand 11/2020 Please read before commissioning!
- Page 2 Transfer or duplication of this document, as well as exploitation and disclosure of its contents are prohibited, if not expressly permitted beforehand. Contraventions will compel you to be liable for damages. All rights for the case of patent application, as well as utility model and design registration are reserved.
- Page 3 Dear Customer! With purchasing the Börkey key cutting machine 912 REXA you have chosen a German quality product. It was manufactured with the highest accuracy and underwent a precise quality inspection. This operating manual will help you carry out works with the new machine accurately and hazard-free.
-
Page 4: Table Of Contents
Table of contents General remarks About the operating manual Delivery and installation Safety provisions Safety installations Notes for usage the machine Description Technical data Accessories Wiring diagram Maintenance Main function parts Spare part list Working notes Inspection - adjustment Description of the 4-way reversible jaw Troubleshooting EC Declaration of Conformity... -
Page 5: About The Operating Manual
1. About the operating manual Please read before commissioning! Any person operating, servicing or repairing the machine must read and understand the operating manual before commissioning, particularly the safety provisions. Notes on the operating manual The operating manual shall facilitate getting to know the machine 912 REXA and to use it for the intended application. -
Page 6: Delivery And Installation
2. Delivery and installation The machine is carefully packed in the factory. Check after delivery: 1. If the packaging is damaged or 2. If the machine shows any transport damage or if it is objectionable. In this case we ask you to inform us immediately. Subsequent complaints cannot be considered. -
Page 7: Safety Provisions
3. Safety provisions 1. Works on the machine must only be conducted by professionally instructed personnel. Observe the legal minimum age! The warranty expires if damages occur due to improper handling. 2. We point out that we do not assume liability for damages that occur due to non-compliance with this operating manual. -
Page 8: Safety Installations
17.Repairs must be conducted by a qualified expert! Maintenance work must only be conducted by persons qualified for the respective maintenance work who are familiar with the corresponding working safety be conducted by persons qualified for the respective maintenance work who are familiar with the corresponding working safety. -
Page 9: Notes For Usage The Machine
5. Information about the use of the machine Proper usage The machine Börkey 912 REXA is exclusively designed for cutting cylinder keys, car keys, and cross keys. Any other use beyond that is not deemed proper. The manufacturer is not liable for damages resulting thereof. The risk is borne solely by the user. -
Page 10: Accessories
8. Accessories Best.- Nr. 4 setting gauges 9954-204-008 2 pins Ø 1.2 9954-204-010 2 stops with recess 9954-204-014 1 brush 9000-021-001 1 allen key SW 2 9000-022-001 1 allen key SW 2.5 9000-022-002 1 allen key SW 3 9000-022-003 1 allen key SW 4 9000-022-004 1 allen key SW 8 9000-022-010... -
Page 11: Maintenance
10. Maintenance The machine must be cleaned of metal residue (e.g. swarfs) in regular intervals. (Brush) You have to check in regular intervals that no metal residue (e.g. swarfs) can accrue between the cutter and the machine body. (Clean with brush) -Do not use compressed air! Possible retension (spring pressure too low) of the lateral springs in the key holder can be achieved by the spring tension mounted beneath the key holder. -
Page 12: Main Function Parts
11. Main function parts Push button machine ON-OFF (1) Push button blue - machine on Push button neutral - machine off Push button machine adjustment of depth ON-OFF (2) Push button at the bottom - adjustment on Push button at the top - adjustment off Push button activation of the wire brush ON-OFF (3) Push button pressed... - Page 13 Intake wire brush (5) Exchanging the wire brush Before replacing cutters, loosen the cylinder screws and remove the safety cowl on the cutter. Plastic brush (6) Replacing the plastic brush Loosen the screw in the plastic brush receiver (4 mm Allen key), draw the plastic brush to the right out of the receiver, insert a new plastic brush, and tighten the cylinder screw in the plastic brush receiver.
-
Page 14: Spare Part List
12. Spare part list 9912-013-004 9912-005-000 9912-013-007 9000-039-123 9912-013-006 9919-004-002 9912-014-005 8954-000-001 9994-010-002 9919-010-000 9912-009-002 9912-012-006 8954-000-001 Prism cutterØ80 x 4,4mm 9912-005-000 feeler mounting complete 9912-005-006 feeler insert 9912-013-004 LED lamp 9000-026-091 Drive motor 9912-013-006 Blue pressure switch with ring lighting ON-OFF 9000-039-123 Green pressure switch adjustment ON-OFF 9912-013-007... -
Page 15: Working Notes
13. Working notes Cutting keys with stop collars Bring the key holder to the left into basic position using the feed lever (11). Fasten the sample key with the stop collar approx. 1 mm from the clamping jaw side into the left clamping jaw. Slightly fasten the key blank with the stop collar approx. - Page 16 Cutting cross-keys up to a length of 120 mm (pic. 8) Depending on the length of the stop collar on the cross keys, the stop plates must be inserted into the outer or inner left groove of the clamping with the gap upwards. The edges of the gap are used as stop collar.
-
Page 17: Inspection - Adjustment
14. Inspection - adjustment Cutting depth (pic.9) Insert setting gauges (20) into both clamping jaws and fasten it. Lead the key holder to the feeler and cutter. Cutter and feeler must now touch the rim of the key blank evenly. Any required correction of the depth ensues using the knurled screw. -
Page 18: Descriptionof The 4-Way Reversible Jaw
15. Descriptionof the 4-way reversible jaw The 4–way reversible jaw Das Spannsystem ermöglicht das Spannen der Schlüssel in Rückenanschlaglage oder in der Profilausbildung. Pic 1 Pic 2 9919-010-004 9919-010-004 Washer U-Scheibe 9919-010-002 Clamping jaw top 9919-204-004 9919-204-004 Pressure spring Druckfeder 9919-010-001 Lower part of the reversible vice Vice complrte... -
Page 19: Troubleshooting
16. Troubleshooting Machine is not operational - Check if the mains plug is properly connected to the power grid. - Switch for restart has not been pressed - Switch machine `ON – OFF´ has not been pressed - Safeguard at the mains plug of the machine is defective Cutter does not work –...
Need help?
Do you have a question about the 919 REXA 5 and is the answer not in the manual?
Questions and answers
hello,my borkey key machine 919 rexa does not turn on from the rear switch,needs to hold it in.is there a replacement part for that