Table of Contents
Advertisement
Quick Links
Important: To provide the best experience this manual is continuously updated. To make sure that you are referring to the
most up to date information download the latest version at leitner.com.au/manual
FAQ: The throttle is NOT connected by default. Please refer to this manual how to connect it.
About this manual
• Thank you for purchasing a Leitner electric bike. We take
pride in providing electric bikes at outstanding value,
delivered to you factory direct. Riding an ebike can be
fun, however for safety reasons it is important to only
ride the bike after reading and understanding the
complete manual.
• The following manual is only a basic guide to assist you
and is not a complete or comprehensive manual of all
aspects of assembling, maintaining, repairing and using
your bicycle. In the interest of safety we recommend that
you visit a local electric bike professional to assemble,
tune and regularly service the bike.
• This manual makes no representation about the safe use
of this bike under all conditions. It is impossible to
predict all situations when riding a bike and there are
risks associated with riding this bike which cannot be
avoided. These risks are at the sole responsibility of the
rider.
• This assembly and operation manual shall remain an
integral part of the electric bicycle. When you transfer
the electric bicycle to others, please enclose
manual as it contains important safety guidance and
operation instructions. Anyone riding the electric bike
shall carefully read the safety guidance and operation
instructions before your first ride.
Meaning of Safety Language.
Riding a bike can cause injury and in extreme cases death,
therefore it is important to read and understand the manual
before using the bike. The most common cause of injury is
falling off the bicycle and reading the manual will help to
avoid situations which put you at risk of injury or death.
• WARNING! Indicates the possibility of injury or death.
• Caution! Indicates the possibility of injury.
As there are different models of eBikes, pictures are for
reference only and may show a similar component from
another model. Certain instructions of this manual may not
apply to your model. All content in this manual is subject to
change or withdrawal without notice. We made effort to
provide accurate information, however we do not assume
responsibility of liability if any errors or inaccuracies appear.
If you are unsure about certain parts of this manual, if you
have a problem or need repair, please visit the website
www.Leitner.com.au
representative at sales@Leitner.com.au with a problem
description and pictures and videos or call 1300 856 725.
Powering Your Freedom
ELECTRIC BICYCLE USER MANUAL
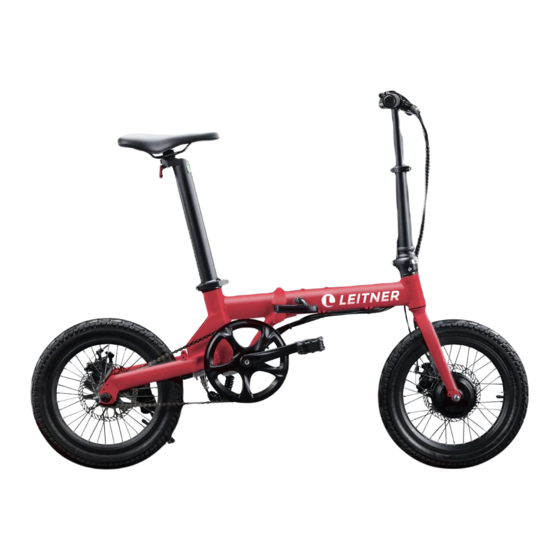
LEITNER ARIA 16" Light-Weight Folding Electric Bike
and
email a
customer
Table of contents:
About this manual...............................................1
Guide to safe operation..................................2-3
Checklist before each ride.................................3
Safeguarding guidelines.....................................4
Maintenance schedule.......................................4
Before your first ride..........................................5
Operation of your electric bike.........................6
Getting started....................................................7
Assembly and adjustment of...
• Folding frame.................................................7
• Quick release levers......................................8
• Handle-bar and Stem................................8-9
• front light.......................................................9
• Bell..................................................................9
• Reflectors.......................................................9
• Seat, battery and seatpost........................10
• Front and rear mudguard..........................11
• Rear Rack......................................................12
• Pedals...........................................................13
this
Crank arm, Bottom Bracket............................13
Battery and charger.........................................14
Battery care, storage and range.....................15
Front and Rear wheel.......................................16
Disc brakes.........................................................17
Headset..............................................................18
Bike stand...........................................................18
Chain...................................................................18
Brake levers........................................................18
Brake and gear Cables......................................18
Rim, Tyres and Tubes.......................................19
Frame and Fork (Frameset).............................19
Accessories.........................................................19
Lubrication.........................................................20
Limited Warranty..............................................20
List of torque recommendations....................20
Conversion table psi/kPa..................................20
Basic trouble-shooting......................................21
Schematic of an ebike and its parts................21
Connecting the throttle....................................22
service
© Leitner Pty Ltd 2020
1
Advertisement
Table of Contents

Related Manuals for Leitner ARIA


Summary of Contents for Leitner ARIA
-
Page 1: Table Of Contents
Important: To provide the best experience this manual is continuously updated. To make sure that you are referring to the most up to date information download the latest version at leitner.com.au/manual FAQ: The throttle is NOT connected by default. Please refer to this manual how to connect it. -
Page 2: Guide To Safe Operation
Do not pedal when going around • Leitner ebikes are designed for use on paved turns. Toe overlap is affected by the size of your feet, the surfaces with shallow gradients where the tyres pedals, crank arms, mudguards and tyres. -
Page 3: Checklist Before Each Ride
The pedals and the crank arm should not be Figure FS2 loose. Loose pedals will damage the thread on pedal arms. Damaged pedal arms need to be replaced. © Leitner Pty Ltd 2020... -
Page 4: Maintenance Schedule
(frame, seat post, • Check with your local authorities whether it is handle-stem). Inspect motor for any unusual noise. allowed to transport the bike with public transport. © Leitner Pty Ltd 2020... -
Page 5: Before Your First Ride
Always wear a helmet while riding which complies with your local safety WARNING! Riding incorrectly can lead to damage and injury. standards. © Leitner Pty Ltd 2020... -
Page 6: Operation Of Your Electric Bike
WARNING: Take care not to activate the throttle accidentally as the motor will accelerate potentially causing injury. Switch the bike OFF if © Leitner Pty Ltd 2020 you’re pushing it. Always be ready to press the brake lever (11) to stop... -
Page 7: Getting Started
4) To close the frame first push the direction of the arrow secured correctly before riding the bike to the long lever to the frame. shown to securely lock the long avoid injury. lever into place. © Leitner Pty Ltd 2020... -
Page 8: Quick Release Levers
(10). The metal part (9) is direction of the arrow until the with brake-levers facing fully retracted in this picture. metal part (9) is fully retracted. forward and close lever (1). Continue to read important safety information on next page. © Leitner Pty Ltd 2020... -
Page 9: Front Light
Use the bell to make other people aware of you in traffic, e.g. before passing a pedestrian. Make sure the bell is functional and securely installed. © Leitner Pty Ltd 2020... - Page 10 (6) at the bottom of the bike. Location is show in Figure B1, 3. Turn the ring (7) clockwise until firmly connected. WARNING! Never short-circuit the battery terminals (8) e.g. with water or metal parts. It may cause fire or explosion. © Leitner Pty Ltd 2020...
-
Page 11: Rear Rack
Maintenance. Steel mudguards may corrode. To prevent corrosion, treat with a rust preventative, especially if scratched. Keep any spare bolts. You will need them for the installation of other optional accessories such as the rear rack. © Leitner Pty Ltd 2020... - Page 12 R3 and R4. I Figure R5: Installed front arms (5), Figure R4. RackAriaINNER. Figure R3: Installation of front arms (5) view from the top. RackAriaINNER. using an Allen key (7). RackAriaINNER. © Leitner Pty Ltd 2020...
-
Page 13: Pedals
The arm shouldn’t move if the bottom bracket is tight. There should be no noise or looseness while riding the bike. If there is excessive movement, have the bike serviced by a bike professional. © Leitner Pty Ltd 2020... - Page 14 Only charge original battery. Do not charge other types of batteries. The charger must not be used Voltage is detected automatically. Do not yank cables. Pull on plugs, not on cables. After charging, disconnect wall socket plug (6) first. © Leitner Pty Ltd 2020...
- Page 15 During first ride after re-installing the front-wheel check © Leitner Pty Ltd 2020 connection regularly for heat build-up and push together if necessary.
-
Page 16: Disc Brakes
Changing Brake pads: Remove wheel or remove brake calliper by loosening Calliper centering bolts. Remove pads and replace with new brake pads. Re- Figure DB3 Disc Brake Assembly: install wheel or tighten Calliper centering bolts in correct position. Magnified view from back © Leitner Pty Ltd 2020... -
Page 17: Headset
Cover the end of the cable with a cable cap to prevent fraying. Cables and electric wires Check all cables monthly if there are any bends, cuts, frays or worn areas. Do not ride bike with damaged cables. Have damaged cables replaced. © Leitner Pty Ltd 2020... -
Page 18: Rim, Tyres And Tubes
Check your accessories, for example mudguards, lights, kickstand, rack, chainguard every 30 days and adjust attachment and alignment if necessary. The rear rack is not centered however this does not affect the function of the bike. © Leitner Pty Ltd 2020... - Page 19 • Discard batteries according to your local battery disposal guidelines. WARNING! If a battery is stored for longer than 1 month without charging it, it may get damaged. WARNING! Lithium-ion batteries may leak, ignite and burst if not handled properly! © Leitner Pty Ltd 2020...
-
Page 20: Lubrication
• Suspension fork: Every month remove old visible Leitner does not accept claims for repairs which were performed without our written approval. Leitner does grease and apply a thin layer of grease to visible part... -
Page 21: Basic Trouble-Shooting
Replace internal motor when wheel is off ground and spun motor gears by hand Replace motor 2)Motor internal gears damaged Tighten all bolts 3)Motor damaged 4)Loose bolts © Leitner Pty Ltd 2020... -
Page 22: Connecting The Throttle
D) Carefully remove the controller cover plate (4). motorbike without registration and license”. We would like you to be aware of this and Leitner Pty Ltd does under no circumstances take any liability for any issues involving riding a bike with unlocked throttle illegally.
Need help?
Do you have a question about the ARIA and is the answer not in the manual?
Questions and answers