
Subscribe to Our Youtube Channel
Related Manuals for Flipkart MarQ 563GSMQS

Summary of Contents for Flipkart MarQ 563GSMQS
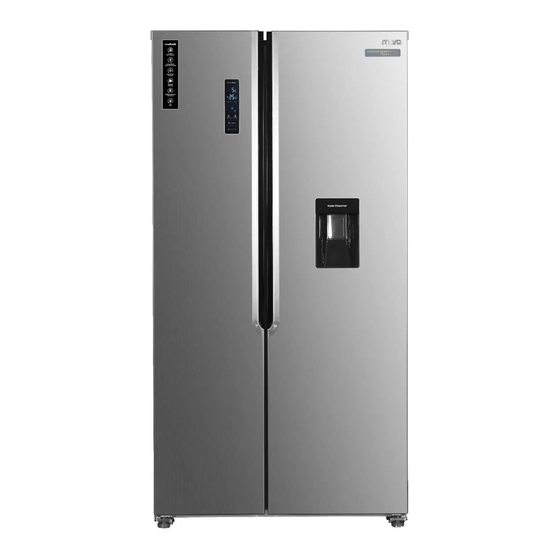
- Page 1 innofresh Refrigerator 563GSMQS User Manual In the Door Energy Efficient Multi Air Flow Water Dispenser Digital Inverter Technology Technology FreshLock Intelligent LED touch Technology Control Pannel Mode...
- Page 3 Index Title Page No. Safety information Overview Installation Daily use Troubleshooting Warranty Terms & Conditions...
-
Page 4: Safety Information
Safety information In the interest of your safety and to ensure the correct use, before Installing and first using the appliance, read this user manual carefully, including its hints and warnings. To avoid unnecessary mistakes and Accidents, it is important to ensure that all people using the appliance are thoroughly familiar with its operation and safety features. -
Page 5: Electrical Safety Warning
Safety information WARNING! Do not use other electrical appliances (such as ice cream makers) inside the refrigerating appliance, unless they are approved for this purpose by the manufacturer. • Do not store explosive substances such as aerosol cans with a flammable propellant in this appliance. -
Page 6: Care And Cleaning
Safety information Daily use • Do not place hot vesels on the plastic parts in the appliance. • Do not place food products directly against the rear wall of the refrigerator. • Frozen food must not be re-frozen once it has been thawed out. •... -
Page 7: Energy Saving
Safety information Service • Any electrical work required to do the servicing of the appliance should be carried out by the brand helpdesk engineers. • This product must be serviced by the brand helpdesk, and only genuine spare parts must be used. Energy saving •... -
Page 8: Disposal Of The Appliance
Safety information Packaging materials The materials with the symbol are recyclable. Dispose the packaging in a suitable collection container to recycle it. Disposal of the appliance 1.Disconnect the mains plug from the mains socket. 2.Cut off the mains cable and discard it. - Page 9 Overview Freezer shelves Fridge shelves Air vents Fridge door shelves Freezer door shelves Water Tank Freezer drawer Covers for fridge covers vegetable containers Fridge vegetable Freezer containers drawers Adjustable Levelling feet Note: Above picture is for reference only. Real appliance may be different...
- Page 10 Installation Remove the doors Tool required: Philips screwdriver. Flat bladed screwdriver. Ensure the unit is unplugged and empty. • To take the door off! It is necessary to tilt the unit backwards. You should • rest the unit on something solid so that it will not slip during the door removing process.
-
Page 11: Space Requirement
Installation 4. Lift the door and place it on a soft pad. Then remove another door with the same process. 5. Unscrew bottom hinges. 6. After the appliance is positioned! Install the doors as reversed process. Space Requirement • Select a location without direct exposure to sunlight; •... -
Page 12: Levelling The Refrigerator
Installation Levelling the refrigerator Doors - Clockwise rotate the feet to heighten them by hand. - Anticlockwise rotate the feet to lower them by hand. To allow the door to self-close, tilt back the top backwards for 8-10mm or by turning the adjustable feet. -
Page 13: Electrical Connection
Installation Positioning Install this appliance at a location where the ambient temperature corresponds to the climate class indicated as below: Climate class Ambient temperature C to :+32 C to:+32 C to:+36 C to :+43 Location The appliance should be installed well away from sources of heat such as radiators, boilers, direct sunlight etc. -
Page 14: Daily Use
Daily use Using the Control panel Buttons Press to adjust temperature of freezer compartment(left side)from-14 C to-22 Press to adjust temperature of fridge compartment(right side)from 2 C to 8 C and off cooling. Press to select running mode from SMART,ECO,SUPER COOLING,SUPER FREEZING and USER'S SETTING(no symbol in display). -
Page 15: Door Open Alarm
Daily use Using the Control panel Smart ECO Mode Super Cooling Super Freezing Notes: ECO Mode: Select this mode when you want to save power. Super cooling mode: This mode allows you to cool foods quickly and will be automatically deactivated after 2.5 hours of operation. Super freezing mode: This mode allows you to freeze foods quickly and will be automatically deactivated after 50 hours of operation. - Page 16 Daily use Before using the water dispenser for the first time, remove and clean the water tank located inside the fridge compartment. Lift and take off tank balcony first, then take off water tank with cover. Detach the cover to wash and clean the tank and cover.
- Page 17 Daily use First use Cleaning the interior Before using the appliance for the first time, wash the interior and all internal accessories with lukewarm water and some neutral soap so as to remove the typical l smell l of a brand new product, then dry thoroughly.
-
Page 18: Helpful Hints And Tips
Daily use Helpful hints and tips Hints for freezing To help you make the most of the freezing process, here are some important hints: • The freezing process takes 24 hours. Suggest not to add any food to be frozen during this period;... -
Page 19: Hints For Refrigeration
Daily use Hints for refrigeration Useful hints: • Meat (all types): wrap in polythene bags and place on the glass shelves above the vegetable drawer. • For safety, store in this way only one or two days at the most. •... -
Page 20: Troubleshooting
Troubleshooting If you experience a problem with your appliance or are concerned that the appliance is not functioning correctly, you can carry out some easy checks before calling for service, please see below. Warning! Do not try to repair the appliance yourself. If the problem persists after you have made the checks mentioned below, contact a qualified electrician, Solution authorized service engineer. - Page 21 Troubleshooting Cause Problem Solution Moisture given off from When placing foods in the fridge first pat them wet foods. with a dry cloth to remove excess moisture. 3.3 Water forms at underside of the crisper glass covers. Door seal leaks or Check the door gaskets and reduce door frequent door openings openings.
- Page 22 Troubleshooting Cause Problem Solution Appliance is not level. Re-adjust the feet. 8.1 Unusual noises The appliance is touching Move the appliance slightly. the wall or other objects. A component, e.g. a pipe, If necessary, carefully bend the on the rear of the component out of the way.
- Page 23 Warranty Terms & Conditions Flipkart India Private Limited ("Company") warranties the product to be free from manufacturing defects or any other specific defect as may be specified in the Specific Terms and Conditions below. The warranty is for a period mentioned in the Specific Terms and Conditions below, the invoice (if not specified in the Specific Terms and Conditions below), as well as the product listing page, and such period shall commence from the date of purchase of the product by the first end user.
-
Page 24: Warranty Terms And Conditions
Warranty Terms & Conditions All transportation & handling expenses incurred while replacing or repairing will be payable by the Customer. For any warranty claim requested by the Customer from the region beyond municipal limits of the jurisdiction of the ASC, a visit by an authorised service personnel may be arranged by the Company through its ASC, on a case to case basis, at its sole discretion and the charges towards such visit will be borne by the Customer. - Page 25 Warranty Terms & Conditions For any further information / assistance please contact our customer Redressal cell at: Consumer Care Officer, Flipkart India Private Limited, Buildings Alyssa, Begonia & Clove Embassy Tech Village, Outer Ring Road,Devarabeesanahalli Village Bangalore, Karnataka-560103 India Tel. no. : 080-46609211 Email - marq@flipkart.com...
Need help?
Do you have a question about the MarQ 563GSMQS and is the answer not in the manual?
Questions and answers