Table of Contents
Advertisement
Quick Links
Advertisement
Table of Contents

Subscribe to Our Youtube Channel
Related Manuals for TAMS 61622

Summary of Contents for TAMS 61622
- Page 1 TAMS PCI GPIO Card Installation & Operation Instructions...
- Page 2 TAMS 61622 PCI GPIO Card Instructions and Software License Test & Measurement Systems Inc. 750 14th Street SW Loveland, CO 80537 Telephone (970) 669 6553 (970) 669 3090 Web Site www.tamsinc.com Copyright Test & Measurement Systems Inc. 1997 - 2003...
-
Page 3: Table Of Contents
Configuring the Card in Windows NT 4.0/2000/XP ......... 15 Configuration Information .................. 19 Connector Pinouts ....................20 Key Differences Between TAMS 61622 & HP 2074/5 ........21 Appendix A: Wiring ..................... 24 Appendix B: TAMS 61622 SICL Extensions ............. 27... -
Page 4: Unpacking Your Product
Unpacking Your Product When you open your TAMS GPIO Card shipment, examine its contents. Do not remove the GPIO card from its protective bag yet. Make sure your shipment contains the following items: l a t t a l &... -
Page 5: Overview And General Information
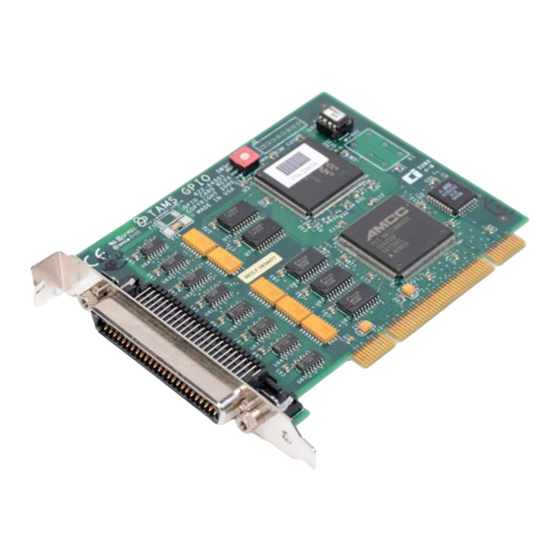
A PCI expansion slot is required to accommodate the GPIO interface card. The TAMS 61622 card has a rotary switch on the upper edge that is not used in systems running Windows NT4 / 2000 / XP. The configuration of the card, in Windows, is completely done in software. -
Page 6: Installing The Gpio Interface
4. Prepare and install the GPIO interface cable. Note: The TAMS 61622 is a PCI device. Unlike most EISA and ISA devices a PCI device does not require an I/O address or IRQ setting. These settings are handled automatically. -
Page 7: Related Software Documentation
Configuring the HP/Agilent I/O Libraries” chapter of the HP/Agilent I/O Libraries Installation and Configuration Guide for Windows. To develop HP/Agilent SICL I/O applications for the TAMS 61622 on a PC, see the “Using GPIO with HP/Agilent SICL” chapter of the HP/Agilent SICL User’s Guide for Windows. -
Page 8: Driver Installation
Refer to your platform specific operating system documentation or contact your system administrator. To install the t61622 driver it is not necessary for the TAMS 61622 interface card(s) to be present in the system. Configuration, however, requires the card(s) and driver to both be present. -
Page 9: Windows 2000 Installation
Windows 2000 installation After installing the card and booting for the first time the Windows 2000 plug and play manager will detect the new hardware (TAMS GPIO card), the screen looks like this: Click on cancel. - Page 10 6. Finally, the installation program will ask you to reboot your PC. Please go ahead and do so. 7. After reboot your TAMS 61622 GPIO card should be ready to be configured. Now, please follow the instructions on page 15, in the section titled: Configuring...
-
Page 11: Windows Xp Installation
Windows XP installation After installing the card and booting for the first time the Windows XP plug and play manager will detect the new hardware (TAMS GPIO card), the screen looks like this: Click on Cancel... - Page 12 1. Make sure you have privileges enabling you to install device drivers. 2. Insert the CD with the t61622 driver into the CD-ROM drive. 3. Run “setup.exe” from the CD directory “WXP_VERx.xx”. 4. Follow the instructions on the screen. You may or may not get the following message: 5.
- Page 13 After rebooting you will be prompted with the following screen: Click on Next...
- Page 14 Finally you will get a screen that looks like this: Click on Finish. After this your TAMS 61622 GPIO card should be ready to be configured. Please follow the instructions in the next section.
-
Page 15: Configuring The Card In Windows Nt 4.0/2000/Xp
Configuring the Card in Windows NT4.0 / 2000 / XP 1. Make sure that the HP/Agilent SICL software package, TAMS 61622 card(s) and the t61622 driver are installed and the computer rebooted. 2. Configure the interface by executing the IO Config program, which will now be located in the SICL/bin subdirectory. - Page 16 5. Select the 61622 card you wish to configure (if you have one card only, you will not need to select any card, the system will do it automatically for you).
- Page 17 7. Modify or accept default configuration parameters. For context sensitive help click on the Help button or press the F1 key. 8. When you are finished setting the configurable parameter, dismiss the dialog box by clicking the OK button.
- Page 18 9. You will see your interface listed on the screen, such as: 10. Click OK. You will get a window like this: 11. Please click on OK but do not reboot your system as this message is intended for ISA cards not PCI cards.
-
Page 19: Configuration Information
Configuration Information This section provides a detailed, functional description of the TAMS 61622 GPIO interface. You will need to understand this information in order to set the appropriate configuration values for the TAMS 61622. This information should also be helpful when you are preparing and installing the GPIO cable. -
Page 20: Connector Pinouts
Connector Pinouts The following figure shows you the Pinouts on the TAMS 61622 GPIO interface connector. TAMS 61622 GPIO Connector Pinouts t n I s t l i l t... -
Page 21: Key Differences Between Tams 61622 & Hp 2074/5
Key Differences between TAMS 61622 & HP 2074/5 TAMS 61622 PCI DMA. The TAMS 61622 interface has two modes of transfer: DMA and interrupt driven. A program may control transfer mode used by calls to ihint(). See the HP/ Agilent SICL Reference Manual for more information.There are six values that... - Page 22 However, the PCI bus DMA error is very unlikely to occur. TAMS 61622 PCTL delay. The TAMS 61622 is much more flexible than any other available GPIO interface. With the HP 2074/5 interface a user has a choice of one of eight delay time values.
- Page 23 Changes take effect when a session on a newly configured interface is started for the first time within a process. Care should be taken when a running application uses TAMS 61622 interface while it is configured. If, for example, a polarity is changed on an interface while an application uses it, it may take effect in the middle of a transfer causing undesired effects.
-
Page 24: Appendix A: Wiring
Appendix A: Wiring Data Lines There are 32 data lines on the TAMS 61622: 16 designated as data input, and 16 designated as data output. Color codes are provided for TAMS 622-001 GPIO cable and HP 5061-4209 GPIO cable. Data Input Lines The 16 data input lines are labeled DIO through DI15. - Page 25 Data Output Lines The 16 data output lines are labeled DO0 through DO15. The following table lists the connector pin numbers and wire color codes for the data output lines. Data Output Lines t e l o l l o l l t e l o l l o l l...
- Page 26 Peripheral Information Lines The following table lists the connector pin numbers and wire color codes for the peripheral information lines. Peripheral Information Lines o l l t e l t e l o l l t e l t e l...
-
Page 27: Appendix B: Tams 61622 Sicl Extensions
Appendix B: TAMS 61622 SICL Extensions All of the TAMS 61622 SICL extension functions are implemented by using the header file t61622sicl.h and the standard SICL functions igpioctrl and igpiostat. These two functions are described below: IGPIOCTRL Supported sessions: ......interface Affected by functions: . - Page 28 The TAMS 61622 PCTL delay function provides a extended PCTL delay control that was not available before. Besides the standard 0-7 values for delay used with HP cards, the delay of the TAMS 61622 may be set directly in nanoseconds.
- Page 29 ♦ For STI and EIR lines, if polarity is set to 0, their behavior is fully compatible with standard GPIO. If set to 1, polarity is reversed for these lines. ♦ For DIN lines, 61622 extensions allow to set polarity for each line independently. Setting the DIN polarity with standard GPIO SICL igpioctrl...
- Page 30 DIN[0..15], STI0, STI1, and EIR lines, in two different fashions depending on what polarity is set for each line in each group (please refer to point 3: TAMS 61622 Polarity). ♦ polarity set to 0, the latch will occur on a LO to HI (logically) transition.
- Page 31 I_GPIO_T61622_PUL, 0) TAMS 61622 Board ID The 61622 is equipped with a rotary switch. This switch is set by the user. The purpose is identification of each GPIO board on a system with multiple GPIO cards. This feature is especially useful if multiple boards are residing on a PCI bridge since some PCI bridges do not provide a reliable way for PCI slot identification.
- Page 32 TAMS 61622 Handshake TAMS t61622 internal handshaking loop makes easier to test/debug GPIO applications without having anything connected to the TAMS 61622 GPIO card. This test mode only has an effect on handshaking transfers. If the mode is on, the PCTL/PFLG get in a loop mode and as a consequence no external device is needed for the handshaking because it is being generated internally by the TAMS 61622 card.
- Page 33 Get the DOUT value igpiostat(id, I_GPIO_T61622_DOUT, &dout) TAMS 61622 Macros The following is a table with all of the defines passed to the TAMS 61622 SICL extension functions that you can use. Individual bits could be passed to select specific line(s).
-
Page 34: Warranty Information
TAMS may at its option repair or replace, a defective unit with a new or refurbished unit. The customer shall be solely responsible for the failure of any TAMS product, resulting from accident abuse, or misapplication of the product, and TAMS assumes no liability as a consequence of such events under the terms of this warranty. - Page 35 Copyright © 1997-2003 Test & Measurement Systems Inc. Other products and companies referred to herein are trademarks or registered trademarks of their respective companies or mark holders. Specifications are subject to change without notice. TAMS 61622 GPIO Interface Printed in USA E03.01.03 Part # 61622-90003...
Need help?
Do you have a question about the 61622 and is the answer not in the manual?
Questions and answers