Table of Contents
Advertisement
Advertisement
Table of Contents

Summary of Contents for Movex Track-O Twin-Track 47
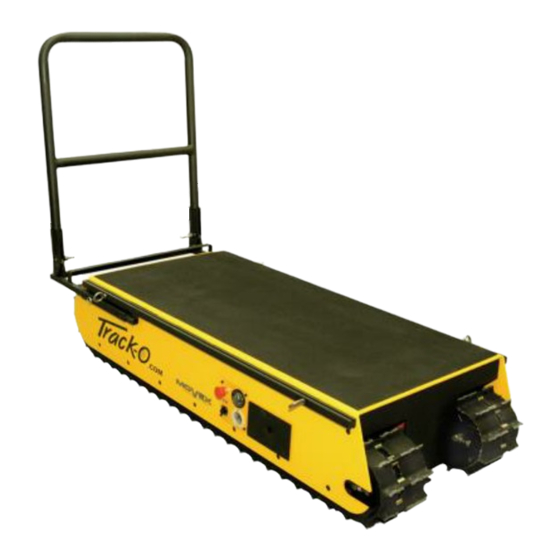
- Page 1 Track-O «Twin-Track 47 & 66» OPERATING MANUAL 2011MAY...
-
Page 2: Table Of Contents
SPECIFICATIONS ....................9 ELECTRIC CIRCUIT ................... 10 ELECTRIC PANEL ..................... 11 REMOTE CONTROLS ................12 - 16 Button Functions ..................12 Frequency Chart ..................13 Wired Remote Control ................14 Wireless Remote Control ..............15 - 16 Movex Innovation Inc. - Page 3 Track-O Spare Parts ................... 27 Options ...................... 28 REGULAR MAINTENANCE Tightening of Tracks ................29 - 30 Replacing the Tracks ................. 31 Cleaning the Interior ................32 - 34 Replacing the batteries ..............35 - 37 Disposing the batteries ................37 Movex Innovation Inc.
-
Page 4: Getting Started / Twin-Track 66
DURING DELIVERY a) Remove drawer located on the left side of the Track-O VIEW THROUGH DRAWER OPENING b) Connect grey plugs as shown above. Note: Before replacing drawer, read next step: Putting Breaker on «ON» position (next page) Movex Innovation Inc. -
Page 5: Putting Breaker To "On" Position
GETTING STARTED / TWIN-TRACK 66 «ON» UTTING REAKER TO POSITION a) Remove drawer located on the left side of the Track-O VIEW THROUGH DRAWER OPENING b) Turn yellow breaker switch to «ON» position. c) Replace drawer. Movex Innovation Inc. -
Page 6: Getting Started / Twin-Track 47
Remove the Control Panel situated on the left side of the Track-O. VIEW THROUGH OPENING b) Connect grey plugs as shown above. Note: Before replacing panel, read next step: Putting Breaker on «ON» position (next page). Movex Innovation Inc. -
Page 7: Putting Breaker To "On" Position
GETTING STARTED / TWIN-TRACK 47 «ON» UTTING REAKER TO POSITION a) Remove the Control Panel situated on the left side of the Track-O VIEW THROUGH OPENING b) Turn yellow breaker switch to «ON» position. c) Replace Control Panel. Movex Innovation Inc. -
Page 8: Charging The Batteries
AFETY REASONS DO NOT OPERATE THE RACK WHILE IT IS PLUGGED However, in case of an emergency the Track-O can operate while it is plugged-in. FOR SAFETY REASONS, BEFORE OPERATING THE TRACK-O PLEASE READ THE OPERATING MANUAL Movex Innovation Inc. -
Page 9: Specifications
Full recharge time/battery 360 min. 360 min. Continuous Run-Time 3 hours 3 hours Storage Leverage Arm Drawer Adjustable (Track-O Retention 66 only) Backrest Control Panel Front Rear Always put Front-end on the elevated part of an inclined surface Movex Innovation Inc. -
Page 10: Electric Circuit
ELECTRIC CIRCUIT Movex Innovation Inc. -
Page 11: Electric Panel
POSITION 2. PRESS THE EMERGENCY RED BUTTON ON THE WIRELESS REMOTE CONTROL AND THEN RE-ACTIVATE THE MACHINE ON THE WIRELESS REMOTE CONTROL 3. CHECK THE BATTERIES OF THE REMOTE CONTROL. IF THE PROBLEM PERSISTS OBTAIN TECHNICAL SUPPORT. Movex Innovation Inc. -
Page 12: Remote Controls
STOP BUTTON BE PRESSED (E ITHER ON THE RACK OR ON IRELESS EMOTE ONTROL OR BOTH THIS WILL AVOID AN UNWANTED AND DANGEROUS MOVEMENT OF THE TRACK-O CAUSED BY AN ACCIDENTAL PRESSING OF A BUTTON ON THE WIRELESS REMOTE CONTROL. Movex Innovation Inc. -
Page 13: Frequency Chart
431.4775 434.4200 437.3625 428.8025 431.7450 434.6875 437.6300 429.0700 432.0125 434.9550 437.8975 429.3375 432.2800 435.2225 438.1650 429.6050 432.5475 435.4900 438.4325 429.8725 432.8150 435.7575 430.1400 433.0825 436.0250 430.4075 433.3500 436.2925 430.6750 433.6175 436.5600 430.9425 433.8850 436.8275 431.2100 434.1525 437.0950 Movex Innovation Inc. -
Page 14: Wired Remote Control
Right track moves in Reverse). = LEFT TURN (Right track will move forward while Left track is stopped. + Turbo = LEFT TURN on the spot, in a circle (Right track will move Forward while Left track moves in Reverse). Movex Innovation Inc. - Page 15 (pressed half way) = Left turn (Right track will move forward while Left track is stopped. (full pressure) Left = Left turn in circle (Right track moves forward and track moves in opposite direction). Movex Innovation Inc.
- Page 16 Right track moves in reverse at slow speed. + (regardless of pressure) = Gradual LEFT turn in reverse (Right track will move in reverse at fast speed while Left track moves in reverse at slow speed. Movex Innovation Inc.
-
Page 17: Operating Instructions
TRACK-O and the load. The Track-O «Twin-Track 47» weighs 630 lbs/286 kg and «Twin-Track 66» weighs 820 lbs/ 372 The batteries must be sufficiently charged (as indicated by the charge level indicator). Movex Innovation Inc. -
Page 18: Prior To Moving A Load With The Track-O Twin-Track
The Track-O should not be used in environments containing hazardous concentrations of metal dust, including aluminium, magnesium, and their commercial alloys, other metals of similarly hazardous characteristics, or in environments containing black carbon, coal or coke dust. Movex Innovation Inc. -
Page 19: Ambient Operating Air Temperature
With all emergency buttons on the «OFF» position In a locale with limited access Where it is not exposed to rain or snow In a locale with an ambient temperature between -10° C (14° F) and 30° C (86° Movex Innovation Inc. - Page 20 O WILL BE MOVING UP AND DOWN IN THE SAME – DIRECTION FOR EXAMPLE GOING DOWNHILL FRONT END FIRST AND THEN GOING UP – HILL FRONT END FIRST THE LOAD MUST BE PLACED AT THE CENTRE OF THE TRACK Movex Innovation Inc.
-
Page 21: Positioning A Load On The Track-O
9. Place the “ON-OFF” switch to the “START” position. Press and button for reverse. IN ALL CASES, NEVER STAND BELOW THE TRACK-O AND ITS LOAD. IF THE LOAD WERE TO FALL YOU COULD BE SEVERELY OR MORTALLY INJURED. Movex Innovation Inc. -
Page 22: Utilizing The Anchoring Rings
Positioning the Anchoring Rings as shown in the picture may result in the rings breaking and could cause the load to fall off the Track-O. WARNING FOR SAFETY REASONS ALWAYS ENSURE THAT THE ANCHORING RINGS ARE PLACED CORRECTLY. Movex Innovation Inc. -
Page 23: Climbing With A Load
11. Apply more downward pressure (by pushing down more firmly) on the «Leverage Arm». The TRACK-O will then tip forward and come to rest horizontally on the landing (with its rear end projecting out over the edge). 12. Resume the forward motion. Movex Innovation Inc. - Page 24 To protect the first step and to reduce the amount of power needed to lift the load off the ground and on to the first step, place a piece of wood (e.g. 4 in x 4 in / 10cm x 10cm) on the ground in front of the first step. Movex Innovation Inc.
-
Page 25: Descending With A Load
11. While remaining in a safe position above the device, raise the «Leverage Arm» so that it will not hit the steps when the TRACK-O reaches the bottom of the stairs or an inclined surface. 12. Resume the slow downward progression with caution. Movex Innovation Inc. - Page 26 Before the TRACK-O reaches the bottom, put a piece of wood (4 x 4 / 10 x 10 cm) on the last two steps to avoid a sudden drop when it reaches the floor (to avoid damaging the load). Movex Innovation Inc.
-
Page 27: Track-O Spare Parts
Electric Harness (Twin-Track) Drive (100 Amp - Twin-Track) Battery - 85 Amp (Twin-Track) Battery charger 110-240 V, 24 V DC, 50/60 Hz, 12/6 A Frame Rubber Cover for Cab (Twin 47) Rubber Cover for Cab (Twin 66) Movex Innovation Inc. -
Page 28: Options
Twin Track 47 Options Wired Remote Control (8' cord) Included Included Wireless Remote Control Available Available Inclinometre Available Available Lateral Attachments Available Available Anchoring Rings Available Available Front Handle Included Included Backrest Available Available Storage Drawer Not Applicable Included Movex Innovation Inc. -
Page 29: Regular Maintenance
1) Tracks should be tightened on a regular basis. Tight tracks ensure maximum performance. 2) The track tension bolts are at the back of the Track-O and are accessed without removing the cab. There are four tension bolts: each track has two tension bolts, one on each side Movex Innovation Inc. - Page 30 4) To ensure both sides are equally tightened, measure the space from the shaft to the tension bolt head. This space should be equal for both sides 5) Once the track is tight, ensure bolt is tightened against the shaft. Movex Innovation Inc.
-
Page 31: Replacing The Tracks
Remove the aluminium cabinet (2 people required). 3) Loosen the track tensioner with a ¾ inch wrench. 4) Remove the screws holding the tensioner support and move the support forward approximately 6 inches / 15 cm. 5) Remove the track. Movex Innovation Inc. -
Page 32: Cleaning The Interior
5/32 inch Allen Key 2) Un-plug wires from electric panel. 3) Remove rubber caps and un-screw 5 bolts on the top of the cab and the two bolts on the back-side using a 3/16 inch Allen Key. Movex Innovation Inc. - Page 33 6) Remove dirt from inside the machine using compressed air or a vacuum cleaner. NOTE: I N CASES WHERE MUD HAS ACCUMULATED INSIDE PRIOR TO USING THE OMPRESSED IR OR ACUUM LEANER OSING THE INTERIOR WITH WATER WILL REMOVE MOST MUD ACCUMULATION See instructions next page: Movex Innovation Inc.
- Page 34 Drives so that they are not accidentally sprayed with water Once the mud has been removed from the Track-O interior, the cleaning process can be completed with compressed air or a vacuum cleaner. Movex Innovation Inc.
-
Page 35: Replacing The Batteries
5/32 inch Allen Key 2) Un-plug wires from electric panel. 3) Remove rubber caps and un-screw 5 bolts on the top of the cab and the two bolts on the back-side using a 3/16 inch Allen Key. Movex Innovation Inc. - Page 36 HE WRENCH SHOULD BE HANDLED WITH CARE SO AS TO NOT TOUCH BOTH BATTERY POSTS AT THE SAME TIME HIS COULD CAUSE AN ELECTRIC SHOCK AND POSSIBLE INJURY 7) Remove the cable clamps from all battery posts. Movex Innovation Inc.
-
Page 37: Disposing The Batteries
When changing the batteries it is important to dispose of the old batteries in an environmentally friendly and legal manner. Local battery dealers may accept to take the old batteries. If you do not know how or where to dispose of the batteries, contact your local municipal authorities for proper instructions. Movex Innovation Inc.
Need help?
Do you have a question about the Track-O Twin-Track 47 and is the answer not in the manual?
Questions and answers