Advertisement
Advertisement
Table of Contents

Summary of Contents for Victure VD300
- Page 1 User Manual VD300 Video Doorbell (with hardwired installation kit)
- Page 3 24 months! Lifetime professional tech support is provided by Victure. Prefer Video? Visit our YouTube Channel ‘Victure Vid eo D oorbell ’ for the instructional videos. You could also visit the link below for our YouTube Channel: https://bit.ly/2U19RXQ...
-
Page 4: Table Of Contents
Contents Package Content Meet the Doorbell Preparation In-app Setup Hardwired Installation How it works Wiring the Chime Kit Mark the install location Install the mounting bracket Using your Doorbell Troubleshooting Need Help? FCC Certification Information... -
Page 5: Package Content
② ③ ④ Video Doorbell (with hardwired installation kit) ⑤ ⑥ ⑦ ⑧ ⑨ ⑩ ① ⑥ VD300 Doorbell Double-sided Tape ② Mounting Bracket ⑦ Reset Pin & Security Screw ③ Hardwired Installation Kit ⑧ Screws ④ ⑨ USB Cable Screwdriver ⑤... - Page 6 Details for Hardwired Installation Kit ① ② ③ ④ ⑤ ① Chime Kit ② Wire Extensions ④ Wire Nut Double-sided Tape ③ ⑤ 2 Metal Parts and 2 Screws...
-
Page 7: Meet The Doorbell
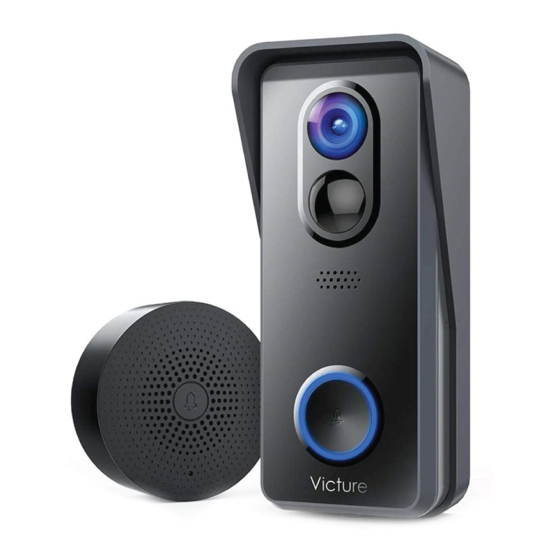
Meet the Doorbell ① ② ⑩ ③ ⑥ ④ ⑤ ⑦ ⑨ ⑧ ① ⑦ Charging Indicator Camera ② ⑧ PIR motion Sensor Micro USB Port ③ Speakers ⑨ Reset Hole ④ ⑩ Hard-wired Power Port Status Indicator ⑤ SD Card Slot Doorbell Button Battery Compartment ⑥... -
Page 8: Preparation
Preparation Insert the SD card 1. Take out the mounting bracket by pushing from the back of the door- bell. ① ② 2. Unscrew the battery compartment lid with the supplied screwdriver. 3. Insert the Micro SD card to the SD card slot. Tip: Doorbell supports class 10 micro SD card from 8G to 128G. - Page 9 Insert the battery Place the new battery in the battery compartment with correct polarity, and tighten the lid of the battery compartment securely with screws. Please make sure the lid of the battery compartment is tightened Tip: with screws, so that there won't be any water leakage issue.
- Page 10 Charge your Victure doorbell Charge the doorbell before installation using the provided USB cable. The small charging indicator next to the USB port will glow blue once fully charged. If you can’ t wait to play with your doorbell, go ahead and set it up. But, we recommend fully charging it for about 8-10 hours before installation.
-
Page 11: In-App Setup
Download the App The CloudEdge app will walk you through setting up and manage your Victure Video Doorbell. Please search ‘CloudEdge’ in the Apple Store or Google Play. You could also download the app by scanning the QR code to download the app. - Page 12 You could also try to use a new email. 2. Add doorbell Please tap the ‘+’ icon to add the device. Devices Tap ‘+’ Add When prompted, select ‘doorbell’ and choose VD300 doorbell.
- Page 13 3. Reset the doorbell and tear off the protective film: When switching or connecting to a new network for the doorbell, please perform a hard reset on your doorbell by inserting the reset pin into the Reset Hole of the doorbell and hold for 5 seconds to reset the doorbell and pair with the cell phone.
- Page 14 2. If you could not pair the doorbell with your app, please check whether your network is 2.4GHz and the make sure the network signal is strong. Try it out! After setup, push the button on the front of your Victure Doorbell to see video from the camera in the CloudEdge app. Tip: 1.
-
Page 15: Hardwired Installation
Perform the in-app setup for your Victure's video doorbell For more details, please check the user manual or follow the in-app instruction for your Victure's video doorbell about pairing the doorbell with the app. Note: Please choose ‘No’ in the app for the mechanical doorbell option if you do NOT connect the doorbell with the mechanical doorbell system. -
Page 16: Wiring The Chime Kit
Wiring the Chime Kit 1. Turn off the circuit breaker for your internal doorbell. Wiring your doorbell to an internal doorbell is optional. If you do so, make sure your existing doorbell wires are working, then shut off power at the breaker before connecting your existing doorbell wires to the small wire terminals inside the mounting bracket. - Page 17 3. Loosen the internal doorbell's front terminal (usually labeled as "FRONT", "F", "1", or "C1") and transformer (usually labeled as "TRANS", "T", "AC", or "0") terminal screws on your internal doorbell. Connect one wire from the Chime Kit to the "Front" terminal, and the other wire to the "Transformer"...
- Page 18 5. Replace the cover on your internal doorbell.
-
Page 19: Mark The Install Location
Note: Please turn OFF the circuitbreaker for your internal doorbell! Tips: If you are installing your Victure doorbell in a house with siding or in a house where the door is atop a set of stairs, please purchase the additional wedge mount to angle your doorbell down. -
Page 20: Install The Mounting Bracket
Install the mounting bracket Accessories shown in these steps will be included in the doorbell package, if not labeled. 1. Take out the mounting bracket by pushing the doorbell from its back. 2. Mark the place to install the screws. 3. - Page 21 4. Connect the metal parts and the wires with mounting bracket Connect the wires coming out of your wall to the screws on the back of your Victure doorbell. Either wire can connect to either screw. The order doesn't matter.
- Page 22 6. Feed all the wires (and the wire nuts, if you used them) into your wall and secure your mounting bracket on the wall using two screws. Please drive the screws into the anchors or directly into the wall until they're flush with the mounting bracket and the bracket is flat against the wall.
-
Page 23: Using Your Doorbell
Using your Doorbell In the CloudEdge app, tap your Victure doorbell to view its settings. Here you could configure your doorbell to meet your needs. Settings Back < 05746608 2020-01-01 00:00:00 Bit Rate:6KB/s WiFi:95% Live History Cloud Screenshot Intercom Record Body Detection Intercom--speak to visitors and hear what they have to say. - Page 24 Automatic Power-Saving Mode when the doorbell does not detect anything for a long time. You could re-activate and control the doorbell remotely with your CloudEdge app. * Switch these functions on or off on this screen. Answering your doorbell < Live Stream Device Name 05746608...
- Page 25 Settings < Settings Device Name 05746608 pps1d1fbc93bb49e419c < Receive Notifications < Device Share < Host Leaves Message < Cloud Storage Service < Network Information < SD Card • Device Share--let family or friends answer live events and view recordings by adding the user account as a friend and selecting the user to share.
- Page 26 • Speaker Volume--adjust the volume of the visitor’s sound. For higher visitor’s sound volume, you could mute the microphone function. • Night Vision-- view the crisp images no matter day or night. The external light source will be recommended for better night vision quality. •...
-
Page 27: Troubleshooting
Troubleshooting Q: I’ve installed my doorbell, but it won’t turn on? A: Please ensure that the doorbell has enough power. If you power the doorbell with wires, please make sure to connect power kit properly, and the connected power is 12V-24V AC. If all the things have been checked, but you’... -
Page 28: Need Help
Need Help? For questions, support, or warranty claims, contact us at the address below or visit govicture.com. Please include your Amazon order number and product model number. vd.support@govicture.com... -
Page 29: Fcc Certification Information
FCC Certification Information Warning: Changes or modifications to this unit not expressly approved by the party responsible for compliance could void the user’s authority to operate the equipment. Tip: This device complies with part 15 of the FCC Rules. Operation is subject to the following two conditions: (1) This device may not cause harmful interference, and (2) this device must accept any interference received, including interference that may cause undesired operation. - Page 30 —Connect the equipment into an outlet on a circuit different from that to which the receiver is connected. —Consult the dealer or an experienced radio/TV technician for help. RF exposure compliance statement: This device has been evaluated to meet the general RF exposure requirement, it can be used in portable exposure condition without restriction.
Need help?
Do you have a question about the VD300 and is the answer not in the manual?
Questions and answers
My mechanical bell hummus and won’t ring