Table of Contents
Advertisement
Available languages
Available languages
Quick Links
Art.-Nr.: 16257
Kfz-Dashboard-Kamera
Bedienungsanleitung . . . . . . . . . . . . . . . . . . 2
Article number 16257
Vehicle dashboard camera
Operating instructions . . . . . . . . . . . . . . . . . . 9
Réf. 16257
Caméra de tableau de bord pour voiture
Manuel de l'opérateur . . . . . . . . . . . . . . . . . 17
Art. nr. 16257
Dashboardcamera
Istruzioni per l'uso . . . . . . . . . . . . . . . . . 25
Cod. art. 16257
Dashboard Camera
Istruzioni per l'uso . . . . . . . . . . . . . . . . . 33
1
Advertisement
Chapters
Table of Contents

Related Manuals for EUFAB 16257


Summary of Contents for EUFAB 16257
- Page 1 Art.-Nr.: 16257 Art. nr. 16257 Kfz-Dashboard-Kamera Dashboardcamera Bedienungsanleitung ....2 Istruzioni per l‘uso ....25 Article number 16257 Cod.
-
Page 2: Table Of Contents
KFZ-DASHBOARD-KAMERA INHALT 1. BESTIMMUNGSGEMÄSSER GEBRAUCH 2. LIEFERUMFANG 3. SPEZIFIKATIONEN 4. SICHERHEITSHINWEISE 5. SYMBOLERKLÄRUNG 6. BEDIENUNGSANLEITUNG 6.1 ÜBERSICHT 6.2 SPEICHERKARTE 6.3 MONTAGE 6.4 ANSCHLIESSEN DER KAMERA 6.5 FUNKTIONEN 6.6 ABSPIELEN/ANSEHEN DER AUFZEICHNUNGEN 6.7 ERSETZEN DER SICHERUNG 6.8 FEHLERSUCHE 7. WARTUNG UND PFLEGE 8. -
Page 3: Symbolerklärung
Objektiv: Weitwinkel, 120 Grad Fotoformat: JPEG Videoformat: AVI Videoauflösung: 1080P FHD, HD, 720P, WVGA, VGA Videoausgang: AV-Buchse, 2,5 mm Fotoauflösung: max. 12 MP Speicher: micro-SD Karte bis max. 32 GB, Class 10 (nicht im Lieferumfang enthalten) 4. SICHERHEITSHINWEISE • Das Warndreieck kennzeichnet alle für die Sicherheit wichtigen Anweisungen. Befolgen Sie diese immer, ande- renfalls könnten Sie sich verletzen oder das Gerät könnte beschädigt werden. -
Page 4: Speicherkarte
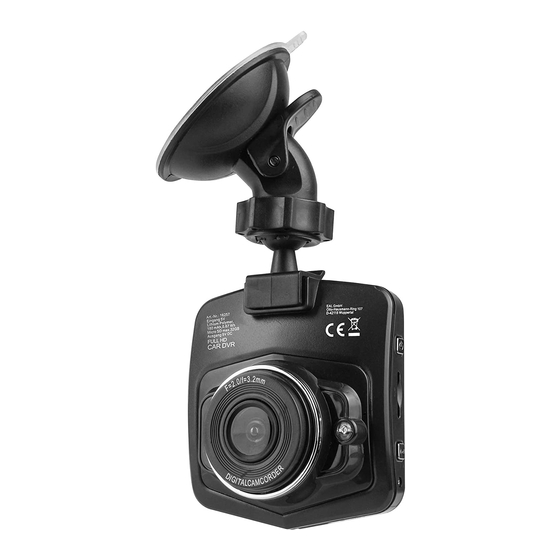
EIN/AUS-Schalter Montageschuh 11 Cursor-Taste nach unten Steckplatz für Speicherkarte USB-Buchse 12 Parkmodus-Taste Menütaste AV-Ausgang 13 Cursor-Taste nach oben Objektiv Display 14 Modustaste Power-LED 10 OK-Taste 15 Saugfuß 16 Hebel 17 Überwurfmutter / Kugelgelenk 18 Kameraaufnahme 19 USB-Stecker 20 Kfz-Stecker Bild 2: Saugfußhalterung Bild 3: Ladekabel 6.2 SPEICHERKARTE Einsetzen der Speicherkarte... - Page 5 Menütaste (Position 3 in der Übersicht) Im Standby-Modus: Kurzes Drücken öffnet das Menü für die Videoeinstellungen. Mit den Cursor- Tasten (Positionen 11 und 13 in der Übersicht) können Sie die verschiedenen Menüpunkte auswählen. Durch Drücken der OK-Taste wird der ausgewählte Menüpunkt geöffnet.
- Page 6 Weißabgleich: Stellen Sie den Weißabgleich für Ihre Photos ein, um möglichst farbechte Bilder zu erhalten. Automatisch – Sonnenlicht – bewölkter – Wolfram (Glühlampenlicht) – fluoreszierend (Leuchtstoffröhrenlicht) ISO: Stellen Sie die Empfindlichkeit der Kamera ein. Automatisch – 100 – 200 Belichtungsausgleich: Hier können Sie die Helligkeit der Photos einstellen.
-
Page 7: Abspielen/Ansehen Der Aufzeichnungen
Format: Die Speicherkarte wird formatiert, alle Daten werden gelöscht. stornieren – bestätigen Die Standardeinstellungen: Die Werkseinstellungen der Kamera werden wieder hergestellt. stornieren – bestätigen Version: Zeigt die Softwareversion der Kamera an. Modus-Taste (Position 14 in der Übersicht) Durch mehrfaches drücken der Modustaste können Sie die Funktionsmodi in folgender Reihenfolge wechseln: Videomodus –... -
Page 8: Wartung Und Pflege
Die Speicherkarte ist nicht korrekt ein- Setzen Sie die Speicherkarte richtig ein gesetzt Schreibschutz der Speicherkarte aktiviert Deaktivieren Sie den Schreibschutz der Speicherkarte Die Speicherkarte ist nicht formatiert Formatieren Sie die Speicherkarte (Format im Abschnitt 6.5 Funktionen) Kein Speichern möglich Der freie Speicherplatz ist zu gering Löschen Sie einige Dateien um Speicherplatz freizugeben... -
Page 9: Proper Use Of The Product
VEHICLE DASHBOARD CAMERA CONTENTS 1. PROPER USE OF THE PRODUCT 2. SCOPE OF DELIVERY 3. SPECIFICATIONS 4. SAFETY PRECAUTIONS 5. EXPLANATION OF SYMBOLS 6. OPERATING INSTRUCTIONS 6.1 OVERVIEW 6.2 MEMORY CARD 6.3 INSTALLATION 6.4 CONNECTING THE CAMERA 6.5 FUNCTIONS 6.6 PLAYING/VIEWING THE RECORDINGS 6.7 REPLACING THE FUSE 6.8 TROUBLESHOOTING 7. -
Page 10: Specifications
3. SPECIFICATIONS Dimensions: 35 x 65 x 70 [mm] Weight: 0.170 kg Power supply: 12 – 24 V DC Battery: Lithium polymer, Monitor: LCD, 5.6 cm (2.2 inches) 180 mAh, 0.67 Wh Lens: Wide angle, 120 degrees Photo format: JPEG Video format: Video resolution: 1080P FHD, HD, 720P, WVGA, VGA... -
Page 11: Operating Instructions
6. OPERATING INSTRUCTIONS 6.1 OVERVIEW Figure 1: Camera ON/OFF switch AV output Slot for memory card Display Menu button 10 OK-button Lens 11 Cursor button, down Power-LED 12 Parking mode button Mounting point 13 Cursor button, up USB socket 14 Mode button 15 Suction base 16 Lever 17 Coupling nut / ball joint... -
Page 12: Installation
6.3 INSTALLATION Clean the section of the windscreen where the camera is to be mounted. Put the camera mount (Position 18 in the overview) into the mounting point (Position 6 in the overview) of the camera. Press the suction base (Position 15 in the overview) against the windscreen. - Page 13 Gravity sensor: When the gravity sensor is switched on, a camera in Parking mode will automatically record a 20 second video in the event of an impact (this recording is not automatically deleted). Three levels may be set for the severity of the impact.
- Page 14 Camera settings (symbol shows a screwdriver in the top left of the display): Stop mode: If the stop mode is activated, the video recording is saved automatically in the event of an impact (this recording is not deleted automatically). Three levels may be set for the severity of the impact.
-
Page 15: Playing/Viewing The Recordings
6.6 PLAYING/VIEWING THE RECORDINGS In order to view the recorded videos and photos, press the Mode button to switch to Play mode. Use the cursor buttons to select the desired video or photo. Press the OK button to view the video or photo. In order to view the recordings on your computer, insert the memory card into an appropriate card reader and connect to your computer. -
Page 16: Maintenance And Care
The lens of the camera is dirty Carefully clean the lens Strong light is acting directly on the As soon as the strong light dissipates, The monitor does not show a lens of the camera the image quality will be OK clean image Incorrect light frequency set Set the appropriate light frequency... -
Page 17: Utilisation Conforme
CAMÉRA DE TABLEAU DE BORD POUR VOITURE SOMMAIRE 1. UTILISATION CONFORME 2. MATÉRIEL FOURNI 3. SPÉCIFICATIONS 4. CONSIGNES DE SÉCURITÉ 5. EXPLICATION DES SYMBOLES 6. NOTICE D‘UTILISATION 6.1 VUE D‘ENSEMBLE 6.2 CARTE MÉMOIRE 6.3 MONTAGE 6.4 RACCORDEMENT DE LA CAMÉRA 6.5 FONCTIONS 6.6 LECTURE/VISIONNAGE DES ENREGISTREMENTS 6.7 REMPLACEMENT DU FUSIBLE... -
Page 18: Matériel Fourni
2. MATÉRIEL FOURNI 1 x Caméra de tableau de bord pour voiture 1 x Support à ventouse pour pare-brise 1 x Câble de raccordement 1 x Mode d’ e mploi 3. SPÉCIFICATIONS Dimensions : 35 x 65 x 70 [mm] Poids : 0,170 kg Alimentation en... -
Page 19: Explication Des Symboles
5. EXPLICATION DES SYMBOLES Correspond aux L‘appareil électrique marqué ne peut Lire le mode directives de la CE pas être jeté dans les ordures ménagères d‘emploi 6. NOTICE D‘UTILISATION 6.1 VUE D‘ENSEMBLE Figure 1: Caméra Interrupteur MARCHE/ARRÊT Sortie AV Emplacement pour carte mémoire Écran Touche Menu 10 Touche OK... -
Page 20: Montage
6.3 MONTAGE Nettoyez l‘endroit du pare-brise où la caméra sera installée. Insérez le support de la caméra (position 18 dans la vue d’ e nsemble) dans le patin de montage (position 6 dans la vue d‘ensemble) de la caméra. Poussez la ventouse (position 15 dans la vue d‘ensemble) contre le pare-brise. - Page 21 Vidéo audio : Allumage/arrêt de son Éteindre – ouvert (allumé) Vignette de date : La date est intégrée dans la vidéo. Éteindre – ouverte (allumée) Capteur de gravité : Lorsque le capteur de gravité est activé, la caméra en mode de stationnement démarre un enregistrement de 20 secondes en cas de choc (cet enregistrement n’...
- Page 22 En mode veille : Appuyez deux fois rapidement pour ouvrir le menu des réglages de la caméra. Les touches curseur (positions 11 et 13 dans la vue d’ e nsemble) permettent de sélectionner différents points du menu. Appuyez sur la touche OK pour ouvrir le point de menu sélectionné.
-
Page 23: Lecture/Visionnage Des Enregistrements
6.6 LECTURE/VISIONNAGE DES ENREGISTREMENTS Pour visionner les vidéos et photos enregistrées, passez en mode lecture en appuyant sur la touche de mode. À l’aide des touches curseur, sélectionnez la vidéo ou la photo souhaitée. Appuyez sur la touche OK pour visionner la vidéo ou la photo sélectionnée. -
Page 24: Maintenance Et Entretien
L’ o bjectif de la caméra est encrassé Nettoyez l’ o bjectif avec précaution Une lumière forte pénètre directe- La qualité de l’image redevient ment dans l’ o bjectif de la caméra correcte dès que la forte incidence L’ é cran n’affiche pas une lumineuse est réduite image claire Mauvaise fréquence lumineuse... - Page 25 DASHBOARDCAMERA INHOUD 1. REGLEMENTAIR GEBRUIK 2. LEVERINGSOMVANG 3. SPECIFICATIES 4. VEILIGHEIDSINSTRUCTIES 5. UITLEG BIJ DE SYMBOLEN 6. GEBRUIKSAANWIJZING 6.2 GEHEUGENKAART 6.3 MONTAGE 6.4 DE CAMERA AANSLUITEN 6.5 FUNCTIES 6.6 DE OPNAMES AFSPELEN/BEKIJKEN 6.7 ZEKERING VERVANGEN 6.8 PROBLEMEN OPLOSSEN 7. ONDERHOUD EN VERZORGING 8.
- Page 26 2. LEVERINGSOMVANG 1 x dashboardcamera 1 x zuignaphouder voor de voorruit 1 x aansluitkabel 1 x gebruiksaanwijzing 3. SPECIFICATIES Afmetingen: 35 x 65 x 70 [mm] Gewicht: 0,170 kg Voedingsspanning: 12 – 24 V DC Accu: lithium-polymeer, 180 mAh, 0,67 Wh Fotoformaat: JPEG Monitor: LCD, 5,6 cm (2,2 inch)
- Page 27 6. GEBRUIKSAANWIJZING 6.1 OVERZICHT Afb. 1: Camera Aan-/uitschakelaar AV-uitgang Sleuf voor geheugenkaart Display Menutoets 10 OK-toets Lens 11 Cursortoets omlaag Power-led 12 Parkeermodustoets Montageschoen 13 Cursortoets omhoog USB-poort 14 Modustoets 15 Zuignap 16 Hendel 17 Wartelmoer/kogelgewricht 18 Camerahouder 19 USB-stekker 20 Autostekker Afb.
- Page 28 6.3 MONTAGE Reinig het gedeelte van de voorruit waarop de camera moet worden bevestigd. Plaats de camerahouder (positie 18 in het overzicht) in de montageschoen (positie 6 in het overzicht) van de camera. Druk de zuignap (positie 15 in het overzicht) tegen de voorruit. Zet de hendel (positie 16 in het overzicht) om. Draai de wartel- moer (positie 17 in het overzicht) op het kogelgewricht los.
- Page 29 Zwaartekrachtsensor: Bij ingeschakelde zwaartekrachtsensor start de camera in parkeermodus bij een botsing automatisch een video-opname van 20 seconden (deze opname wordt niet automatisch gewist). U kunt drie niveaus voor de sterkte van de botsing instellen. uitschakelen – 2G (zachte botsing) – 4G – 8G (harde botsing) U verlaat het menu door op de modustoets te drukken.
- Page 30 Stop-modus: Bij ingeschakelde stop-modus wordt de video-opname bij een botsing automatisch opgeslagen (deze opname wordt niet automatisch gewist). U kunt drie niveaus voor de sterkte van de botsing instellen. uitschakelen – 2G (zachte botsing) – 4G – 8G (harde botsing) Datum/tijd: Stel de datum en tijd in met de cursortoetsen en bevestig elke invoer door op de OK-toets te drukken.
- Page 31 6.7 ZEKERING VERVANGEN Draai de punt van de 12V-stekker van de laadkabel linksom totdat deze loskomt van de stekker en verwijder deze. De zekering is nu vrij en kan uit de stekker worden getrokken. Vervang deze door een nieuwe zekering van gelijke waarde en schroef de punt weer op de stekker.
- Page 32 7. ONDERHOUD EN VERZORGING Verwijder vóór het reinigen de aansluitkabel van de camera. Reinig de behuizing met een zachte, droge doek. Gebruik geen agressieve reinigings- of oplosmiddelen. Laat nooit vloeistoffen in de behuizing terechtkomen. Bewaar de dashboardcamera op een droge plaats wanneer deze niet wordt gebruikt. Stel de camera niet bloot aan sterke temperatuurschommelingen.
- Page 33 DASHBOARD CAMERA INDICE 1. USO CONFORME 2. FORNITURA 3. SPECIFICHE 4. AVVERTENZE DI SICUREZZA 5. SPIEGAZIONE DEI SIMBOLI 6. ISTRUZIONI PER L‘USO 6.1 VISTA D‘INSIEME 6.2 SCHEDA DI MEMORIA 6.3 MONTAGGIO 6.4 COLLEGAMENTO DELLA VIDEOCAMERA 6.5 FUNZIONI 6.6 RIPRODURRE/CONTROLLARE LE REGISTRAZIONI 6.7 SOSTITUZIONE DEL FUSIBILE 6.8 RICERCA GUASTI 7.
- Page 34 2. FORNITURA 1 camera per cruscotto 1 supporto a ventosa per il parabrezza 1 cavo di collegamento 1 manuale d’uso 3. SPECIFICHE Dimensioni: 35 x 65 x 70 [mm] Peso: 0,170 kg Alimentazione: 12 – 24 V DC Batteria ric.: ai polimeri di litio, 180 mAh, 0,67 Wh Monitor: LCD, 5,6 cm (2,2 pollici) Formato foto: JPEG...
- Page 35 6. ISTRUZIONI PER L‘USO 6.1 VISTA D‘INSIEME Figura 1: videocamera Interruttore ON/OFF Uscita AV Slot per scheda di memoria Display Tasto Menu 10 Tasto OK Obiettivo 11 Tasto direzionale verso il basso LED di potenza 12 Tasto modalità di parcheggio Slitta di montaggio 13 Tasto direzionale verso l‘alto Porta USB...
- Page 36 6.3 MONTAGGIO Pulire l‘area del parabrezza a cui deve essere fissata la videocamera. Inserire il supporto della videocamera (vista d‘insieme, posizione 18) nella slitta di montaggio (vista d‘insieme, posizione 6) della videocamera. Premere il supporto a ventosa (vista d‘insieme, posizione 15) contro il parabrezza. Ribaltare la leva (vista d‘insieme, posizione 16).
- Page 37 Audio del video: attiva/disattiva l‘audio off – aperto (attivato) Adesivo con data: la data viene visualizzata nel video. off – aperto (attivato) Sensore forza di gravità: quando il sensore di gravità è attivato, in caso di impatto, la videocamera avvia automaticamente una registrazione video di 20 secondi in modalità...
- Page 38 In modalità standby: premendo brevemente due volte si apre il menu delle impostazioni della camera. Con i tasti direzionali (vista d‘insieme, posizioni 11 e 13) si possono selezionare le singole voci del menu. Premendo il tasto OK si apre l‘opzione del menu selezionata.
- Page 39 6.6 RIPRODURRE/CONTROLLARE LE REGISTRAZIONI Per visualizzare i video e le foto registrate, attivare la modalità di riproduzione premendo il pulsante della modalità. Con i tasti direzionali si seleziona il video o la foto desiderata. Premere il tasto OK per vedere il video o la foto selezionata.
- Page 40 9. COME CONTATTARCI EAL GmbH +49 (0)202 42 92 83 0 info@eal-vertrieb.com Otto-Hausmann-Ring 107 www.eal-vertrieb.com +49 (0) 202 42 92 83 – 160 42115 Wuppertal, Germania © EAL GmbH, 16257, 08.2019...
Need help?
Do you have a question about the 16257 and is the answer not in the manual?
Questions and answers