Table of Contents
Advertisement
Advertisement
Table of Contents

Related Manuals for Apator Metra E-ITN 30


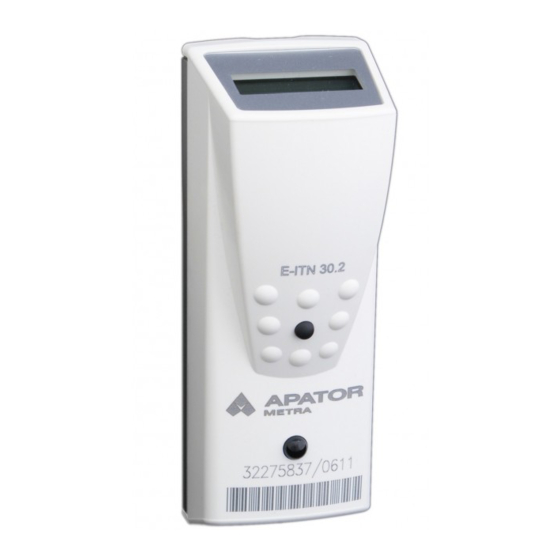
Summary of Contents for Apator Metra E-ITN 30
- Page 1 LECTRONIC HEAT COST ALLOCATOR WITH INTEGRATED RADIO TRANSMITTER E-ITN 30 Installation and service manual APATOR METRA s.r.o. Havlíčkova 919/24 787 64 Šumperk tel.: +420 583 718 111 fax: +420 583 718 150 e-mail: prodej@metra - su.cz www: http://www.metra - su.cz...
-
Page 2: Table Of Contents
4.5.1.9. Current time (E-ITN 30.2, 30.4 only).....................12 4.5.1.10. Display test (E-ITN 30.3 only)......................12 4.5.1.11. Average ambient temperature for the last billing period (E-ITN 30.3 only).........12 4.5.2. Structure of submenu with month values ( E-ITN 30.2, 30.4 only)..........13 4.5.3. Structure of submenu with month values (E-ITN 30.3 only)............13 4.5.4. - Page 3 NSTALLATION METHODS 7.1. Allocator installation..........................21 7.2. Allocator back plate..........................21 7.3. List of installation material........................22 7.4. E-ITN 30 mounting place on segmented and panel radiators..............23 7.4.1. Vertical position: ........................23 7.4.2. Horizontal position:........................23 7.5. Installation on segmented radiators...................... 24 7.5.1.
-
Page 4: Introduction
1. I NTRODUCTION E-ITN 30 is modern electronic device intended for ratio based allocation of heat cost in buildings with central heating system. The heat cost allocator E-ITN 30 uses the two-sensor measuring principle – integrates temperature difference between sensor of radiator surface temperature and sensor of surrounding temperature. -
Page 5: Device Description
Parameter can be set by manufacturer or before installation with Programming unit for changing allocator parameters of E-ITN 20.x, 30.x connected to PC. Radiator type (Kc) can be set in sleeping mode by pressing the button. E-ITN 30.3 ican be ordered after agreement with manufacturer only. Billing period is year. 2.3. T E-ITN 30.4... -
Page 6: Technical Specifications
≥ 4 °C Billing period year (E-ITN 30.2, E-ITN 30.3) month (E-ITN 30.4) Resulting rating factor K unified scale, K = 1 (E-ITN 30.2, E-ITN 30.4) individual scale (E-ITN 30.3) Calendar functions E-ITN 30.2 • consumption value in the last billing period •... - Page 7 Class of working cycle 1 (duty cycle percentage <0,1 %) Transmission length 8 ms Reading period E-ITN 30.2, E-ITN 30.3 • 30 - 36 seconds first month after the billing period beginning (frequent transmission) • 240 - 246 seconds rest of the year E-ITN 30.4...
-
Page 8: Construction
3.1. C ONSTRUCTION Electronic heat cost allocator E-ITN 30 complies with ČSN EN 834:1995. Allocator consist of cover and printed circuit board covered with mounting plate. Mounting plate is bolted with cover and secured with latch and seal.. -
Page 9: Operation Modes
When notice uPr appears, hold the button till notice --A - - is displayed and indicates submenu activation. Submenu activation and navigation in the items is described in chapter 4.2. Submenu navigation. Table 1: Submenu structure in sleeping mode, type E-ITN 30.2 a 30.4 Activation of working mode Allocator self test Table 2: Submenu structure in sleeping mode, type E-ITN 30.3... -
Page 10: Activation Of Working Mode
(because of power saving), press the button briefly to switch it on. In mode of waiting for start date, following actions can be performed: • allocator self test • displaying of: set radiator type, nominal radiator power and coefficient K (E-ITN 30.3 only) 10 / 46... -
Page 11: Submenu Structure In Mode Of Waiting For Start Date
For submenu activation and navigation between items see chapter 4.2. Submenu navigation. Allocator self test activation is described in chapter 4.3.1.2. Allocator self test. Radiator type selection E-ITN 30.3 is described in chapter 4.3.1.3. Setting of radiator type (E-ITN 30.3 only). -
Page 12: Value For Current Billing Period
. The test is important when the measured values are read visually. 4.5.1.11. Average ambient temperature for the last billing period (E-ITN 30.3 only) Average surroundings temperature is displayed as 24.4°C SM with accuracy of one decimal place. 12 / 46... -
Page 13: Structure Of Submenu With Month Values ( E-Itn 30.2, 30.4 Only)
„month value“ du is displayed press and hold the button till –A-- appear. After release, current month number - 0 is displayed. Table 9: Structure of submenu with month values, type E-ITN 30.2 a 30.4 Current month Value for the current billing period... -
Page 14: Menu Structure In Service Mode (E-Itn 30.3 Only)
–A-- appears. After release allocator will switch into the service mode. Table 11: Menu structure in the service mode, type E-ITN 30.3 Number of measuring cycles in one sensor mode 7526 SM Max. -
Page 15: Error Mode
E-ITN 30 Installation and service manual M2019/01a [EN] 4.6. E RROR MODE In error mode the notice Error is permanently displayed and allocator does neither measure temperatures, count the increase of consumption nor transmit measured data. Allocator just actualizes real time. Allocator switches from working mode to error mode automatically after registration of serious error (e.g. -
Page 16: Other Informations
(disassemble from back plate). 5.3. T RANSPORTATION E-ITN 30 allocators can be transported under following conditions: • devices can be transported by all usual covered means of transport •... -
Page 17: Storage
Installation and service manual M2019/01a [EN] 5.4. S TORAGE E-ITN 30 is an electrical device and can be stored under these conditions: • devices must be originally packed by manufacturer and individually stored in antistatic bags • storage temperature from +10 °C to +30 °C •... -
Page 18: Accompanying Documentation
Boxes are stored always cover up on the standard shipping pallets. Electronic heat cost allocator E-ITN 30 is sensitive to static electricity. For this reason, each allocator is shipped in antistatic packaging. Antistatic package should be removed just before installation. - Page 19 E-ITN 30 Installation and service manual M2019/01a [EN] Illustration 4: Packing sheet 19 / 46...
- Page 20 E-ITN 30 Installation and service manual M2019/01a [EN] E-ITN 30 INSTALLATION 20 / 46...
-
Page 21: Installation Methods
E-ITN 30 Installation and service manual M2019/01a [EN] 7. I NSTALLATION METHODS 7.1. A LLOCATOR INSTALLATION The back plate is mounted on the radiator using mounting material in compliance with EN 834:1995 and with Installation and service manual. Mounting material is provided by manufacturer and supplied with allocator. -
Page 22: List Of Installation Material
E-ITN 30 Installation and service manual M2019/01a [EN] 7.3. L IST OF INSTALLATION MATERIAL Mounting material is used to install allocator to the radiator. Manufacturer does not guarantee the accuracy of coefficient Kc when used a different installation material. Type... -
Page 23: E-Itn 30 Mounting Place On Segmented And Panel Radiators
7.4.2. Horizontal position: For both variants of vertical installation, place E-ITN 30 into the half of length L. In cause of odd number of the spaces, place E-ITN 30 into the gap closer to the end of the radiator, i.e. at radiator with 10 segments between 5. -
Page 24: Installation On Segmented Radiators
Clamp FONAL 7.5.1. Description of installation E-ITN 30 back plate should be installed on the radiator with clamps and bolts as follows: • place back plate into the final location and fix with clamp and bolt through the centre hole, •... -
Page 25: Installation Differences
For installation on radiators with larger distance between the segments (Svratouch radiator): • use clamp IV and insert the spacer 45 under E-ITN 30 back plate (Illustration 8: E-ITN 30 Mounting material for segmented radiators). c) For radiators with solid and long cells, as KUVAL radiators: •... -
Page 26: Installation On Panel Radiators
Washer 4 ČSN 02 1746.25 Bolt M3x12 7.6.1. Description of installation E-ITN 30 back plate should be installed on the panel radiators with two welded bolts thread M3 and special nuts as follows: • mark the place for both welding bolts on the radiator, •... - Page 27 E-ITN 30 Installation and service manual M2019/01a [EN] • tighten the nuts to a torque 1 Nm, • place the allocator into the back plate profile groove from top, align it with the base plate and push allocator to connect it with the back plate.
-
Page 28: Installation On Horizontal And Vertical Registers
Nut M3 6 Bolt M4x8 7.7.1. Installation description E-ITN 30 back plate should be installed on the tubular radiators with spacer, welded bolt M3x6 and nut M3, and two bolt M4x8: • mark the place for welding bolt on the radiator, •... -
Page 29: Proper E-Itn 30 Installation On Different Register Types
V. Ribbed or bare tube with more than two curves • 2x E-ITN 30 always in the beginning of the upper curve and in the end of the lower curve • in case of register welded into the frame, place E-ITN 30 on a vertical tube VI. - Page 30 III. Bare tube with more than two curves • 2x E-ITN 30 in the beginning of the first curve and in the end of the (last) upper curve • in case of register welded into the frame, place E-ITN 30 on a horizontal tube II.a...
-
Page 31: Model No. 1 - Cast Iron Radiators
E-ITN 30 Installation and service manual M2019/01a [EN] 7.8. M . 1 – C ODEL AST IRON RADIATORS Verified on: KALOR 500/110, manufacturer: ŽDB GROUP a.s., plant Viadrus Basic dimensions of the KALOR – 500x110 for 10 segments, data for correct allocator installation (mm): Height –... -
Page 32: Model No. 2 - Cast Iron Radiators With Flat Vertical Front Panel
E-ITN 30 Installation and service manual M2019/01a [EN] 7.9. M . 2 – C ODEL AST IRON RADIATORS WITH FLAT VERTICAL FRONT PANEL Verified on: KALOR 3, manufacturer: ŽDB GROUP a.s. , plant Viadrus Basic dimensions of the KALOR 3 for 10 segments, data for correct allocator installation (mm): Length - H Mounting distance –... -
Page 33: Model No. 3 - Cast Iron Radiators With Distance Pad
E-ITN 30 Installation and service manual M2019/01a [EN] 7.10. M . 3 – C ODEL AST IRON RADIATORS WITH DISTANCE PAD Verified on S-130, manufacturer: Romania Basic dimensions of the S-130 for 10 segments, data for correct allocator installation (mm): Height - H Montanan distance –... -
Page 34: Model No. 4 - Steel Radiators
E-ITN 30 Installation and service manual M2019/01a [EN] 7.11. M . 4 – S ODEL TEEL RADIATORS Verified on: NERIA 500/150, manufacturer: NERIA a.s., Hustopeče u Brna Basic dimensions of the NERIA 500/150 for 10 segments, data for correct allocator installation (mm): Height –... -
Page 35: Model No. 5 - Steel Radiators With Distance Pad
E-ITN 30 Installation and service manual M2019/01a [EN] 7.12. M . 5 – S ODEL TEEL RADIATORS WITH DISTANCE PAD Verified on: Svratouch 500/160, manufacturer: Dílo - Svratouch Basic dimensions of the SVRATOUCH 500/160 for 10 segments, data for correct allocator installation (mm):... -
Page 36: Model No. 6 - Panel Radiators With Shaped Front Side
E-ITN 30 Installation and service manual M2019/01a [EN] 7.13. M . 6 – P ODEL ANEL RADIATORS WITH SHAPED FRONT SIDE Verified on: RADIK, KLASIK mod, type 10, manufacturer: KORADO, a.s. Česká Třebová Basic dimensions of the RADIK, KLASIK modification, type 10 and data for correct allocator installation... -
Page 37: Model No. 7 - Panel Radiators With A Flat Front Panel
E-ITN 30 Installation and service manual M2019/01a [EN] 7.14. M . 7 – P ODEL ANEL RADIATORS WITH A FLAT FRONT PANEL Verified on: RADIK PLAN, VENTIL KOMPAKT mod, type 11, manufacturer : KORADO, a.s. Česká Třebová Basic dimensions of the RADIK, VENTIL KOMPAKT modification, type 11 PLAN VK and data for correct... -
Page 38: Model No. 8 - Tubular Radiators - Ladder
E-ITN 30 Installation and service manual M2019/01a [EN] 7.15. M . 8 – T ODEL UBULAR RADIATORS LADDER Verified on: K 750/1640, manufacturer: Thermal – trend, s.r.o. Basic dimensions of the K 750/1640 and data for correct allocator installation (mm):... -
Page 39: Model No. 9 - Tubular Radiators - Ladder With Oval Base
E-ITN 30 Installation and service manual M2019/01a [EN] 7.16. M . 9 – T – ODEL UBULAR RADIATORS LADDER WITH OVAL BASE Verified on: KDO 750/1640, manufacturer: Thermal – trend, s.r.o. Basic dimensions of the K 750/1640 radiator and data for correct allocator installation (mm):... -
Page 40: Model No. 10 - Radiators Made From Smooth Or Ribbed Tubes - Register
As per diagram 0056 Illustrations and the figures are indicative only. Installation of two allocators must be recorded in installation protocol. For more information’s about E-ITN 30 installation refer to chapter: 7.7. Installation on horizontal and vertical registers. 40 / 46... -
Page 41: Patter No. 11 - Aluminium Radiator With Vertical Ribs
E-ITN 30 Installation and service manual M2019/01a [EN] 7.18. P . 11 – A ATTER LUMINIUM RADIATOR WITH VERTICAL RIBS Verified on: FONAL TYP A 650-175, manufacturer: Kovohutě Mníšek Basic dimensions of the FONAL A 650-175 and data for correct allocator installation (mm):... -
Page 42: Model No. 12 - Aluminium Radiator With Vertical Ribs
E-ITN 30 Installation and service manual M2019/01a [EN] 7.19. M . 12 – A ODEL LUMINIUM RADIATOR WITH VERTICAL RIBS Verified on: SOLAR 500/10, manufacturer: LIPOVICA trade s.r.o. , Reissigova 15, BRNO 612 00 Basic dimensions of the SOLAR 500 radiator and data for correct allocator installation (mm):... -
Page 43: Model No. 13 - Radiator Jaga Tempo
0010 Warning! Allocators E-ITN 30 designed for installation to JAGA Tempo radiators include a back plates with a different distance of the mounting holes (Illustration 6: Back plate for JAGA Tempo radiators). Please pay attention to use right back plate. -
Page 44: Model No. 14 - Radiators Koratherm Horizontal K22Hm
E-ITN 30 Installation and service manual M2019/01a [EN] 7.21. M . 14 – R K22HM ODEL ADIATORS ORATHERM HORIZONTAL Verified on: Koratherm horizontal K22HM, manufacturer: KORADO a.s., Bří Hubálků 869, 560 02 Česká Třebová Basic dimensions of the Koratherm horizontal K22HM radiator and data for correct allocator installation... -
Page 45: Model No. 15 - Radiators Ot Koral
E-ITN 30 Installation and service manual M2019/01a [EN] 7.22. M . 15 – R OT K ODEL ADIATORS ORAL Verified on: OT KORAL , manufacturer: Kovohutě Mníšek, a.s., Mníšek pod Brdy 252 10. Basic dimensions of the Koral radiator and data for correct allocator installation (mm):... -
Page 46: Model No. 16 - Koratherm Vertikal K20 V
E-ITN 30 Installation and service manual M2019/01a [EN] 7.23. M . 16 – K K20 V ODEL ORATHERM ERTIKAL Verified on: OT Koratherm , výrobce: KORADO,a.s., Bří Hubálků 869, Česká Třebová. Basic dimensions of the Koratherm radiator and data for correct allocator installation (mm):...
Need help?
Do you have a question about the E-ITN 30 and is the answer not in the manual?
Questions and answers