1010music Blackbox User Manual
Hide thumbs
Also See for Blackbox:
- User manual (49 pages) ,
- Quick start manual (4 pages) ,
- Quick start manual (7 pages)
Table of Contents
Advertisement
Quick Links
Advertisement
Table of Contents

Related Manuals for 1010music Blackbox


Summary of Contents for 1010music Blackbox
- Page 1 Blackbox User Manual 1.7 Mar 17, 2021...
-
Page 2: Table Of Contents
Blackbox User Manual 1.7 Table of Contents WELCOME SET UP BLACKBOX MicroSD Card for Storage..............................8 Power ......................................8 Standard Power Outlet: ............................8 USB Power Outlet:...............................8 Output Connections .................................9 Control the Volume .................................10 Test Your Setup...................................10 Connect an Audio Input for Sampling .......................10 OVERVIEW Navigation Highlights.............................. - Page 3 Recording New WAV Files ............................42 To record a single WAV file:.........................42 Working with WAV Files Recorded on Blackbox ................45 If you are recording WAVs for the current preset: ...............45 If you are recording WAVs to build up a library of sounds:............45 Advanced Recording Techniques........................46...
- Page 4 Blackbox User Manual 1.7 WORK WITH KEYS To Play a Sample, Clip or Granular Mode Pad With the Traditional Keyboard:..58 To Play a Sample, Clip or Granular Mode Pad With the Grid Keyboard: ......58 To Play Slicer Mode Pads With Keys: ....................59 To Select a Scale on the Grid Keyboard: .....................60...
- Page 5 When will my legacy WAV files get cleaned out of the root folder?......83 TOOLS Settings on the Tools Screen:........................... 84 USE MIDI DEVICES WITH BLACKBOX Work with MIDI Inputs ..............................86 To Trigger Pad Hits and Sequences with a MIDI Device:............87 To Play Notes and Use Common MIDI Modulation Signals with a Specific Pad or Pads:....................................88...
- Page 6 REDUCE ALIASING WHEN PLAYING PADS CHROMATICALLY PROCESSOR MANAGEMENT TIPS UPDATE FIRMWARE, AUDIO FILES AND PRESETS Switch to a New MicroSD Card While Operating Blackbox ............. 102 Backup Your Presets and WAV Files......................... 102 To Install New Firmware:..........................102 Reset a Blackbox Preset to Factory Settings ....................103 TECHNICAL SPECS On-Board Memory ................................104...
-
Page 7: Welcome
Welcome to the blackbox user manual. Thanks for taking the team to read this. If you want to get a quick overview of the basic features of blackbox, please check out the Quick Start Guide. You can find it in the box with your blackbox, or on the blackbox support page at: https://1010music.com/blackboxdocs... -
Page 8: Set Up Blackbox
Blackbox stores all of the samples and presets on the microSD card. Before you can use the blackbox, you will need to insert the microSD card, connect to power and connect to one or more outputs. -
Page 9: Output Connections
► You can take the microSD card out and reinsert while blackbox is powered up. ► When you plug blackbox into a USB power bank, keep in mind that these power banks do not send information to blackbox about how much power is remaining. -
Page 10: Control The Volume
Connect an Audio Input for Sampling Blackbox assumes Eurorack level audio is coming in to the AUDIO IN jack at +/-5V. If you are using a line level signal of +/- 1V, you may need to adjust the input gain on the recording screen. -
Page 11: Overview
STOP PLAY Blackbox has a fairly simple set of input controls. You choose which functional area you are controlling by pushing the white navigation buttons. You control playback and recording of clips, sequences and songs using the black REC, STOP and PLAY buttons. -
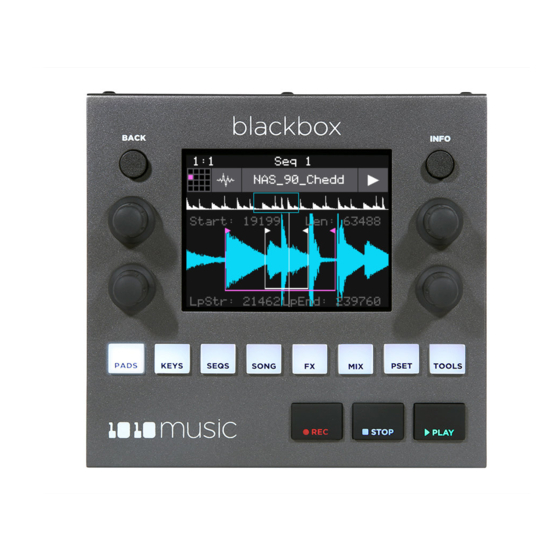
Page 12: Display Highlights
Pads Screen Display Highlights The black bar along the top of the screen displays the blackbox playback state and recording context. The number pair on the left displays the overall playback time in measures and beats. The text in the middle displays the recording context. In Song Mode, this will display the name of the section that you are recording into. -
Page 13: Quick Start
QUICK START Blackbox comes with a number of presets on the included microSD card. Let’s explore one to see how blackbox works. We will dive into more detail later. We will start by loading a preset: Push the white PSET button to see the preset loader screen. -
Page 14: Explore Keys
A white box appears around the active sequences. Push the black PLAY button to play the active sequences. Touch sequences to turn them on and off. There may be a delay in response as the blackbox Sequences waits for the next quantization point before triggering the sequence. -
Page 15: Explore Song Sections
4 beat count down, tap some pads to create a sequence. By default, the sequence is one bar long. Blackbox will play the sequence in a loop as soon as you finish recording it. If you tap some more pads, you will add more pad triggers to the sequence. Push REC to stop recording while the sequence still plays. -
Page 16: Song Mode And Rec | Stop | Play Buttons
Blackbox User Manual 1.7 Song Mode and REC | STOP | PLAY Buttons Let’s talk about Song Mode and the transit buttons. When Song Mode is disabled, the PLAY, STOP and REC buttons generally control the sequences. The one exception is when you are recording a new sample on the Sample Recording screen. -
Page 17: To Save A Preset
Note: ► Blackbox does not automatically save changes as you work. If you don’t save your changes, the preset will remain in its original state on your microSD card when you load a different preset, create a new preset or power down blackbox. -
Page 18: Create A New Preset
Blackbox User Manual 1.7 CREATE A NEW PRESET A preset is the master file that stores a blackbox composition. It holds the pad assignments, sequences, song sections, FX settings, Mix settings and the detailed parameters for each of these. Blackbox does not automatically save your work. You must save the preset to avoid losing your work when you change presets or turn off the unit. -
Page 19: Screen Navigation Map
Blackbox User Manual 1.7 SCREEN NAVIGATION MAP The diagram below shows the primary navigation paths through blackbox. You can use this to see where we are going and where we have been. Waveform Pads Pad Parameters Modulation Parameters "New Rec"... -
Page 20: Work With Pads
Blackbox User Manual 1.7 WORK WITH PADS Each pad in blackbox can be assigned a WAV file or a folder of WAV files. You can configure playback options, such as trigger mode and looping, individually for each pad. Once a pad is loaded, you can touch the pad on the main Pads screen to trigger it. You can also use the Keys screen to play the currently selected pad. -
Page 21: To Load Wav Files And Assign Pad Modes
Blackbox User Manual 1.7 Reverse Beat Loop Play Poly- Icon Mode Description Playback Sync Points Slices phony Slicer Use with a WAV file with 2 notes different sections that √ you want to trigger independently. Granular Generate new sounds mono from your samples. -
Page 22: To View Wave With Start, End, Loop And Slice Points
From the WAV file selection screen, use the control knobs to scroll through the list of files. Blackbox displays the directories at the top of the list followed by the individual files in alphabetical order. The selected file or directory name has a blue highlight. -
Page 23: To Configure Pad Parameters And Choose A Pad Mode
Blackbox User Manual 1.7 swipe to scroll along the length of the waveform. You can quickly jump to a different section of a long waveform by touching that section of the wave in the top view. If the pad is in Sample or Granular mode, the bottom waveform shows a pink bracket that indicates the portion of the WAV file that will be played by this pad. - Page 24 ► To optimize the performance of blackbox, use the lowest polyphony required for each pad. ► Blackbox has been tested to reliably playback up to 24 simultaneous voices. The absolute maximum number of voices is 32, but you may encounter CPU issues before that depending on other demands on the processor.
- Page 25 Trigger: Activate the Pad by touching the Mode affects the playback of a pad. pad or through MIDI note on. Blackbox will start playback of the WAV file and play through to the end. Gate: Begin the WAV file playback in the same manner as Trigger mode.
- Page 26 Blackbox User Manual 1.7 Parameter Description Range of Values Target? MIDI In Specifies a MIDI channel to be used None, Ch1 through Ch16. to play this pad chromatically or sliced across keys. This channel is also used for MIDI modulation of some parameters.
-
Page 27: Set Up A Sample Pad
Blackbox User Manual 1.7 At the top of the ADSR parameters page, the menu option to the right of the grid icon allows you to control exclusive grouping of pads. Touch this menu option, Excl C in the screenshot, to see the options. Touch an option to select it. -
Page 28: Single Sample Pads
Blackbox User Manual 1.7 Single Sample Pads A sample pad loaded with a single sample supports reverse playback, along with forward and bidirectional looping. You can also use the Start and Len parameters to play a portion of the WAV file. - Page 29 The Loop Start point must be greater than zero for this to work. Blackbox will use a copy of the WAV signal from just before the Loop Start point that is of a length of the loop fade of the loop length. It will then fade in that signal so that it ends just at the Loop End point.
-
Page 30: Loop Fading
E, F, G and H of the WAV file are looped. When Loop Fade is zero, blackbox does not overlay any extra content on top of the looped sections. When Loop Fade is 25%, section D, which is a section of... -
Page 31: Multi-Sample Pads
If there are no root notes defined, blackbox will load the files in alphabetical order and map one file to each successive note, starting at C2. You can also use this approach to map a list of different sounds across the keys of the keyboard, for example if you want to map different drum sounds to different notes. - Page 32 Blackbox User Manual 1.7 Blackbox will now load all of the files in the current directory into this pad and map the files to notes across the keyboard based on the root notes defined in the WAV files. Now, use the KEYS screen or an external MIDI controller to play notes for that pad. Blackbox will play the sample with the root note that is closest to the note played, and pitch shift as needed to achieve the necessary tone.
- Page 33 ► Multi-sampling can quickly use a lot of samples. In order to prevent potential issues, blackbox limits you to loading 80 WAV files at a time. If you hit that limit, it won’t load any more wav files until you free up some slots by clearing out a pad.
-
Page 34: Work With A Clip Pad
► In order to synchronize the clips, there has to be an available clock. Blackbox only uses the clock when in Play mode. Therefore, you must push Play before playback of a clip pad will begin. If you trigger a clip pad before you push Play, a white bar will appear below the pad to show that it is queued up and ready to start. -
Page 35: Pad Parameters Specific To Clip Mode
Auto, 1 to 512 blackbox more information to work with when synchronizing playback to the current song BPM. If set to Auto, blackbox will attempt to detect the beat count automatically. Quant Size Use Quant Size to quantize when the playback None - always start and stop starts and stops. -
Page 36: Clip Mode And Quantization
In Clip mode, blackbox will play the whole 2 bar riff when the note is triggered. But the beats in the WAV file might not be playing at the same tempo as the clock speed. If you leave Sync set to None, the WAV file will play in its entirety and will get out of sync with your clock. -
Page 37: Tips For Synchronizing Clips
There should be no blank space at either end and it should loop cleanly at full length. ■ Help blackbox determine the beat count. Blackbox will use the following methods in this order to identify the beat count: Look at the BeatCount parameter when it is not Auto ▪... -
Page 38: Pad Parameters Specific To Slicer Mode
Auto, 1 to 512 give blackbox more information to work with when synchronizing playback to the current song BPM. If set to Auto, blackbox will attempt to detect the beat count automatically. Only used when Sync is set to ON. -
Page 39: To Manually Create Or Remove Slices
You can control the sensitivity of the algorithm. When you use slice to grid, you define a fixed number of slices, and blackbox will create splits that evenly divide the WAV file into the specified number of slices. -
Page 40: To Use Auto Scan To Create Slices
You can use slices in a clip pad to synchronize playback of the beats in the clip. When the value of the Sync parameter for a clip pad is set to Slice, blackbox will use the location of the slices in the WAV file as the location of the “beats” for Sync purposes in order to prevent timing drift. -
Page 41: Work With Granular Pads
Blackbox User Manual 1.7 Work with Granular Pads The final pad mode is granular mode. Granular is similar to sample mode, but with the additional ability to use multiple grains when playing back your sample. You can use granular to facilitate loop cross fading and to generate new sounds from your samples. In this mode, the sample is played back in small portions about 10 to 200ms in length, called grains. -
Page 42: Recording New Wav Files
Blackbox User Manual 1.7 Recording New WAV Files Blackbox comes with over 800 WAV files loaded on the microSD card and allows you to load your own WAV files on the microSD card. You can also record new WAV files to create your own custom sound. - Page 43 Auto - Inputs play through the outputs while recording or the recording screen is visible. On - Inputs always play through the outputs. RecToPlay When to set to On, blackbox will On, Off automatically start to play the new sample when recording ends if the Length parameter was used for recording.
- Page 44 ► There may be a delay between when you push Rec + Play and when the recording starts as blackbox waits to quantize the recording to the selected Rec Quant time interval. See Synchronize Playback with a Clock below for more information about clocks and quantization.
-
Page 45: Working With Wav Files Recorded On Blackbox
Note: ► Blackbox won’t stop you from loading a WAV file from a Preset B folder into Preset A. However, if you do this, you could potentially break Preset A if you ever move or rename Preset B for any reason. Therefore, if you... -
Page 46: Advanced Recording Techniques
Blackbox User Manual 1.7 Advanced Recording Techniques To Record a Single WAV File while Sequences or Song Sections are Playing: You can record WAV files while you are also playing sequences or song sections. Set up the sequences or song sections you want to play, and start playback. - Page 47 Record the files into the new MyBank preset. Delete any extra files that are not needed. Assign root notes to each of the files if you want to ensure blackbox maps the files to the correct note. For example, if you recorded a sample for C3 and you want that sample to be used when you play C3 and pitched shifted for notes on either side of it, then set the Root Note parameter for that WAV file to C3.
-
Page 48: To Record A Multi-Sample Bank Using Midi Or Cv + Gate Automation
You may need to use the TRS to MIDI 5 pin DIN adapter included with blackbox. If you are using a CV trigger, connect the audio OUT 1 of blackbox to the CV and Gate inputs of the instrument to be recorded. The CV signal will be sent on the left channel, and the gate will be on the right channel of audio OUT 1. - Page 49 Controls when the incoming audio signal will be On - the audio input will always be played. played out through the blackbox outputs. Auto - the audio input will only be played when you are on the recording page for this pad.
- Page 50 Keep in mind that if you have a folder full of WAVs that you recorded but that are not used on any pads, blackbox will assume you do not need them and the folder and its contents will be deleted when you Clean a preset.
- Page 51 Blackbox User Manual 1.7 Save and Load Parameters in WAV Files There are several pad parameters that blackbox can read from and write to WAV files. These parameters are: Parameter Description Supported Pad Modes Root Note When you use Notes to play this sample, the base sample will play for Sample this root note.
-
Page 52: To Save The Values You Have Configured For A Pad Back To The Wav File
This means you can set these values in the other product and then use them in blackbox, and the reverse. ► When blackbox first loads a WAV file that has parameters stored in it, it will load the values of the parameters that are in the WAV, and use default values for the other parameters. -
Page 53: Trim Wav Files
Touch the name of the WAV file at the top of the screen to display the WAV Selection screen. Touch File and then Trim. Blackbox will ask if you want to Trim and Save? Touch OK to overwrite the WAV file with the portions outside of the pink bracket trimmed off. -
Page 54: Use Clipboard Functions With Pads
Blackbox User Manual 1.7 Use Clipboard Functions with Pads Blackbox has a slightly hidden set of clipboard buttons on the Pad screen. You can use these buttons to Cut, Copy and Paste between pads and to Clear a pad. To access these functions, turn the lower right knob while on the Pads screen. -
Page 55: Manage Wav Files
Blackbox User Manual 1.7 Manage WAV Files Blackbox comes with hundreds of WAV files bundled with the firmware. You can load WAV files into pads in order to add them to a preset. We talked about how to configure pads previously in this document. Here we will discuss what tasks you can perform to manage the WAV files themselves. -
Page 56: To Delete, Save As Or Rename A Wav File
Preset, but the Waveform screen will be blank until you load a new WAV file into the pad. ► Blackbox supports samples in the WAV file format. It supports 1 or 2 channel files with 16, 24 or 32 bit resolution at any sample rate. 48kHz is the preferred sample rate. -
Page 57: To Pack A Preset
Load the preset you want to pack. Push PSET and then touch File->Pack. Blackbox will find all of the WAV files that are assigned to pads and copy them into the folder for this preset. Multi-sample banks will be copied to a sub-folder. -
Page 58: Work With Keys
When you select a slicer pad to play with Keys, blackbox will map the slices in the pad to the notes on the keyboard. When you a use multi-sample pad with Keys, it will play the sample that has the root note closest to the played note and then pitch shift as needed. -
Page 59: To Play Slicer Mode Pads With Keys
Push KEYS again to go to the Grid Keyboard screen. Blackbox will display numbered squares in the grid for each slice in the WAV file. Use the arrows at the top of the screen to access additional octaves. -
Page 60: To Select A Scale On The Grid Keyboard
Blackbox User Manual 1.7 Note: ► On the traditional keyboard, the last slice will be played for all notes above the last slice. Nothing will play for notes below C2. ► If you use the Grid-based keyboard with a slicer pad, the slices are mapped to the notes available in the selected scale. -
Page 61: Work With Sequences
(e.g. Seq 3 or Section 1) displays the current recording context for blackbox. When not in Song Mode, this context display will indicate the sequence you are recording or editing, and the blue progress bar in the top right displays the current playback state of the sequence that has context. -
Page 62: To Record A Sequence
MIDI device. Hold down the REC button while you push PLAY to start recording. If you have the global Lead In option set to ON, blackbox will wait four beats, then start to play any active sequences and start recording. -
Page 63: To Edit And View The Notes And Pad Triggers In A Sequence
You can use the INFO button with a selected sequence cell to view and edit the sequence. Touch a sequence cell to select it. Push the INFO button to drill into that cell. Blackbox will display the sequence editor Piano Roll screen. If you... - Page 64 Blackbox User Manual 1.7 Action Result Turn the top left control Cycles the note selection through the notes knob on the piano roll Turn the top right control Changes the length of the currently selected knob note Turn the bottom left control...
-
Page 65: To Copy And Clear Sequences
Blackbox User Manual 1.7 To Copy and Clear Sequences: You can use standard clip board style functions to cut, copy, paste, and clear sequences. Push SEQS to display the Sequences Grid. Piano Roll Edit Touch a sequence or turn a knob to select a sequence. -
Page 66: To Edit Sequence Settings
1/64, 1/32T, 1/32, 1/16T, 1/16, sequence. When a sequence is activated or 1/8T, 1/8, 1/4T, 1/4, 1/2T, 1/2, 1 deactivated, blackbox will wait until the start bar, 2 bars, 4 bars, 8 bars of the next Quant Size interval to start or stop the sequence. -
Page 67: To Use Sequence Quick Action Buttons
WAV files are mapped to different velocities either during automated multi- sample recording on blackbox, or in an external WAV file editor. When recording a sequence, blackbox will capture velocity values used during the recording from either MIDI Velocity or the Velocity touch control on the right side of the PADS screen. -
Page 68: To Import A Mid File Into A Sequence
To Import a MID file into a Sequence: If you have a MIDI sequence you created in your DAW or another device, you can use a .mid file to import the sequence into blackbox. The sequence will be a KEYS sequence and will play with the Push SEQS to go to the Sequences screen. - Page 69 Step Count to match the imported sequence if needed. Note: ► Blackbox will only import the first track in a MIDI file. ► The sequence will be mapped to the pad selected in the pad grid at the time of import. You can use Copy and Paste to move it to a different pad if needed.
-
Page 70: Work With Song Sections
When you create a new preset, by default Song Mode is turned off. This means that blackbox is recording and playing sequences. Song sections are ignored in this mode. When you enter Song Mode, you can now record into and playback song sections. To toggle Song Mode on or off: Push the SONG button below the screen. -
Page 71: To Play Song Sections
If you want the selected section to play in a loop, touch the Loop button at the top of the screen to enable it. If Loop is disabled, blackbox will play all subsequent song sections in order when the current section ends. -
Page 72: To Reorder Song Sections
Blackbox User Manual 1.7 Note: ► You can play additional sequences during song section playback by activating them on the sequence screen. ► You can play pads and keys on top of song sections that are playing. To Edit Song Sections: The Edit menu on the Song screen allows you to perform basic clipboard operations and to rename the section. -
Page 73: To Change The Tempo Of A Song
Swing is a feature that makes electronic music sound more like a live performance. The swing setting in blackbox controls the relative timing of even numbered 1/16 notes compared to the notes on either side of them. When the swing setting is set to the default of 50%, the even 1/16 notes occur in their metered place halfway between the notes on either side. -
Page 74: Apply Effects
Blackbox User Manual 1.7 APPLY EFFECTS Blackbox has two effects that can be applied to as many pads as you want. You apply an effect by selecting the send amount for the pad for each of the desired effects (FX1 or FX2) and then configuring the parameters for that effect. - Page 75 ► The same effect parameter values are applied to all pads that are sending signals to that effect. ► The Reverb effect is very processor intensive. Blackbox does not limit what you can do based on anticipated processor needs. As a result, it is possible to overdrive the processor, causing crackling and drop outs.
-
Page 76: Adjust The Mix
Blackbox User Manual 1.7 ADJUST THE MIX On the Mixer screen you can independently adjust the volume and pan of each pad. The number on the pad represents the dB level of the audio output. The bar at the bottom of the grid cell represents the pan position for the pad. -
Page 77: Manage Presets
WAV files that are available on the microSD card. You can use the microSD card to load your own WAV files into blackbox, as well as record new ones. Blackbox also enables you to customize and create your own presets. -
Page 78: To Save Changes To A Preset
If you want to keep the results of your efforts, you will need to save the preset. Blackbox does not automatically save changes as you work. If you change to a different preset or unplug blackbox, you will lose your work. -
Page 79: To Load A Preset
Load the preset you want to pack. Push PSET and then touch File->Pack. Blackbox will copy all of the WAV files used by this preset into this preset’s folder. Any multi-sample banks will be copied with their folder. The preset.xml file will be updated to point to these copies of the WAV files and will be saved. -
Page 80: To Clean Unused Wav Files Out Of A Preset's Folder
WAV files that are not mapped to pads in this preset. Any WAV files in this preset’s folder that are not used by pads in this preset will be deleted. Blackbox will save the preset.xml file as part of this process. -
Page 81: To Rename A Preset
Push the PSET button to view the Preset Management screen. Touch File to display the Preset File Menu. Touch Save As. Blackbox displays a touch screen keyboard you can use to enter a new name. Touch the Enter button to save the changes and go back to the Pads screen with the renamed preset loaded. -
Page 82: Work With Preset Files On The Microsd Card
Each time you open a preset that is stored in the root, blackbox will create the preset folder for this preset and move the preset into that folder. In this way, as you open the presets, they will be migrated to the new structure one at a time. -
Page 83: When Will My Legacy Wav Files Get Cleaned Out Of The Root Folder
Blackbox User Manual 1.7 When will my legacy WAV files get cleaned out of the root folder? We won’t move them automatically. We recommend that you pack up all of your presets one by one, which will copy all of the files used by the presets into their respective folders. -
Page 84: Tools
Controls the volume of the signal going to the headphones. Compressor When set to On, blackbox will apply a compressor to the signals sent to Out 1. RecToPlay When set to ON, blackbox will automatically start to play the new sample when recording ends if the Length parameter was used for recording. - Page 85 ProgChange parameter is set to ON. ProgChange When set to ON, blackbox will respond to MIDI program change messages received on the MIDI Pads and MIDI Keys channels by opening the Preset that Use MIDI Devices maps to the specified program number.
-
Page 86: Use Midi Devices With Blackbox
MIDI Outputs of blackbox. Work with MIDI Inputs Blackbox is designed to work with MIDI devices to offer a more tactile input mode and a bigger keyboard. It can also use MIDI inputs to modulate pad and effects parameters. -
Page 87: To Trigger Pad Hits And Sequences With A Midi Device
To Trigger Pad Hits and Sequences with a MIDI Device: Blackbox has a MIDI Pads parameter that defines which MIDI channel can trigger pads and sequences. By default, this value is set to Omni, which means that it will respond to all MIDI channels. - Page 88 MIDI Keys channel. As with the MIDI Pads setting, you can select OMNI for the MIDI Keys channel to have blackbox respond to all channels in this way. However, any channel that is assigned to anything else is pulled from the pool of MIDI channels that blackbox responds to in Omni mode.
-
Page 89: To Configure Midi Modulation For A Parameter Using Named Midi Sources
Blackbox User Manual 1.7 Push TOOLS and then touch MIDI In to see the global MIDI input settings. Turn the knob next to MIDI Keys to select the MIDI Channel blackbox will use as the global keys channel. Connect a MIDI Device to blackbox and set the device to use the channel assigned to MIDI Keys. -
Page 90: To Use Midi Learn Mode To Modulate A Parameter
Feedback. It can be challenging to determine which MIDI CC number is sent by any given control on your MIDI device. To make it easier to use these MIDI CCs, blackbox has the ability to learn which control you want to use for modulation for any given parameter. -
Page 91: To Remove Midi Modulation From A Parameter
5% (20% - 15%), and the highest value of the control will map to 35% (20% + 15%). ► MIDI CC mappings are recorded in the blackbox preset as a mapping to a specific MIDI CC number on a specific MIDI Channel. If you swap out... - Page 92 Blackbox User Manual 1.7 Parameter Value Explanation Launch Mode Trigger This will cause the WAV slice to play from beginning to end when a trigger is received. Other values will work, but let’s use this for the example. Loop Mode We will turn off looping for this example.
-
Page 93: Sharing Of Midi Input Channels
Blackbox User Manual 1.7 Sharing of MIDI Input Channels How do all of these MIDI Input channel assignments work together? Basically, they all work together, with one big exception for Omni settings. Any channel that is assigned to anything else will no longer be included in the list of channels responded to by a parameter with the Omni setting. -
Page 94: Use Midi Program Change To Open A Preset
You can also use blackbox pads and sequences to send note events to drive other MIDI instruments. Connect your blackbox to a MIDI device via the MIDI Out TRS jack. If you are having trouble getting MIDI to work through the TRS jack, please read the... -
Page 95: To Send Midi Notes From A Sequence To An External Midi Device
Set the MIDI Out parameter to the MIDI channel used by the MIDI device that will receive the signal. Trigger the pad on the blackbox by touching the pad, or playing it in a sequence. Blackbox will now send the note events from the configured pad to the MIDI device on the same MIDI channel. -
Page 96: Synchronize Playback With A Clock
Blackbox User Manual 1.7 SYNCHRONIZE PLAYBACK WITH A CLOCK Blackbox can either run on its own internal clock or follow an external clock. It can also provide a clock signal for other devices to follow. Configure Blackbox to Follow an External Clock... -
Page 97: Send The Blackbox Clock Signal To External Devices
Send the Blackbox Clock Signal to External Devices Blackbox sends out a MIDI clock signal through the TRS MIDI output. If you are using the TRS MIDI port, be sure to check TRS Mini-jack compatibility. See Pin Mapping for Mini TRS Jack to MIDI 5 Pin DIN Connectors below for more information about compatibility. -
Page 98: Powering Midi Devices
■ Any adapter that supports under 2 amps at 5 volts If you need to use one of these lower power sources for blackbox, you may be able to use a separate power supply to power the MIDI device. If the power supplied is insufficient, the MIDI controller may not power up and blackbox may have unreliable behavior. -
Page 99: Create Preset Templates For Re-Use
Blackbox User Manual 1.7 CREATE PRESET TEMPLATES FOR RE-USE Preset template support was added in blackbox 1.2 in response to requests from some users who like to set up their presets a certain way each time, and other users who want to configure a preset in preparation for a live performance. -
Page 100: Reduce Aliasing When Playing Pads Chromatically
REDUCE ALIASING WHEN PLAYING PADS CHROMATICALLY Blackbox offers two choices for the interpolation algorithm used to play pads Chromatically. The first algorithm is called Normal mode. In this mode, blackbox may introduce some aliasing with some WAV files when pitch shifting notes to play sample, multi-sample and granular pads chromatically. -
Page 101: Processor Management Tips
If you have experienced drop outs or crackling sounds with blackbox, you have most likely pushed the processor to its limits. Blackbox does not limit what you can do based on anticipated processor load. We have tried to balance the design of the system to optimize what you can do without over driving the processor while still giving you room to make creative choices. -
Page 102: Update Firmware, Audio Files And Presets
Blackbox User Manual 1.7 UPDATE FIRMWARE, AUDIO FILES AND PRESETS You can update the blackbox firmware to get the latest features and other updates. The firmware can be updated with the factory image, which includes the original presets, or just the firmware itself. You can also choose individual presets to copy over to your microSD Card. -
Page 103: Reset A Blackbox Preset To Factory Settings
Reset a Blackbox Preset to Factory Settings If you want to reset one or more of the blackbox presets to the original factory settings, you can copy individual preset files onto your microSD card. Download the blackbox firmware onto your computer. You can find the available firmware images on the forum at https://forum.1010music.com. -
Page 104: Technical Specs On-Board Memory
Blackbox supports stereo samples. It can record in stereo and has stereo outputs. Blackbox supports samples in the WAV file format. It supports 1 or 2 channel files with 16, 24 or 32-bit resolution at any sample rate. 48kHz is the preferred sample rate. The blackbox engine uses a 24-bit ADC and DAC. -
Page 105: Pin Mapping For Mini Trs Jack To Midi 5 Pin Din Connectors
MIDI connector and the labels of the connection components of a mini TRS jack. 1010music products are compatible with cables that use the following mapping of MIDI signals between female MIDI connectors and mini TRS jacks:... -
Page 106: Stay Up To Date
There is a very active community of users of 1010music products at forum.1010music.com. If you have a question about blackbox that isn’t answered in this manual, this is your best source for help. We actively monitor the wish list sub-forums for ideas for future versions of our products.
Need help?
Do you have a question about the Blackbox and is the answer not in the manual?
Questions and answers