Table of Contents
Advertisement
Quick Links
Advertisement
Table of Contents
Troubleshooting

Related Manuals for Carver GVS Series

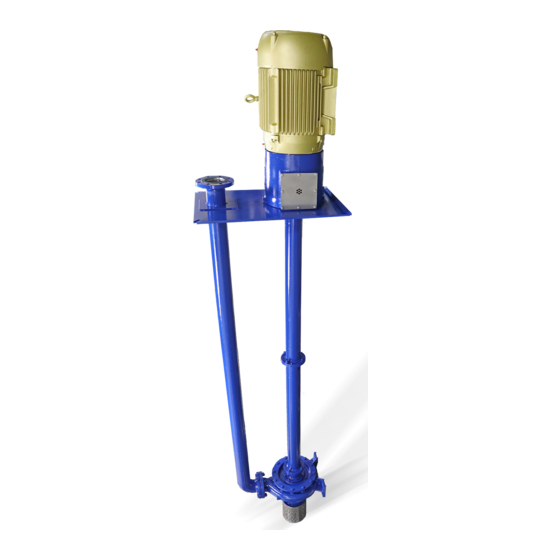
Summary of Contents for Carver GVS Series
- Page 1 (GVS) I-480 Rev. 01...
-
Page 2: Service Record Page
SERVICE RECORD PAGE Service No. ________________ Size and Type ______________ Make ________________________ Cust. Order No. ________________________ Date Installed __________________________________ Installation Date Location Application PUMP RATING Capacity (GPM) __________________________ Total Head (ft) _______________________________ Suction Pressure _________________________ Speed (RPM) ________________________________ Liquid __________________________________ Temperature ________________________________ Specific Gravity __________________________ Viscosity ____________________________________ Impeller Diameter (inches) ______________________________________________________________ PUMP MATERIALS... -
Page 3: Notes On Inspection And Repairs
NOTES ON INSPECTION AND REPAIRS INSPECTION DATE REPAIR TIME REPAIRS COST REMARKS... -
Page 4: Table Of Contents
Starting the Pump....5 4. Impeller/Wear Ring Matching Materials ........15 Stopping the Pump ....5 5. Recommended Spare Parts ..16 TROUBLESHOOTING....6 6. Pump Parts List for GVS Series VII. MAINTENANCE ......9 Pump ..........17 Field Inspection .....9 LIST OF ILLUSTRATIONS Stuffing Box ......9... -
Page 5: General Information
Quantity of parts needed on the order acknowledgment, and is properly installed and maintained, as recommended herein, Carver may ship an interchangeable part that is not factory warranty applies. identical in appearance or symbol. Examine the parts This manual, which is the result of carefully conducted... -
Page 6: Ordering Codes
The following Ordering Code defines the new This Ordering Code enables Carver Pump GVS Series pump and pump/motor and top Company to accept orders quickly, assuring plate arrangements. When quoting or ordering a timely and correct manufacture of the desired GVS pump, this Ordering Code must be used. -
Page 7: Safety Precautions
B. STORAGE OF PUMP. If the equipment is While working near electricity, do NOT NOT immediately installed and operated, Carver use metal rules, flashlights, metallic Pump Company recommends rotating each shaft pencils, or any other objects having several revolutions at least once every two weeks to exposed conducting material. -
Page 8: Installation
(for example, a unit used for seasonal operation), contact a representative from Support all piping as to avoid undue pipe Carver Pump Company. If this is the case, strain or weight upon the pump. Do NOT Carver will provide specific instructions for force piping. -
Page 9: Alignment
Carver representative. Use of a check valve in discharge piping is Install a check valve and closing valve in the recommended if there is a high volume of discharge line. -
Page 10: Troubleshooting
If pump is stopped for overhaul, slowly close VI. TROUBLESHOOTING. the discharge valve. Otherwise, leave discharge valve set at condition. The pump should provide reliable service and long life Stop the pumping unit in accordance with the if the installation and starting procedures outlines in directions on the electrical power supply. -
Page 11: Troubleshooting
Failure to deliver fluid. 1. Discharge valve closed. 1. Check discharge valve. 2. Discharge head above 2. Consult with nearest Carver shutoff. Pump Company representative or factory. 3. Impeller or suction pipe 3. Inspect and clean impeller clogged. - Page 12 Table 1. Troubleshooting (cont.) SYMPTOM PROBABLE CAUSE REMEDY Reduced capacity and/or 8. Speed too low. 8. Consult wit nearest Carver pressure (cont). Pump Company representative or factory. 9. Semi-open impeller running 9. Check semi-open impeller clearance too large. clearance according to section VIII, paragraph D.
-
Page 13: Maintenance
Normal duty calls for relubrication every 1000 hours of Using a hand-operated grease gun on operation. Bearings are lubricated at Carver Pump grease fittings, add approximately one ounce Company with Amoco Rykon Premium Grease No. -
Page 14: Service And Repair
NOTE bearing adaptor (37). Install bearing adaptor (37) on shaft (6). Install bearing spacer (176) Carver recommends replacing bearings if over shaft (6) in bearing adaptor (37). Install removed from the shaft. If it is necessary to new ball bearing (18) over shaft (6) in reuse bearings that are in good condition, bearing adaptor. - Page 15 impeller, wear ring (enclosed impeller pumps only), CAUTION and shaft sleeve. NOTE To lift pump, use a hoist or suitable lifting device. Prior to assembly, refer to the following paragraphs in this section: Parts Inspection, Attach lifting straps and eyebolts to base (23). paragraph C, Adjusting Im peller Clearance, Remove baseplate mounting capscrews.
-
Page 16: Parts Inspection
Disassembly of lineshaft bearings sealing faces should be perfectly clean. 14. Check lineshaft bearings in accordance with Carver recommends that all grease seals, lip paragraph C (of this section), Parts seals, oil seals, gaskets, o-rings, and locking Inspection. If lineshaft bearings need... -
Page 17: Throttle Bushing Dimensions
Table 2. Throttle Bushing Dimensions Refer to Table 3, Enclosed Impeller Clearance. Measure inside diameter of suction Frame Size Maximum Minimum cover (9) or wear ring (7), if equipped, in Diameter Diameter three places. If difference between high reading of 43V-01 1.277 inches 1.275 inches... - Page 18 If column is over 10 feet long, the lineshaft is lineshaft bearings already installed, be two pieces. To assemble a two-piece purchased from Carver Pump Company. lineshaft, use the following procedure and This will prevent the likelihood of lineshaft refer to figure 2: bearings shattering due to misalignment.
-
Page 19: Adjusting Impeller Clearance On Pumps Equipped With Semi-Open Impellers
CAUTION Recheck coupling gap and adjust, if necessary. Connect coupling (42) by Use a hoist or suitable lifting device to lift installing snap-wrap spider. pump. Install the coupling guard (131) and secure with capscrews (602), washers (652), and 18. Attach hoist or suitable lifting device to nuts (612). -
Page 20: Parts List And Figures
Measure outside diameter of front impeller CAUTION (2) hub and record the value. Mount suction cover (9) with new wear ring During assembly, install new impeller (7) ins talled in a lathe. Indicate male rabbet capscrew (26) with locktite. Impeller to within 0.002 T.I.R. -
Page 21: Pump Parts List For Gvs Series Pump
Table 6. Pump Parts List for GVS Series pump Item No. Part Name Item No. Part Name Casing Column Impeller Coupling guard Shaft Coupling spacer Wear ring (if equipped) Bearing spacer Back wear ring Tube (optional) Suction cover Male tube connector (opt.) -
Page 22: Gvs Sectional Drawing
Figure 1. GVS Sectional Drawing... -
Page 23: Shaft Coupling Detail
Figure 2. Shaft Coupling Detail... -
Page 24: Bearing Lube Options
Figure 3. Bearing Lube Options... -
Page 25: Optional Wear Ring
Figure 4. Optional Wear Ring... - Page 27 October 2003...
Need help?
Do you have a question about the GVS Series and is the answer not in the manual?
Questions and answers