
Summary of Contents for CRYSTAL GROUP INC. purway PUR Booster 5 stages
- Page 1 PUR Booster 5 stages User manual Bongartz GmbH - purway Crystal Group® | Damaschkestr. 10 | 28307 Bremen | Telefon: +49 (0)4721 - 66 30 50 | E-Mail: info@purway.de...
-
Page 2: Table Of Contents
CONTENT Safety instructions ........................ 2 Introduction to the main functions of the reverse osmosis system ........3 Technical specifications ......................4 Computer control ........................4 Installation instructions ......................5 Initial start-up ........................10 Maintenance and Care ......................10 Filter change ........................11 Troubleshooting ........................ -
Page 3: Safety Instructions
Safety instructions Do not make any changes to Do not cover the device! the device! Do not exceed the maximum Do not load the system with water inlet pressure of 4 bar! heavy objects! Do not contaminate the Do not use the device near system with caustic or sources of fire! corrosive materials! -
Page 4: Introduction To The Main Functions Of The Reverse Osmosis System
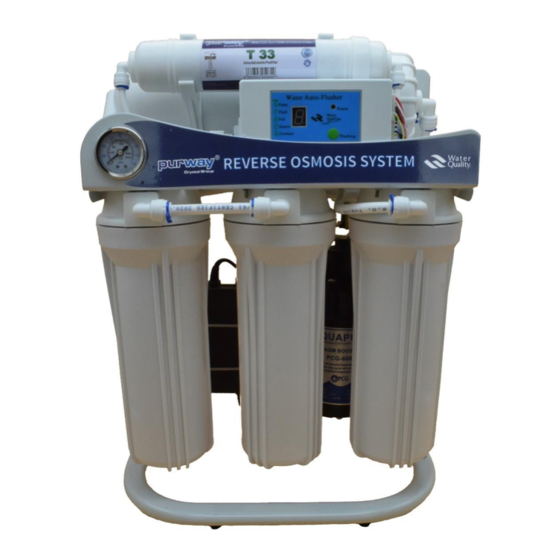
Introduction to the main functions of the reverse osmosis system MPa 0…1,6 Inlet solenoid valves psi 0…220 Wastewater solenoid valves RO-membrane: Booster pump 400/ 600 GPD: 0,0001 µm effective filtration of Increases the pressure in the membrane bacteria, viruses, heavy metals, housing to overcome the osmotic pesticides, insecticides, residues, pressure. -
Page 5: Technical Specifications
Technical specifications Voltage U 230V AC 50 Hz/60 Hz - 24V DC Rated power P 60 / 75 W Rated power standby P < 1W Recommended water supply pressure p 1 – 4 bar Eintr Operating pressure p 8 bar ± 0,5 bar Betr Water temperature ϑ... -
Page 6: Installation Instructions
Scope of delivery • 1x Reverse osmosis system PUR Booster 5 stages including pre-installed filters • 1x User manual PUR Booster 5 stages • 1x RO membrane model 3012-400 or 3012-600 • 1x Drain clamp for 1/4“ tube • 1x 3-way inlet valve with washer 1/2" •... - Page 7 Use of quick-change adapters Assembly Release Remove the blue safety Remove the blue safety clip. clip. Push the front ring Push the t over a towards the connector constriction (seal) into the with your thumb and index connector (approx. 8mm). finger.
- Page 8 4. Installation of the water supply Ball valve Connection faucet Screw nut Washer 3-way inlet valve Ball valve Washer Inlet water valve 4.1 Shut off the water supply. 4.2 Release the flex tube of your faucet in the cold water and screw the 3-way inlet valve to the water pipe. 4.3 Ensure a correct fit of the washers.
- Page 9 6. Installation of the faucet 6.1 Mark the place where you want to mount your osmosis faucet. 6.2 Use a drilling machine to drill a 12 mm diameter hole through the sink or worktop. 6.3 Guide the base and the white rubber seal over the threaded rod and place the fitting in the hole in the worktop or sink.
- Page 10 8. Installation Aquastop leak sensor (optional) An Aquastop leak sensor with two separate inserts is included in the scope of delivery for further protection against leaks. An insert is placed in the mount and swells as soon as it gets in contact with water. This opens the flap and immediately cuts off the water supply to the system.
-
Page 11: Initial Start-Up
Initial start-up Please make sure that the faucet of the reverse osmosis system is closed when the system is started up for the first time, so that the system can perform an automatic flush after plugging in the power switch. This ensures that any possible coal dust from the prefilters will be flushed out and does not reach the membrane! Usage hint To prevent microbial contamination on the membrane during storage and transport, the membrane was... -
Page 12: Filter Change
Filter change 1. Installation prefilters Before you start changing the filters, disconnect the water supply to your RO unit and pull the 230 V power plug out of the socket! When the system is empty and depressurized, the filter bowls can be opened more easily. - Page 13 Make sure that the filter cartridge and the internal O-ring are properly seated in the filter bowl and fasten it onto the filter Close the filter bowls only hand tight. head. Do not use the spanner! 2. Installation of the T33 post filter: 2.1 Loosen the quick-change adapters on the T33 postfilter and disconnect them.
-
Page 14: Troubleshooting
Troubleshooting Error Reason Solution The device cannot be Device is not connected to the power. Check the power supply. switched on. power supply defective. Contact customer service. Blown fuse in the computer control. Replace the computer controller. The pump works Inlet water solenoid valve is defective, Replace the solenoid valve. - Page 15 Declaration of conformity for the R & TTE directive 2016/35 / EC The manufacturer hereby declares that the device complies with the basic requirements and all other relevant provisions of Directive 2016/35 / EC. Only for use in closed rooms Bongartz GmbH - purway Crystal Group®...
Need help?
Do you have a question about the purway PUR Booster 5 stages and is the answer not in the manual?
Questions and answers