Advertisement
Advertisement

Subscribe to Our Youtube Channel
Summary of Contents for Living & Co BM1356-SA
- Page 1 BREAD MAKER INSTRUCTION MANUAL MODEL: BM1356-SA...
-
Page 2: Table Of Contents
Contents IMPORTANT SAFETY INSTRUCTIONS PRODUCT OVERVIEW CLEANING AND MAINTENANCE INTRODUCTION TO BREAD INGREDIENTS INGREDIENT MEASUREMENT TROUBLE SHOOTING GUIDE 16 17... -
Page 3: Important Safety Instructions
IMPORTANT SAFETY INSTRUCTIONS Before using the electrical appliance, the following basic precautions should always be followed: 1. READ ALL INSTRUCTIONS. 2. Before using check that the voltage of wall outlet corresponds to that shown on the rating plate. 3. Do not operate any appliance with a damaged cord or plug or after the appliance malfunctions, or it is dropped or damaged in any manner. - Page 4 IMPORTANT SAFETY INSTRUCTIONS (CONTINUED) 17. Do not operate the appliance for other than its intended use. 18. Always use the appliance on a secure, dry level surface. 19. Do not use outdoors. 20. This appliance has been designed with a grounded (earthed) plug (Class I). For safety reasons, please ensure the wall outlet in your house is well earthed.
-
Page 5: Product Overview
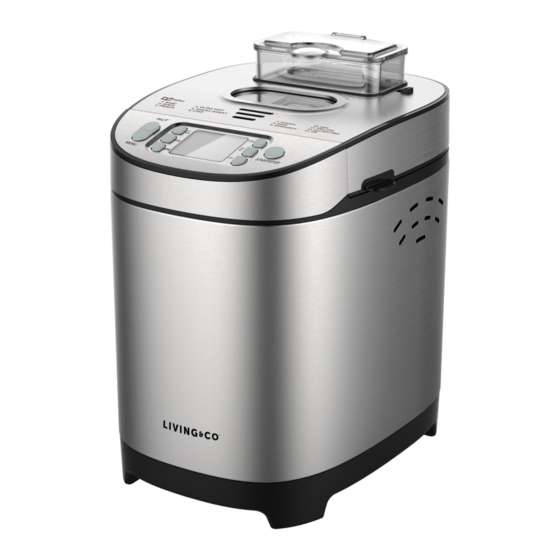
PRODUCT OVERVIEW Fruit & Nut dispenser container Release lever for dispenser container Viewing window Digital display (LCD) Control panel Detachable kneading blade Detachable baking (bread) pan Measuring Spoon Hook Measuring Cup Note: Images are for indicative purposes only and may vary from the actual product. - Page 6 CONTROL PANEL OVERVIEW TIME MIX DOUGH (shortcut key for menu 11) BAKE(shortcut COLOUR key for menu 8) START/STOP MENU DIY (shortcut key fo menu 13) GRAM Note: Images are for indicative purposes only and may vary from the actual product. OPERATION AFTER POWER-UP As soon as the bread maker is plugged into the power supply, the digital display (LCD) will be...
- Page 7 PAUSE After commencement of a program, push the “START/STOP” button once to interrupt at any time, the operation will be paused but the program setting will be memorised, the remaining operational time will display (flash) on the LCD. Push the “START/STOP” button again or within 10 minutes without touching any other button, the program will continue from where it was paused.
- Page 8 FRUIT & NUT DISPENSER Once the desired program has been selected, press the NUT button to select if using auto add ingredient function. The default setting is on “√”, switch to off “×” by pressing the button again When selecting auto add ingredient function, the program will automatically release the contents of the dispenser container at the correct stage during the baking process.
- Page 9 ENVIRONMENT The machine may work well in a wide range of ambient temperatures, however there could be a difference in loaf size between a very warm room and a very cold room. We suggest the room temperature should be between 15℃ and 34℃. WARNING DISPLAY 1.
- Page 10 USING YOUR BREAD MAKER 1. Place the appliance on a stable, flat and level surface away from other objects such as curtains, food, other appliances. 2. Before making bread, prepare and weigh the ingredients you need. 3. The baking pan can be removed from the cooking cavity by opening the main lid, folding the pan carry handle up and gently rotating anticlockwise to unlock.
-
Page 11: Cleaning And Maintenance
14. Use non-stick spatula to gently loosen the sides of the bread from the pan. CAUTION: The Baking pan and bread may be very hot! Always handle with care and use oven mitts. 15. Turn bread pan upside down onto a clean counter top and gently shake until bread falling out onto rack. -
Page 12: Introduction To Bread Ingredients 1
INTRODUCTION TO BREAD INGREDIENTS 1. Bread flour Bread flour is a kind of high-gluten flour, also called as high-protein flour containing high protein, which has good flexibility and can prevent loaf from being sunken during rising. As typically the content of its gluten is higher than that in plain flour, it can be used for making loaves having a large size and good inner fiber texture. - Page 13 Yeast test The test described below will allow you to check whether your yeast is fresh and active or not. (1) Pour 1/2 cup warm water (45-50°C) into a measuring cup (2) Add 1 tsp. white sugar into the cup and stir, then sprinkle 2tsp. yeast over the water. (3) Put the measuring cup in a warm place for about 10min.
-
Page 14: Ingredient Measurement
INGREDIENT MEASUREMENT An important step for making good bread is to measure ingredients accurately. It is recommended to use a measuring cup or measuring spoon to obtain an accurate measurement, otherwise the bread will be largely influenced. IMPORTANT: Do not exceed the maximum flour and raising agent quantities specified in the recipes supplied. -
Page 15: Trouble Shooting Guide
TROUBLE SHOOTING GUIDE Problem Cause Solution Some ingredients may adhere Unplug the bread maker and to or near the heating element. clean the heating element, Smoke from ventilation Before first use, oil may remain but be careful not to burn holes when baking on the surface of the heating yourself, during the first use,... - Page 16 Bread collapses in the The flour is old or weak and middle part when Use fresh bread flour. can’t make dough rise baking dough Yeast rate is too rapid or yeast yeast room temperature is too high temperature. Excessive water makes dough Adjust water on recipe too wet and soft.
- Page 17 RECIPES The following recipes are for reference only, you may adjust them depending on ingredients, own taste and experiments. Do not exceed the maximum flour and raising agent quantities specified in the recipes supplied. Maximum flour quantity for this appliance is 520g, maximum dry yeast quantity for this appliance is 4 teaspoons.
- Page 18 9. SANDWICH BREAD LOAF SIZE 700grams 900grams Water 220ml 300ml Margarine or butter 1 /2tbsp 2tbsp Salt /2tsp 2tsp Sugar 1tbsp 1 1/2tbsp Bread flour 380g 500g Dry yeast 1 1/4tsp 1 1/2tsp Program: Sandwich 10. CAKE LOAF SIZE SMALL / LARGE Sugar 8 tbsp 10 tbsp...
- Page 19 Warranty We pride ourselves on producing a range of quality home appliances that are both packed with features, and completely reliable. We are so confident in our products, we pack them up with a 2 year warranty. Now you too can relax knowing that you are covered. Customer Helpline NZ: 0800 422 274 This product is covered by a 2 year warranty when Accompanied by proof of purchase.
Need help?
Do you have a question about the BM1356-SA and is the answer not in the manual?
Questions and answers