Advertisement
Quick Links
Advertisement

Related Manuals for Bakfiets Q-4 T-BOX

Summary of Contents for Bakfiets Q-4 T-BOX
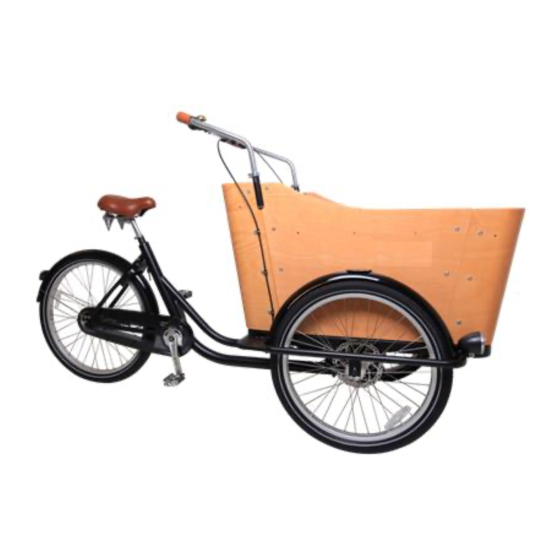
- Page 1 BAKFIETS Q-4 T-BOX...
- Page 2 1 rear frame、canopy tube、 front wheel、accessories、 canipy、leather seatand . 2 left picture: a.canopy tubex2 b.rear framex1 c.leather seatx2 d.canopyx1 e.front fenderx2 f.front wheelx2 g.saddlex1 h.hedraulic disc brake(without disc)x1 i.seat postx1 j.safe beltx4...
- Page 3 3 bottom frame,folded plate 4 left picture: a.bottom framex1 b.folded platex4...
- Page 4 5 you can see three pats:woo box、handlebar、accessories. 6 Left picture: a.front woodx1 b.rear woodx1 c.bottom woodx1 d.side woodx2 e.seat woodx2 7 left picture: a.front lightx2 b.foot stepx2 c.pendalx1 d.bellx1 e.damperx2 f.wheel reflectorx3 g.dscx2 h.release(∮25.4)x2 i.damper bushingx2 j.fasteners bagx1 8 left photo: a.handelbar rightx1 b.handelbar leftx1...
- Page 5 a.Bearing shell(big)x1 b.Bearing shell(small)x1 c.Hammerx1 10 The bearing shell (small) flat on the bottom frame to the plane of the head tube, beaten with a hammer 11 bearing shell(small) please see the result...
- Page 6 12 10 The bearing shell (big) flat on the bottom frame to the plane of the head tube, beaten with a hammer 13 Bearing shell(big) beat out a.Adjustable wrenchx1 b.M18nutx1 c.spring washerx1 d.flatx1 e.bearing (small)x1...
- Page 7 15 Please let the rear frame and bottom frame together,do as picture 16 check the finished 17 put bearing(small) 18 see the finished...
- Page 8 19 put flat mat,then put spring washer 20 screw on M18 nut 21 lock it 22 fasteners&damper and tool , a.damperx2 b. damper bushingx2 c.M8X50 boltx2 d.M8 nylon nutx2 e.flat matx2 f.12#wrenchx1 g.13#wrenchx1...
- Page 9 23 please let the damper fit frame hole 24 put one flat,and M8 nylon 25 use12#&13#扳手wrench lock 26 in a hole of the other end,put the bushing...
- Page 10 27 M8x50 bolt 28 use 13#wrench lock it 29 damper finished a.flat matx1 b.M5X20 inner hexagon boltx1 c.wrenchx1...
- Page 11 31 Please let the brake hole to fit bottom thread,then put flat mat,use M5*20 hexagon bolt 32 Please adjust the position,use wrench to lock it a.flat matx12 b.M6 hexagon boltx4 c.wrenchx1...
- Page 12 34 let the cable like this 35 Leave rubber sleeve 36 use 3 flat mat...
- Page 13 37 Fit Hexagon bolt 38 Lock it 39 assembling right brake same as left(Attention:the cable don't need round)
- Page 14 40 disc brake kit sub-pump the following part of the assembly after the completion of the effect 41 Place the disc brakes on the bottom of the bottom frame from the bottom of the right side...
- Page 15 a.8#wrench x1 b.cross screwdriverx1 c.M5nylon nutx4 d.flat matx4 e.M5x12round cross boltx4 43 please find the fender hole on bottom,put flat mat,fitM5x12 round cross bolt 44 use cross screwdriver&8# wrench lock it...
- Page 16 45 the fender finished 46 Let foot ladder top hole to fit fender top hole,use M5x12 flat head cross screw 47 put the falt mat on the inside fender and M5nylon nut...
- Page 17 48 use the cross screwdriver &8# and wrench 49 finished foot ladder...
- Page 18 50 let shift lever from left bottom 51 shift lever go though like this picture...
- Page 19 a.discx2 b.screwx12 c.wrench(plum flower head)x1 53 the assembling finished(attention:whatever right wheel or left wheel,the disc direction same as wheel moving) a.15#wrenchx1 b.3/8:flange nutx1 c.safety hookx1...
- Page 20 55 front wheel,put safety hook,fit 3/8”flange nut 56 use15#wrench lock it 57 front wheels assembling be finished(attention:tread patern's arrow direction same as wheel moving)
- Page 21 58 adjust front disc brake a.13#wrenchx1 b.cross screwdriverx1 c.M8nylon nutx2 d.flat matx2 e.M8x70 boltx2 60 put the wood on bottom,be careful for hole,use bot,falt mat,nylon nut(attention:the wood hole position)
- Page 22 61 use cross screwdriver&13#wrench lock bolt 62 the wood finished a.front lightsx2 b.8#wrenchx1 c.M5X12hex boltx2 d.falt matx2 64 find light holder fit the hole,add flat mat,fit M5X12hex bolt...
- Page 23 65 use8#wrench lock it 66 finished 67 Round wood assembling: a. ∮6X13lock screwx28pair b.wrenchx1...
- Page 24 68 back board and rear folded plate 69 use wrench lock it 70 the back board assembling...
- Page 25 71 front board and front folded plate assembling 72 finish 73 Link to baseboard: a.cross screwdrivex1 b.10#wrenchx1 c.M6nylon nutx8 d.flat matx8 e.M6x25round cross head boltx8...
- Page 26 74 Please make the folded plate hole and baseboard hole up,then put flat mat and bolt,screw nylon nut under 75 use cross screwdriver&10#wrench 76 seat board assembling: a. ∮6X13 lock screwx8 pair b.wrenchx1...
- Page 27 77 put the seat board,make hole line up,insert lock screw 78 lock it 79 the 3 holes on side board line up foot ladder holes,then insert the lock screw,lock it...
- Page 28 80 a.shoulder padx2 (for one) b.jockstrapx1 (for one seat belt) 81 do like this 82 finished 83 do like this 84 finished 85 the one seat belt...
- Page 29 86 assembling seat belt: a. ∮6X13lock screwx4 pair b.wrenchx1 87 please insert the seat belt end into U shaped hole,adjust 88 saat belt back part 89 do like this,put the belt under the seat board...
- Page 30 90 seat belt assembling finished 91 canopy assembling: a.socket wrenchx1 b.cross screwdriverx1 c.M5nylon nutx8 d.M5x30flat screwx8 e.plastic wheelx8 92 put tht plastic wheel outer side board,insert the bolt inter board add flat mat,screw the nylon nut .Use cross screwdriver and socket wrench...
- Page 31 93 assembling 4 plastic wheel on side board 94 do like this 95 do like this 96 do like this...
- Page 32 97 finished 98 the clamp are used to fix brake cables and shift cables(small)x6 99 Rmove the right side lock screw,use the clip stuck in brake cable,make the hole line up properly卸 (attention:clamp direction as the picture) 100 lock it...
- Page 33 101 finished looking 102 the same way for shift cable...
- Page 34 103 assembling brake lever on the left side of handlebar 104 put shift lever onthe right side of handleb 105 Screw M6*16 hex bolt in right handlebar (mandrel) 106 assembling the left and right handlebar...
- Page 35 107 screw M6x16 hex bolt in left handlebar 108 use10#wrench lock it 109 lock the handlebar: a.bundling(∮25.4)x2 b.wrenchx1 110 put the bundling on the top of side folded plate...
- Page 36 111 please be careful the position and keep balance. 112 lock it 113 adjust the position and lock it...
- Page 37 114 adjust it 115 assembling bell on the right of handlebar,adjust it and lock it 116 the finished picture...
- Page 38 Foot and 15 wrench Note: The foot of the label "L" on behalf of the left, "R" on behalf of the right Tilt the pedal into the crank hole and lock it with the tool The left graph is: a. Multi-function wrench x1 b.
- Page 39 120 saddle tube, saddle assembly 121 Insert the saddle into the inside of the frame, adjust and lock it. Adjust the saddle so that it is parallel to the ground and lock with the multifunction wrench 122 Note: saddle tube safety line can not be exposed outside the tube, otherwise unsafe...
- Page 40 124 The left side shows the shaft protection cover x2 125 Insert the shaft protection cover opening into the front wheel outer nut and insert it 126 shaft protection cover installed after the effect 127 The following figure shows: a. light film x2 b.
- Page 41 128 Assembled discs & locked with a Phillips screwdriver (Note: assembly position is recommended to be placed opposite the valve) 129 rounds of light installed effect 129 rounds of light installed effect...
- Page 42 131 ceiling tube assembly after the completion of the effect 132 tarpaulin assembly, the tarpaulin set to the roof tube, flattened, buckle on both sides of the tarpaulin back of the buckle 133 paste the good effect...
- Page 43 134 Tighten the elastic band inside the side of the tarpaulin to the plastic guide groove 135 elastic tape attached to the plastic guide wheel groove on the effect 136 single side elastic band attached to the plastic guide wheel groove on the effect 137 in the sunny or hot days can be both sides of the...
- Page 44 138 both sides of the tarpaulin rolled up and fixed after the effect 139 installed tarpaulin vehicle effect 140 without tarpaulin vehicle effect...