Advertisement
Quick Links
Advertisement

Related Manuals for Garden Games Skyhigh


Summary of Contents for Garden Games Skyhigh
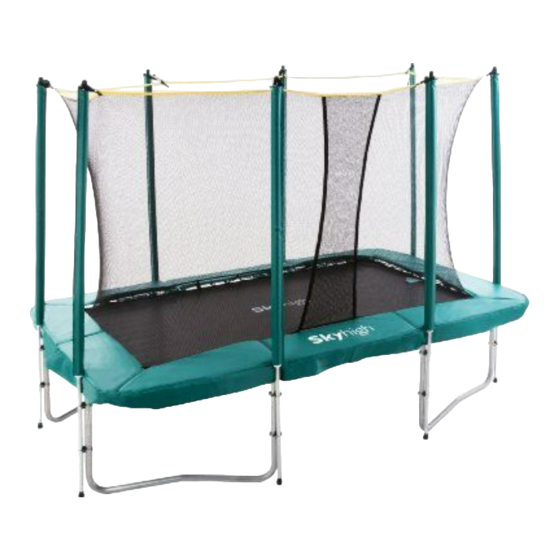
- Page 1 7' x 10' Rectangular Skyhigh Trampoline...
- Page 2 Thank you for purchasing the 7' x 10' Rectangular Skyhigh Trampoline IN CASE OF MISSING OR BROKEN PARTS, PLEASE CONTACT PLACE OF PURCHASE FOR ASSISTANCE.
- Page 3 Trampoline Assembly Instructions Firstly find a suitable location for the trampoline to be situated: 1. Ensure adequate overhead clearance. A minimum of 26ft (8 meters) from ground level is recommended e.g wires, tree branches etc. 2. Ensure adequate lateral clearance. Place the trampoline away from walls, structures, fences, swimming pools and other play areas or equipment.
- Page 4 Parts List: Reference Part Number Description Quantity Number Trampoline Mat, stitched with V-Rings TR800 Frame Pad TR801 Top Rail with Leg Sockets TR802 TR803 Top Rail TR804 Leg Base TR805 springs TR806 Safety Instruction Placard Spring Loading Tool TR807 Enclosed in this manual are the current specifications and product features available at time of printing, however, changes may be made in equipment, availability, specifications and features without notice.
- Page 5 STEP 1 - ASSEMBLING THE MAIN FRAME A. Slide all Top Rail with Leg Sockets (3) onto the Leg Base (5) as shown B. Now, install the other 4 Top Rails (4) into Top Rail with Leg Sockets (3) the both ends To connect the parts, simple slide a section of tubing into the adjacent section.
-
Page 6: Trampoline Mat
Step 2 - Trampoline Mat (Bed) Assembly Take care when attaching the springs to the trampoline mat. You will need 2 people to complete this part of the assembly. ATTENTION when attaching the springs, the connector points can pinch as the trampoline mat stretches the springs and tightens. - Page 7 3. Attaching the springs: 4. If you notice that you have skipped a hole and V ring connection, recount and remove or attach any springs required to maintain the count of springs. Step 3 - Safety Cardy Instruction Placard (part number 7). Using the cable tie attach the safety instruction placard to the trampoline.
- Page 8 Step 4 - Frame Pad Assembly 1. Lay out the frame pad (part number 2) over the trampoline so that the springs and the steel frame are covered. Please ensure that the frame pad covers all the metal parts. 2. Tie the strap located on the underside for the frame pad to the frame. 3.
- Page 9 7 x 10 Safety Enclosure Thank you for purchasing our product IN CASE OF MISSING OR BROKEN PARTS, PLEASE CONTACT PLACE OF PURCHASE FOR ASSISTANCE. Adult Supervision *Adult assembly required. *Adult supervision required for children using Safety net. Protect Children: *Prevent falls and strangulation---Exit through the door only, and 10/01 use caution.
-
Page 10: Package Contents
ASSEMBLY INSTRUCTION FOR PROTECTIVE NET 1. PACKAGE CONTENTS : REFERENCE DESCRIPTION 7' × 10' NUMBER GALVANIZED PIPE(WITH LONG FOAM) GALVANIZED PIPE(WITH SHORT FOAM) SCREW SCREW SET NYLON WASHER SAFETY NET SPACER POLE COVER SAFETY NUT SPANNER Fix Strap DIAGRAMS FOR PARTS: 3. - Page 11 ASSEMBLY INSTRUCTION FOR PROTECTIVE NET STEP 1: AND PUT TWO SECTIONS OF SUPPORT PIPES CONNECTED TOGETHER AS SHOWN IN FIGURE 1. ATTACH A CAP AT THE END OF THE PIPES. FIGURE 1 FIGURE 2 FIGURE 3 STEP 2: USING THE STEEL SCREW (SEE A1 AND A2). THE SUPPORT POLES SHOULD REACH THE BASE OF THE TRAMPOLINE LEGS.
- Page 12 Step 3: Warning: (B1): To avoid strangulation and entanglement, keep all cords out of the reach of young children. (B3): Repeat the steps B1 and B2 to set up all straps in order and (B4): Do not tighten the straps fully until all of the straps are set up.
- Page 13 Step 4: A. Put the hook of elastic through V-ring of mat. B. Then attach the other end of hook to the next V-ring as shown A and B. A. Put the hook of elastic through V-ring of mat. B. Press one side of the elasticity button, and then hang the end of hook to the V-ring as shown A and B.
-
Page 14: Important Warning
IMPORTANT WARNING!! YOU SHOULD GO BACK NOW AND STRETCH ALL ATTACHMENT HOOKS TIGHT AND DOUBLE CHECK TO SEE WHETHER YOU HAVE FASTENED THE SCREWS USE THE SCREW SETS OR NOT, SO THE SAFETY NET STANDS STIFF. OTHERWISE, THE SAFETY NET WILL NOT FUNCTION PROPERLY. THEN FINISH ASSEMBLING. IMPORTANT –... - Page 15 (1) control entry and exit to and from the trampoline and, (2) allow jumpers to gain confidence, balance, coordination and agility without the fear of rebounding off the trampoline, where injury could occur. Adult supervision of children – Children should always be supervised while they are ...
- Page 16 The product must not be used until properly and fully installed and checked. Galvanised tubular products may require occasional maintenance. If surface rust appears it should be removed with either a wire brush or coarse sandpaper, and the area treated with non-toxic paint.
- Page 17 BOUNCE SAFELY ON YOUR TRAMPOLINE...
- Page 18 1. Do not attempt or allow somersaults. Landing on your head or neck can cause serious injury, paralysis or even death. This is even if you land in the middle of the mat. 2. Maximum user weight 114kg (18 stone) 3.
- Page 19 25. Read all the instructions prior to us. Warnings and instructions for the care maintenance and use of the trampoline are included to promote safe, enjoyable use of this equipment. 26. Do not wear hard soled shoes as they can cause excessive wear to the mat. 27.
- Page 20 key to safety and having fun on the trampoline is control and mastering the various bounces. Never try to out-bounce another bouncer in terms of height! Never use the trampoline without supervision. Mounting and Dismounting: Be very careful when getting on and off the trampoline. DO NOT mount the trampoline by grabbing the frame pad, by stepping onto the springs, or by jumping onto the mat from any surface (e.g.
-
Page 21: Windy Conditions
This trampoline was designed and manufactured with quality materials and craftsmanship. With proper care and maintenance, it will provide all jumpers with years of exercise, fun, and enjoyment. Please follow the guidelines below: This trampoline is designed to withstand a specific weight and usage. Ensure only one person uses the trampoline at any one time. - Page 22 1. Maybe the leg tubes (#6) with T-section (#4) very tight, not easy disassemble. Please use the rubber mallet hit the top rail (#3). So, you can easy disassemble this part. 2.When you disassemble, please don't disassemble the T-section (#4) and the top rail (#3), you can keep it as it is.
- Page 23 2. When you disassemble, please don't disassemble the T-section (#4) and the top rail (#3), you can keep it as it is. When you next assemble the trampoline, it will be easier and save time. Optional trampoline accessories available Trampoline Tents Trampoline Ladder A fun accessory for your family.
- Page 24 LESSON PLAN The following lessons are recommended in order to learn basic steps and bounces before moving onto more difficult, complicated bounces. You should read and understand all safety instructions before mounting the trampoline. A complete discussion and demonstration of body mechanics and trampoline guidelines should occur between the supervisor and student.
- Page 25 SERIOUS INJURY OR DEATH BACK OR HEAD INJURY. Always consult a physician before performing any kind of physical activity PLEASE RETAIN THIS INFORMATION FOR FUTURE REFERENCE Garden Games Ltd Holly House, Pine Woods Road, Longworth, Oxfordshire, OX13 5HG England Tel +44 (0)1865 392439...
Need help?
Do you have a question about the Skyhigh and is the answer not in the manual?
Questions and answers