
Summary of Contents for Atmos Audio Cube 31
- Page 1 Operating Instructions ATMOS ® Audio Cube 31 English 0483 GA1 G B . 140201.0 2017-12 Index 02...
-
Page 2: Table Of Contents
3.3.3 Hearing test booth ..................... 11 3.4 Connection diagram ....................12 3.5 Use with other devices ................... 12 3.6 Connecting the device .................... 14 3.7 Installing the software .................... 14 3.8 Installation of the ATMOS PatSoft 31 ..............14 ® 3.8.1 Call up O ....................15 ptiOns 3.8.2 Select the start window ..................15 3.8.3 Setting the section W ..............16 aiting rOOm 3.9... - Page 3 4.5.7 Illustration of the measurement ..............28 4.5.8 Organize measurement data ................29 Cleaning and disinfection ................32 5.1 Cleaning and disinfection ..................32 5.2 Overview hygiene measures.................. 33 5.3 Recommended disinfectants ................. 33 Maintenance and service ................35 6.1 Period tests ......................35 6.2 Daily function check ....................36 6.3 Weekly function check .................... 37 6.4 Metrological check / electrical safety ..............
-
Page 4: Introduction
These operating instructions must always be kept available near the device. Care, period tests, regular cleaning and proper application are indis- pensable. They guarantee the operational safety and usability of the ATMOS Audio Cube 31. ® Maintenance, repairs and period tests may only be carried out by persons who have the appropriate technical knowledge and are familiar with the product. To carry out these measures the person must have the necessary test devices and original spare parts. Peruse chapter „2 Hints for your safety“ on page 8 before using the device for the fi rst time. This helps you avoid potentially dangerous situations. The product ATMOS Audio Cube 31 bears CE marking CE 0483 accord- ® ing to the EC Directive of the council for medical products 93/42/EEC and meets the basic requirements of appendix I of the directive. The product ATMOS Audio Cube 31 complies with all applicable re- ® quirements of the directive 2011/65/EC restricting the use of certain hazardous substances in electrical and electronic equipment (“RoHS”). The declaration of conformity and our general standard terms and conditions can be obtained on our website at www.atmosmed.com. The quality management system at ATMOS has been certifi ed according to international standards EN ISO 13485. -
Page 5: Explanation Of Pictures And Symbols
1.2 Explanation of pictures and symbols In the operating instructions DANGER Warning of a danger which causes immediate death or serious injury. Observe the necessary measures. WARNING Beware of a danger which can cause death or serious injury. Observe the necessary measures. CAUTION Beware of a danger which can easily hurt you. Observe the necessary measures. ATTENTION Indication of a danger where the product or other items could be damaged. Observe the necessary measures. Warning of a danger which can cause death or serious injury. Information regarding possible material damage which could be caused. Useful information on the handling of the device. Action. Go step by step. Numeration. » Result of an action. On device and type plate This product complies with the relevant Application part type B requirements of EU Directives Serial number Observe operating instructions! Order number Manufacturing date Professional disposal. -
Page 6: Intended Use
Application time: For the short-term application on patients (max. 60 minutes). Application site: In clinics and practices for ENT doctors. The examination may only be performed by healthcare professionals. Contraindications: None The product is: active Sterility: Not necessary Single-use product / reprocessing: No single use product 1.4 Function Principle: Audiometry is the subjective examination of the hearing ability, for which there are several different methods. Unlike objective audiometry (tympanography/OAE/ BERA) the active cooperation of the person to be examined is required. The audiometric tests are performed in a soundproof room. Measuring method: The ATMOS Audio Cube 31 applies the tone and speech audiome- ® try by means of air and bone conduction as well as in the free field. Tone audiometry: The auditory threshold is determined with a tone audiogram. The patient is presented with tones of different frequencies. The volume of the tone is grad- ually increased until the patient can perceive the tone, the so-called threshold. Initially this test is performed by means of air and then by bone conduction. Together the result is the tone audiogram. Now it can be determined whether there is a conductive hearing loss (hearing defect in the middle ear) or a sensorineural hearing loss (hearing defect in the inner ear) or if it is a combination of both. If there is a difference in hearing between both sides, masking is required for the non-test ear. -
Page 7: Scope Of Delivery
(USB fl ash instructions drive) 1.6 Transport and Storage Transport at low temperatures can damage the device. 1. Prior to start-up the unit must acclimatize for up to 6 hours at room temperature. Transport the device only in a shipping carton, which is padded and off ers suffi cient protection. If damage occurs during transport: 1. Document and report the damage to ATMOS. 2. Fill in the form QD 434 “customer complaint/return shipment”. This is enclosed to the product. 3. Send the device to ATMOS (Chapter „6.6 Sending in the device“ on page 40). Ambient conditions for transport and storage • Temperature: -10°C to +45°C • Air humidity: 30 % to 90 % • Air pressure:... -
Page 8: Hints For Your Safety
2 Hints for your safety The safety of the ATMOS Audio Cube 31 complies with all the recognized rules of ® technology and the directives of the Medical Devices Act. Read and follow the safety information carefully before using the product. General safety information If you wish to operate the ATMOS Audio Cube 31 in combination with non-medical ® products, (e.g. PC, printer), observe the chapter „3.5 Use with other devices“ on page The device has application parts from type B. Dangers for users, patients and third parties Protect yourself against an electric shock! Burns, cardiac arrhythmias and even death are possible. • Prior to each use check whether the device or power cable are damaged. Never operate the unit, if it shows any obvious safety defects. In this case clean the device and send it in to ATMOS for repair. • Disconnect the device from the mains power supply prior to cleaning or disinfection. • Prior to switching the device on/off remove the transducer from the patient or examiner. - Page 9 • The product may only be applied by medically trained staff. • A diagnosis may only be made by persons with the appropriate medical training. • Only use the product in a soundproof, audiological room with an acoustic level <40 dB SPL. • Prior to use a daily function check must be performed. • Only adjust the level to > 80 dB HL if it was prescribed by the doctor. • Only remove or connect the transducer to the audiometer when it is switched off. Otherwise the transducers crackle. • Only connect the acoustic transducers to the sockets provided. • As soon as you replace or use a different transducer then the device must always be recalibrated. In this case contact ATMOS. • Please pay attention to the period tests in chapter „6.1 Period tests“ on page 35. • Only use original accessories and original spare parts from ATMOS. • Assembly, new settings, modifications, extensions and repairs may only be carried out by persons who are authorized by ATMOS. Only a fully functional product meets the safety requirements of users, patients and third parties. Therefore read the following instructions carefully: Avoid damage to the device Observe the ambient conditions regarding transport, storage and operation. Take care that no liquid penetrates the device. If liquid has penetrated the device it may no longer be operated. In this case clean the device and send it in to ATMOS for repair. The device may only be connected to the mains power supply when mains voltage and frequency of device and mains power supply correspond. Only use proper mains connections and extension cords. Do not twist or bend the wires.
-
Page 10: Setting Up And Starting Up
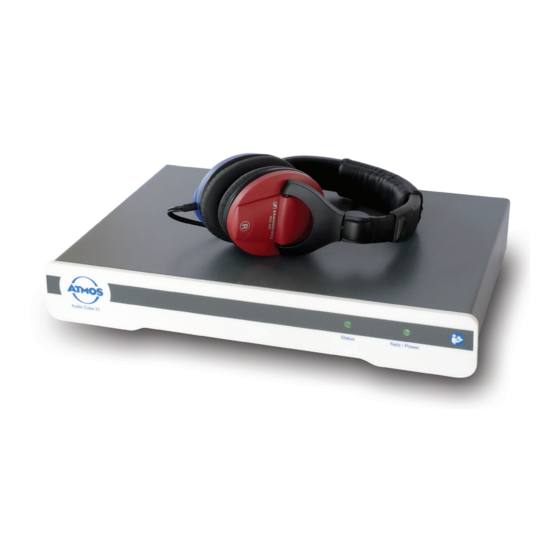
3 Setting up and starting up 3.1 Device overview Front view LED Status LED Power Rear side Connection power cable On/Off switch The connections are described in chapter „3.4 Connection diagram“ on page 12. 3.2 System requirements CAUTION Inappropriate hardware The patient cannot be examined and treated. • Observe the minimum requirements for the hardware. Operating system Windows Vista / 7 / 8 Free hard-drive capacity min. 50 GB CPU performance min. 2 GHz Available RAM min. 4 GB RAM Graphic resolution min. 1600 x 900... -
Page 11: Installing And Starting Up
3.3.1 Audiometer with free fi eld loudspeaker Please observe the following standards: • DIN EN ISO 8253-2 (July 2010): Acoustics - Audiometric test methods - Part 2: Sound fi eld audiometry with pure-tone and narrow-band test signals. • DIN EN ISO 8253-3 (August 2012): Acoustics - Audiometric test methods - Part 3: Speech audiometry. Speech audiometry. 1. The installation of the free fi eld loudspeaker may only be performed by a service technician authorized by ATMOS. Free fi eld loudspeakers must always be calibrated on site. 3.3.2 Audiometer with headphones Damage to the device as a result of the wrong connectors. 1. Only connect the transducer and the patient probe with the audiometer. These may not be connected to other system components. 2. Connect the transducer and external devices. Observe chapter „3.4 Connection diagram“ on page 12. 3.3.3 Hearing test booth 1. The installation of the audiometer to the hearing test booth may only be performed... -
Page 12: Connection Diagram
3.4 Connection diagram CAUTION Wrong measurement results due to incorrectly calibrated transducers. Damage to the patients hearing is possible. • As soon as you replace or use a diff erent transducer then the device must always be recalibrated. In this case contact ATMOS. 10 11 12 Name Connection Note Mains supply Mains supply RS - 232 Service interface No function Patient re- Patient response sponse button Microphone Patient microphone patient Signal input left External CD player Signal input left: white / black connec- tor;... - Page 13 If you have to use portable multiple sockets, attention must be paid to the following: • The portable multiple sockets must comply with IEC 60601-1. • The portable multiple sockets cannot be extended repeatedly. • Do not exceed the permissible nominal load of the multiple socket. • Only devices which are part of the medical system may be connected to the multiple socket. Otherwise the leakage current could exceed the permissible limit. PC to USB interface The USB interface is electrically isolated and therefore complies with the requirements of EN 60601-1. If your PC does not comply with IEC 60601-1, please observe the following: • Your PC must comply with the IEC 60950 and the applicable EMC standards. • If your PC is positioned in the immediate vicinity of the patient then it must be pow- ered via an isolation transformer which complies with the requirements IEC 60601-1. CD player, active free field loudspeaker, printer If other devices do not comply with IEC 60601-1,observe the following: • The devices must be powered via an isolation transformer or power supply unit which complies with IEC 60601-1. • The devices must comply with EMC standards. Connecting the system 1. Observe the notes in this chapter. 2. Connect the device.
-
Page 14: Connecting The Device
• Software to be installed & Depending on the software the programme automatically selects the necessary software components (driver). 6. Click on the button i nstallieren install » The software will be installed. The current status is displayed at the bottom left. » As soon as the installation is complete the message i appears at nstallatiOn COmplete the bottom left. 7. Perform a function check: Chapter „6.3 Weekly function check“ on page 37. 3.8 Installation of the ATMOS PatSoft 31 ® & As soon as you exit the section O , you will be asked if you want to save the ptiOns settings. Click the button Y , to save the settings or the button n , not to. 14 Setting up and starting up... -
Page 15: Call Up Options
3.8.1 Call up O PTIONS 1. Start the PatSoft 31. 2. Click the button atmOs , on the above right. » The section O is opened. ptiOns 3.8.2 Select the start window After opening the PatSoft 31 you can select which section should be displayed. 1. Go to the section O ptiOns 2. Click on the tab g eneral 3. Select in this section the requested start screen under s tart Creen Depending on the workplace situation ATMOS recommends you to select the following start window: Reception •... -
Page 16: Setting The Section W Aiting Room
, after how many table COlOurs hours the patient data in the section waiting room should be highlighted in yellow. Maximum amount of patient data 1. Select in the text fi eld the maximum amount of maximum patients in Waiting rOOm patient data which should be in the section waiting room. 3.9 Installation of the ATMOS Audio Cube 31 software ® User and practice data 1. Click the button O ptiOns » The window Options is opened. 2. Enter the user initials . This is represented in the main window for selection. - Page 17 4. If required select the praxis logo in the format *.bmp or *.jpg 5. Enter the practice address & The practice information appears on the printout. 6. Click the button OK. » The entries are saved. » The window is closed. Setting up and starting up...
-
Page 18: Operation
4.2 Switching on the device 1. Switch on the device with the on / off switch. » The green indicator lamp illuminates on the front of the device. 2. Start the software if it does not start automatically. 4.3 Switching off the device 1. Close the software with the button C or via the red X above left. lOse 2. Switch off the device with the on / off switch. 4.4 Patient management with the ATMOS PatSoft 31 ® 4.4.1 Starting the ATMOS PatSoft 31 ® & The PatSoft 31 automatically starts during boot up. If necessary you can also start the PatSoft 31 over an icon on the desktop. 1. Start the PatSoft 31 over the Windows menu start all prOgrammes »... -
Page 19: Create A New Patient
4.4.5 Create a new patient 1. Go to the section e atient data 2. Go to the tab n 3. Go to the section n and enter the patient data. atient 4. Save the data by clicking on the button s 4.4.6 Importing patient data manually 1. Go to the section t or in the section e able atients... -
Page 20: Searching Patient Data
4.4.7 Searching patient data In the section T ABLE ATIENTS 1. Go to the section t able atients 2. Enter in the section s the patient data which you are searching for. earCh » As soon as you enter the fi rst character, a corresponding hit will be highlighted in the chart. & If you want to edit the patient data, click on the button e atient data In the section E ATIENT DATA 1. Go to the section e atient data... -
Page 21: Place The Patient Data In The Section Waiting Room
3. Change the patient data. 4. Click on the button s , to save changes. & If you do not wish to save the data, click on the button a bOrt 4.4.9 Place the patient data in the section WAITING ROOM 1. Go to the section t or in the section e able atients atient data 2. Find for the patient data in the section searCh 3. Double click on the desired patient data . 4. Click on the button a dd tO Waiting rOOm »... -
Page 22: Calling Up The Diagnostic Software
3. Click on the relevant diagnostic software button which you would like to use. » The diagnostic software starts. & The patient data is automatically adopted. 4.4.11 Remove the patient data from the waiting room 1. Double click on the desired patient data. 2. Click on the button remOve FrOm the Waiting rOOm » The patient data is deleted from the section Waiting rOOm 4.5 ATMOS Audio Cube software ® 4.5.1 Software overview & You may operate the software via a touch screen, keyboard or mouse. 22 Operation... - Page 23 Patient data, examiner and status display. Select speech audiometry / tone audiometry. Current settings during the tests. Display of the measurement data. General settings for measuring. Transducer which is Settings for mask- used for the test. ing. Tone audiometry Level increment Speech audiometry Speaking to the patient High tone measurement. Tone audiometry Speech audiometry Set the type of signal. Select speech test. Activate additional tests. Operation. New measurement. Save measurement as a PDF. Diagnosis, enter the Start patient management. findings from the measurement. Operation...
-
Page 24: Set Default Settings
Load the measure- Set up the software. Only qualified ment. personnel may change the settings. Save measurement. Close the programme. Print measurement. 4.5.2 Set default settings Diagnosis / comments If you wish to comment on the measurements you may create standardized selection texts. 1. Click the button O ptiOns » The window Options is opened. 2. Select the tab d iagnOsis 3. Enter the available texts for diagnosis and findings. 4. Click the button OK. » The entries are saved. » The window Options is closed. Software representation / measurement settings 1. Click the button O ptiOns »... -
Page 25: Patient Management
The following settings can be made in the individual tabs: Setting options Tone audiometry Representation of the tone audiometry. Speech audiometry Representation of the speech audiometry. Keyboard Loudspeaker function. 4.5.3 Patient management Please note: If you are only going to document the measurements electronically, then the data must be stored patient related. The data is subject to data security evidence for the health insurance. If the audiometer software is not integrated in a practice software then the patient data must be managed via the audiometer software. If the audiometer software is integrated in a practice software then the patient manage- ment of the audiometer software is blocked. Selecting a patient 1. Click on the button in the main window to open the patient management. patient 2. Select the patient from the table or enter the surname in the field n in the group searCh 3. Click the button OK. » The patient data appears in the top of the main window. Operation... -
Page 26: Prepare For Measurement
Creating a new patient 1. Click on the button in the main window to open the patient management. patient 2. Click on the tab 3. Enter the patient number, surname, first name and date of birth. Only the patient number is mandatory. 4. Click the button OK. » The patient data appears in the top of the main window. Changing or deleting a patient & The patient number cannot be changed. 1. Click on the button in the main window to open the patient management. patient 2. Select the patient. 3. Click on the tab Change 4. Change the patient data. 5. Click on the button , to save the changes. save 6. -
Page 27: Measurement Tone Audiometry
Incorrect measurement results due to a cold device. The patients hearing can be damaged due to an inappropriate treatment. 3. Wait for at least 5 minutes. The device must warm-up. 4. Adjust the desired parameters for the measurement. 5. Select the patient in the audiometer software. If you do not select a patient the measurement can be printed, but not saved. 6. Position the patient. 7. Explain the test sequence to the patient. Risk of infection due to contaminated headphones. Cross infection is possible. 8. Use standard protective covers for headphones. 9. If necessary put on the required transducer to the patient and give him the patient response button. 4.5.5 Measurement tone audiometry CAUTION Level is too high. Damage to the patients hearing is possible. • Only adjust the level to > 80 dB HL if it was prescribed by the doctor. 1. Start with the right ear. 2. Press the arrow key to the right or left to adjust the fi rst frequency. The arrow key is either on the keyboard or on the centre of the display. »... -
Page 28: Measurement Speech Audiometry
4.5.6 Measurement speech audiometry CAUTION Level is too high. Damage to the patients hearing is possible. • Only adjust the level to > 80 dB HL if it was prescribed by the doctor. 1. Start with the right ear. 2. Play the fi rst word by pressing the button 3. Change the level by pressing the arrow key up/down. The arrow key is either on the keyboard or on the top left of the display. Increase the level gradually. 4. As soon as the patient repeats the text, press „Correct“ or „Incorrect“. » The software marks the comprehensibility quote at each level. 5. By doing so you can check all the desired texts. 6. Continue with the left ear. Please note: Please note: you can change the level with the key and . piCture piCture 4.5.7 Illustration of the measurement Tone audiometry Display, which frequency can be heard at what level. -
Page 29: Organize Measurement Data
Speech audiometry Comprehensibility quote depending on the level. Z: Numbers W: Words 4.5.8 Organize measurement data Comments If you wish to comment on the measurements you may create standardized selection texts (Chapter „Comments“ on page 29). If you have loaded several measurements you cannot comment on them. Therefore, load the measurements individually. 1. Click on the button C Omment » The comment window is opened. 2. Enter the diagnosis and/or findings. 3. Click the button OK. » The comments are saved. Storage Measuring data can only be stored when it is assigned to a patient. 1. Click on the button s » The measurement is stored in the database. Operation... - Page 30 Load 1. Select a patient. 2. Click the button l » The Load window is opened: » Only measurements regarding the selected patient will be displayed. 3. Navigate with 4. Select the measurement by clicking on it. & You can select up to 5 measurements simultaneously, if you keep the STRG key pressed and click on the measurement. 5. Click the button OK. » The measurement is displayed in the main window. Delete 1. Select a patient 2. Click the button l » The Load window is opened: » Only measurements regarding the selected patient will be displayed. 3. Navigate with 4. Select the measurement by clicking on it. 5. Click on the button m inus 6.
- Page 31 Export 1. Click the button pdF. » The PDF is opened. 2. Save the PDF. Print 1. Click the button p rint » The printer dialogue is opened. 2. Select printer settings. 3. Print the document. Operation...
-
Page 32: Cleaning And Disinfection
In this case clean the device and send it in to ATMOS for repair. • Observe the operating instructions of the disinfectant manufacturers. Note in particular the information on the concentration and material compatibility. • Only use disinfectants, which are recommended by ATMOS (chapter „5.3 Recom- mended disinfectants“ on page 33). The use of other disinfectants may damage the device. ATMOS Audio Cube ® Clean the ATMOS Audio Cube after each patient. ® Electric shock due to liquid in the device. 1. Disconnect the device from the power supply. Porous plastic due to detergents containing solvents. 2. Dampen a soft cloth with water and a mild, solvent-free detergent. 3. Clean the device with a damp (not wet) cloth. 4. Disinfect the housing with a recommended disinfectant. 5. Make sure the ATMOS Audio Cube is dry before you switch it back on. ® Headphones, bone vibrator and patient response button Replace the ear cushions and headband pads at regular intervals. Clean the headphones, bone vibrator and patient response button after each patient. 32 Cleaning and disinfection... -
Page 33: Overview Hygiene Measures
Porous plastic due to detergents containing solvents. 1. Dampen a soft cloth with water and a mild, solvent-free detergent. Damaged headphone capsules due to water. 2. Make sure that the headphone capsule does not come into contact with water. 3. Clean the following items with a damp cloth: • Headphone bow. • Headphone ear cushions. • Bone vibrator capsule. • Patient response button. 5.2 Overview hygiene measures Device part Recommendation Device x mild solvent-free detergent Headphone bow mild solvent-free detergent Ear cushions mild solvent-free detergent Bone vibrator capsule mild solvent-free detergent Patient response mild solvent-free detergent button 5.3 Recommended disinfectants If you are using aldehyde and amine-containing disinfectants on the same object, this may cause discolouration. - Page 34 Disinfectant Ingredients in 100 g Manufacturer Perform Pentapotassium-bis(peroxymonosul- 45 g Schülke & Mayr, ® phate)-bis(sulphate) Norderstedt Terralin Protect Benzyl-C12-16 alkyldimethyl-, chloride 22 g Schülke & Mayr, ® (Application concen- Norderstedt 2-phenoxyethanol 17 g trate) aminoalkylglycine 0.9 g non-ionic surfactants, perfumes Mikrobac forte benzyl-C12-18-alkyldimethyl-ammonium 19.9 g Bode Chemie, ® (Application concen- chlorides Hamburg trate) N-(3-aminopropyl)-N-dodecylpropane-1,3-di- amine 34 Cleaning and disinfection...
-
Page 35: Maintenance And Service
• Please observe the deadlines in this chapter. • If you notice any errors or defects on the audiometer: Please contact ATMOS. Mandatory test Period Tester Daily function check Daily prior to use User Weekly Every week User function check When the device is rarely used: prior to each use Metrological check including re- Every 12 months. Persons with the appropriate peat test of the electrical safety technical knowledge and the (Germany: Metrological check necessary testing devices. according to Medical Device Recommended: Operator Ordinance). ATMOS service partner & ATMOS recommends: • Document all tests which were carried out. • For each examiner an audiogram should be created for the subjective examination of the hearing threshold. Maintenance and service... -
Page 36: Daily Function Check
6.2 Daily function check Visual check 1. Visually check the following condition of the device: □ All the operating controls are smooth running, nothing is bent or overtorqued, plug, power supply and accessory cables are not damaged; there are no signs of ageing. □ The headphone ear cushions have no cracks, breaks or any signs of ageing. Replace if necessary. □ The serial number of the device (SN) is indicated on the headphones and bone vibrator: SN headphone: __________________________ SN bone vibrator: __________________________ SN audiometer: __________________________ If the serial number on the transducer does not correspond to the serial number on the audiometer then you cannot use the transducer with that audiometer! 2. Switch on the device. 3. Wait for at least 5 minutes. The device must warm-up. Checking tone audiometry 4. Check subjectively the hearing threshold via air conduction and bone conduction. □ The hearing threshold is within normal limits. 5. Test the following conditions of the air conduction and bone conduction: □ No disturbing noises, no signal from other channels, no difference in the tone quality when the masking noise is switched on. -
Page 37: Weekly Function Check
6.3 Weekly function check 1. Visually check the following condition of the device: □ All the operating controls are smooth running, nothing is bent or overtorqued, plug, power supply and accessory cables are not damaged; there are no signs of ageing. □ The headphone ear cushions have no cracks, breaks or any signs of ageing. Replace if necessary. □ The headphone fits perfectly and does not slip. All the joints move freely. □ The serial number of the device (SN) is indicated on the headphones and bone vibrator. If the serial number on the transducer does not correspond to the serial number on the audiometer then you cannot use the transducer with that audiometer! SN headphone: _______________________ SN bone vibrator: __________________________ SN audiometer: _______________________ 2. Switch on the device and wait for at least 5 minutes. The device must warm-up. 3. Check subjectively the hearing threshold via air conduction and bone conduction. □ The hearing threshold is within normal limits. 4. Test the following condition at levels just above the hearing threshold: □ No disturbing noises, no signal from other channels, no difference in the tone quality when the masking noise is switched on. □ dB splitter - weakening is ok □ dB splitter without mechanical and electrical noises □ Tone switch (mute button) mechanically silent □ The emitted noise from the audiometer cannot be heard by the test person 5. -
Page 38: Metrological Check / Electrical Safety
6.4 Metrological check / electrical safety Only persons with the appropriate technical knowledge may perform this test. Interna- tional and country-specific regulations must be complied with. ATMOS recommends: Work should be carried out by an authorized ATMOS service partner. When the test is completed make sure the following is available: • Test report with the target and actual value of all parameters as well as the error limits • Seal of approval with information on the testing organization and the date for the next check At least the following will be tested within the metrological check: • Visual check, wear parts will be replaced • Function check • Patient probe and patient communication test • Disturbing noise, cross-talk, distortion test • Pressing force of the headphones • Frequency accuracy of the test tone • Total harmonic distortion (THD) of the air conduction • Tone level attenuation • Deviation of the sound pressure level tone and noise masking per setting frequency air conduction • Total harmonic distortion of the bone conduction • Deviation of the force level bone conduction per setting frequency •... -
Page 39: Parts Replacement
6.5 Parts replacement Only the parts described in this chapter may be replaced by the user. All the other parts must be replaced by a service partner authorized by ATMOS. 6.5.1 Sennheiser HDA280 headphone cushions 1. Switch off the device. 2. Grip the cushions from behind and remove from the ear piece. 3. Replace with new cushions. 6.5.2 Sennheiser HDA280 headphone bow cushion 1. Switch off the device. 2. Open the fastener on the cushion and remove from the bow. 3. Replace the cushion onto the bow with the opening turned upwards. 4. Pull both fastener sides together until they overlap. 5. Press them together. 6.5.3 Head bow of the bone vibrator B71 1. Switch off the device. -
Page 40: Bone Vibrator Cable B71
3. Loosen the top and bottom of the fuse holder with a screwdriver. 4. Remove the fuse holder. 5. Replace both glass tube fuses. 6. Reattach the fuse holder. Press until it audibly locks. 6.6 Sending in the device 1. Remove and properly dispose of consumables. 2. Clean and disinfect the product and accessories according to the operating instruc- tions. 3. Place used accessories with the product. 4. Fill in the form QD 434 „Delivery complaint / return shipment“ and the respective decontamination certifi cate. & This form is enclosed with each delivery and can be found at www.atmosmed.com. 5. The device must be well padded and packed in suitable packaging. 6. Place the form QD 434 „Delivery complaint / return shipment“ and the respective decontamination certifi cate in an envelope. 7. Affi x the envelope to the outside of the package. 8. Send the product to ATMOS or to your dealer. 40 Maintenance and service... -
Page 41: Troubleshooting
7 Troubleshooting The ATMOS Audio Cube 31 was subjected to a thorough quality control in the factory. ® Nevertheless, if a problem should occur you can possibly solve it yourself. Error indication Possible cause Remedy Measurement does No USB connection 1. Check whether the PC is connect- not start. between PC and audiom- ed to the device. eter. 2. If necessary connect the PC and ATMOS Audio Cube 31 with the ® USB cable. The software does Patient management 1. Keep the Alt and Tab keys pressed not respond. window is still open in and select the patient manage- the background. ment with the arrow. 2. Close the patient management. Troubleshooting... -
Page 42: Accessories
8 Accessories CAUTION Incorrect measurement results or level is too high caused by incorrectly calibrat- ed transducers. Damage to the patients hearing is possible. • As soon as you replace or use a diff erent transducer then the device must always be recalibrated. In this case please contact ATMOS. • Free fi eld loudspeakers must always be calibrated on site. In this case please contact ATMOS. Accessories Patient microphone 512.2118.0 Cable harness, acoustic booth 512.2114.0 Loudspeaker active* 512.2115.0 Loudspeaker cable, 2m 512.2116.0 Loudspeaker cable, 3m 512.2117.0 Option high tone-audiometry incl. headphones HDA 300 512.2120.0... -
Page 43: Spare Parts And Consumables
9 Spare parts and consumables Spare part Sennheiser HDA 280 headphone cushions 512.2123.0 Sennheiser HDA 300 headphone cushions 512.2124.0 Sennheiser HDA 280 / HDA 300 headphone, bow cushion 512.2122.0 Replacement headband Sennheiser HDA 280 512.2125.0 Head bow bone vibrator B71 512.2121.0 Patient response button 512.2112.0 Headset Stereo 512.2113.0 Spare parts and consumables... -
Page 44: Disposal
10 Disposal Device • Do not dispose of the device with household waste. • The ATMOS Audio Cube 31 does not contain any hazardous goods. ® Disposal in Germany 1. Clean and disinfect the device. 2. Send in the device to ATMOS or your specialized dealer. They will dispose of the device professionally. Disposal within the EC 1. Clean and disinfect the device. 2. The product may not be disposed of over the domestic waste (EC Directive WEEE and RoHS). 3. Dispose of the device professionally and according to country-specific regulations. Disposal in countries which do not belong to the European Union 1. Clean and disinfect the device. -
Page 45: Technical Data
11 Technical data Voltage 100 to 240 VAC ± 10% Frequency 50 to 60 Hz ± 3 Hz Power consumption 30 VA ± 10 % Fuses 2 X T1A L/250V glass tube Weight approx. 4.5 kg without accessories Dimensions approx. 505 x 355 x 110 mm (W x H x D) Life cycle approx. 11 years Warm-up time <10 min full acclimatization at the specific operating environment Ambient conditions Transport and storage Temperature: -10°C to +45°C Air humidity without condensation: 30% to 90 % relative humidity Air pressure: 70 kPa to 106 kPa Operation Temperature: +15°C to +35°C Air humidity without condensation: 30% to 90 % relative humidity Air pressure: 98 kPa to 104 kPa Signal output Headphone (audiometer headphone) Bone vibrator Free field: 2 loudspeakers, active or passive External: further headphones or earphones or 2 other loudspeakers Monitor Mono: monaural listener Monitor Stereo: binaural listener Signal inputs... - Page 46 Pulse tone 0.25 - 2.5 Hz in steps of 0.25 Hz Frequency modulation 1 - 20 Hz in steps of 1 Hz (Wobbel) Wave form of modulation: Sinus Complexity of sound 1 - 25% in steps of 1% (Wobbel) Amplitude modulation 5, 3, 2, 1 dB steps (SISI) Masking tone test Contralateral free or synchronous Broadband noise Narrowband noise (acc. to EN 60645-1 chapter 6.4, 8.5 and table 4) Spectrum: 1/3 octave Masking speech test Contralateral free or synchronous Broadband noise Speech-simulating noise Frequency-weighted noise acc. to EN 60645-2 chapter 13 frequency Speech test Monaural and binaural External speech test any connectable signal source Supra-threshold tests SISI, FOWLER, Lüscher, Langenbeck, Stenger and Tinnitus Output level max. 120 dB HL Bone vibrator B 71 Pressing force 5,4 N Coupling type IEC 373 Headphone Sennheiser Pressing force 5,0 N HDA 280 Coupling type IEC 303...
-
Page 47: Notes On Emc
12 Notes on EMC Medical electrical equipment is subject to special precautions with regard to EMC and must be installed acc. to following EMC notes. Portable and mobile HF communication facilities can influence medical electrical equip- ment. The use of other accessories, other converters and cables than stated may lead to an increased emission or a reduced interference immunity of the equipment or system. Guidelines and Manufacturer's Declaration - Emissions The product ATMOS Audio Cube 31 is intended for use in the electromagnetic environ- ® ment specified below. The customer or user of the audiometer should ensure that it is used in such an environment. Emissions Test Compliance Electromagnetic Environment - Guidance RF Emissions acc.to Group 1 The audiometer uses RF energy only for its internal CISPR 11 function. Therefore, its HF emissions are very low and it is unlikely that nearby electronic devices will be affected. RF Emissions acc.to Class B The audiometer is suitable for use in all estab-... - Page 48 Guidelines and Manufacturer´s Declaration - Immunity The product ATMOS Audio Cube 31 is intended for use in the electromagnetic environ- ® ment specified below. The customer or user of the audiometer should ensure that it is used in such an environment. Immunity Test IEC 60601- Test Compliance Electromagnetic Environment - Level Level Guidance Electrostatic +/- 6 kV Contact +/- 6 kV Contact Floors should be made of wood discharge (ESD) or concrete or tiled with ceramic +/- 8 kV Air +/- 8 kV Air according to IEC tiles. If floors are synthetic, the 61000-4-2 relative humidity should be at least 30%. Fast electrical +/- 2 kV Mains...
- Page 49 Guidelines and Manufacturer´s Declaration - Immunity The product ATMOS Audio Cube 31 is intended for use in the electromagnetic environ- ® ment specified below. The customer or user of the audiometer should ensure that it is used in such an environment. Immunity Test IEC 60601- Test Compliance Electromagnetic Environment - Guid- Level Level ance Conducted Portable and mobile communications interference equipment should be separated from according to IEC the audiometer including the cables by 61000-4-6 no less than the distances calculated/ listed below. Radiated RF IEC 3 V/m 3 V/m 61000-4-3 Recommended distances: 80 MHz to 1.0...
- Page 50 recommended below, according to the maximum output power of the communications equipment. Power of transmit- Safety distance, depending on transmit-frequency m ter W 150 kHz to 80 MHz 80 MHz to 800 MHz 800 MHz to 2.5 GHz d = 1.17 * √(P) d = 1.17 * √(P) d = 2.33 * √(P) 0.01 0.12 0.12 0.233 0.37 0.37 0.74 1.17 1.17 2.33 11.7 11.7 23.3 For transmitters for which the maximum nominal output is not indicated in the above table, the recommended safety distance d in meters (m) can be determined using the equation belonging to the respective column whereas P is the maximum nominal output of the transmitter in watts (W) acc. to manufacturer's specification. NOTE 1 With 80 MHz and 800 MHz the higher frequency range applies. NOTE 2 These guidelines may not be applicable in all cases. The emanation of electromagnetic waves is affected by absorption and reflection of buildings, objects and people.
-
Page 51: For Your Notes
13 For your notes For your notes... - Page 52 ATMOS MedizinTechnik GmbH & Co. KG Ludwig-Kegel-Straße 16 79853 Lenzkirch / Germany Phone: +49 7653 689-0 atmos@atmosmed.de www.atmosmed.com...
Need help?
Do you have a question about the Audio Cube 31 and is the answer not in the manual?
Questions and answers