
Subscribe to Our Youtube Channel
Related Manuals for COMAC INNOVA 60 B 2013

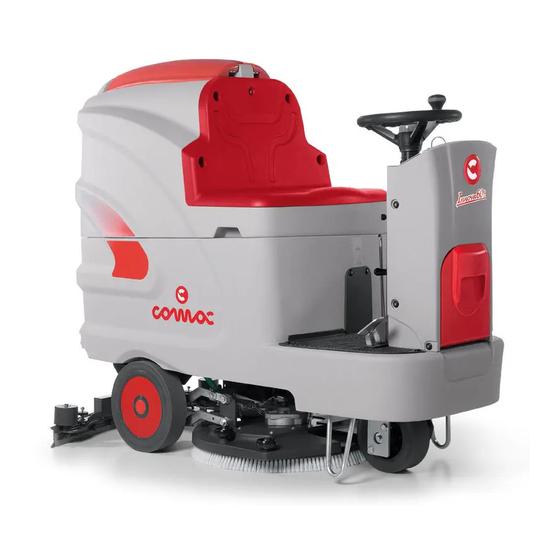
Summary of Contents for COMAC INNOVA 60 B 2013
- Page 1 USE AND MAINTENANCE MANUAL INNOVA 60 B 2013 INNOVA 65-75-85-100 B 2013 INNOVA 70 S 2013 ED. 07-2013 ORIGINAL INSTRUCTIONS Doc. 10029401 AC Version...
- Page 3 The descriptions contained in this document are not binding. The company therefore reserves the right to make any modifications at any time to elements, details, or accessory supply, as considered necessary for reasons of improvement or manufacturing/commercial requirements. The reproduction, even partial, of the text and drawings contained in this document is prohibited by law.
-
Page 4: Table Of Contents
CONTENTS ON CONSIGNMENT OF THE MACHINE............................. 6 INTRODUCTORY COMMENT ................................6 INTENDED USE ....................................6 SERIAL NUMBER PLATE ................................. 6 TECHNICAL DESCRIPTION ................................7 SYMBOLS USED ON THE MACHINE ..............................8 GENERAL SAFETY REGULATIONS ............................... 13 PREPARATION OF MACHINE ................................ 15 1. - Page 5 44. OVERFLOW DEVICE (Innova 60B versions) ..........................46 45. OVERFLOW DEVICE (Innova 65B - Innova 75B - Innova 85B - Innova 100B - Innova 70S - Innova 70BTO versions) ....... 47 AT THE END OF THE WORK ................................48 DAILY MAINTENANCE ................................... 50 46.
-
Page 6: On Consignment Of The Machine
On consignment of the machine Serial number plate The serial number plate is located at the rear of the steering When the machine is consigned to the customer, an immediate column, and it contains the general characteristics of the machine, check must be performed to ensure all the material mentioned in and in particular the machine's serial number. -
Page 7: Technical Description
Innova Innova Innova Innova Innova Innova Innova TECHNICAL DESCRIPTION 100B 70BTO Working width 1010 Squeegee width 1085 1085 Working capacity, up to 3660 3900 4500 5100 6000 4100 4200 Disc brushes 1/610 2/340 2/390 2/430 2/510 No. / ∅ mm Cylindrical brushes 1/210 No. -
Page 8: Symbols Used On The Machine
SYMBOLS USED ON THE MACHINE Indicates the maximum gradient. Pedal labels that indicate the forward and reverse direction of the machine. Used to indicate the direction of the machine. Water quantity regulation symbol. Used on the steering column to indicate the knobs for adjusting the quantity of water distributed in the machine's water system. - Page 9 SYMBOLS USED ON THE MACHINE Label with warnings on the type of detergent to use (CDS system only). Label with Ph value of the detergent to use (CDS system only). Indicates the risk of crushed hands. Main switch symbol (key switch). Used on the instrument panel, to indicate the key switch for machine operation on (ON/I) or off (OFF/0).
- Page 10 SYMBOLS USED ON THE MACHINE Horn symbol (Innova 60B versions). It is used in the rear of the steering column to indicate the horn button. Brush head / squeegee operating symbol (Innova 65B - Innova 75B - Innova 85B - Innova 100B - Innova 70S - Innova 70BTO versions).
- Page 11 SYMBOLS USED ON THE MACHINE Brush uncoupling symbol (Innova 65B - Innova 75B - Innova 85B versions). Used on the control panel to indicate the button for uncoupling the brushes. Brush uncoupling symbol (Innova 65B - Innova 75B - Innova 85B versions). Used on the control display to indicate that the brushes are being uncoupled.
- Page 12 SYMBOLS USED ON THE MACHINE “ECO SCRUBBING-DRYING” program symbol (Innova 65B - Innova 75B - Innova 85B - Innova 100B - Innova 70S - Innova 70BTO versions). Used in the control display to indicate that the “ECO SCRUBBING-DRYING” working program is active, in this case the brush motor, the solenoid valve and the vacuum motor are operating in economic mode.
-
Page 13: General Safety Regulations
GENERAL SAFETY REGULATIONS The regulations below must be carefully followed in order to avoid harm to the operator and damage to the machine. WARNING: • Read the labels on the machine carefully. Do not cover them for any reason and replace them immediately if they become damaged. - Page 14 • If you need to replace any components, request the ORIGINAL spare parts from an Authorised Retailer or dealer. • Restore all electrical connections after any maintenance interventions. • Before using the machine, check that all the hatches and covers are positioned as shown in this Use and Maintenance Manual.
-
Page 15: Preparation Of Machine
PREPARATION OF MACHINE 1. HANDLING THE PACKED MACHINE The machine is contained in specific packaging with a pallet for the handling with fork trucks. The packages cannot be placed on top of each other. The overall weight of the package (machine without batteries, plus packaging elements) is: Innova Innova Innova... -
Page 16: Instrument Panel Components (Innova 60B Version)
PREPARATION OF MACHINE 4. INSTRUMENT PANEL COMPONENTS (Innova 60B version) The instrument panel components are identified as follows: Battery level / hour meter display Battery level hour meter display control button Main key switch Red warning light indicating that the parking brake is on 5. -
Page 17: Steering Column Components (Innova 60B Version)
PREPARATION OF MACHINE Choose the desired operating program with the I-Drive device: A. Transfer: movement of the machine without working. B. Drying: using the squeegee only. C. Scrubbing / Drying: using both the brushes and the squeegee. D. Scrubbing only : using the brushes only. "ECO"... -
Page 18: Side Components Of The Machine
PREPARATION OF MACHINE Service brake pedal. Parking brake lever. Pedal for extra brush head pressure (Innova 65B - Innova 75B - Innova 85B - Innova 100B versions). Water level pipe (versions with CDS) or solution level pipe (versions without CDS). 10. -
Page 19: Rear Components Of The Machine
PREPARATION OF MACHINE Vacuum cap. Optional blinking light kit. 11. REAR COMPONENTS OF THE MACHINE The rear components of the machine are identified as follows: Recovery tank drainage tube. Squeegee vacuum hose. 12. BATTERY TYPE To power the machine it is necessary to use: •... -
Page 20: Fitting The Batteries Into The Machine
PREPARATION OF MACHINE 14. FITTING THE BATTERIES INTO THE MACHINE The batteries must be housed in the special compartment beneath the recovery tank and should be handled using lifting equipment that is suitable in terms of both weight and coupling system. They must also satisfy the requirements of Standard CEI 21-5. -
Page 21: Connecting The Batteries And Battery Connector
PREPARATION OF MACHINE 15. CONNECTING THE BATTERIES AND BATTERY CONNECTOR Connect the batteries in series using the jumper cables supplied (03) to the poles “+” and “-“. Connect the battery connector cable (01) to the “+” and “-“ poles to obtain a voltage of 24V on the terminals. -
Page 22: Connecting The Battery-Charger (Versions With A Built-In Battery Charger)
PREPARATION OF MACHINE Connect the battery charger cable (07) to the battery connector (06). Grip the handle on the safety catch and turn the recovery tank until it hooks up with the prop in the first point of the safety catch. ATTENTION: keep the recovery tank open for the duration of the battery recharging cycle to allow gas fumes to escape. -
Page 23: Hour Meter (Innova 60B Versions)
PREPARATION OF MACHINE Check the main switch (04) is at "0", if not, turn the key by a quarter of a turn to the left, and remove the key from the instrument panel. Grip the handle on the right side of the recovery tank. Lift the recovery tank until it hooks to the end of the safety catch. -
Page 24: Hour Meter (Innova 65B - Innova 75B - Innova 85B - Innova 100B - Innova 70S - Innova 70Bto Versions)
PREPARATION OF MACHINE 19. HOUR METER (Innova 65B - Innova 75B - Innova 85B - Innova 100B - Innova 70S - Innova 70BTO versions) The control display is on the machine's instrument panel, the third screen after the machine has been started allows you to observe: In the first part of the display you can display the work voltage that has been set and the type of battery. -
Page 25: Filling The Solution Tank With Water
PREPARATION OF MACHINE 23. FILLING THE SOLUTION TANK WITH WATER Before filling the solution tank, carry out the following steps: Take the machine to the usual place for filling the solution tank Check that the recovery tank is empty; if not, empty it using the tube provided for this purpose (01) positioned at the rear of the machine (read the section "EMPTYING THE RECOVERY TANK"). -
Page 26: Detergent Solution (Version Without Cds)
PREPARATION OF MACHINE The solution tank can be filled with water in three different ways: By unscrewing the filler cap (01) and filling it using a rubber tube or bucket. ATTENTION: Check that the filter (02) under the filler cap (01) is positioned correctly;... - Page 27 PREPARATION OF MACHINE Remove the cap (02) of the detergent canister (03). Remove the machine's detergent canister (03). Fill the canister with the desired detergent, in the manner set out on the label coming with the machine. ATTENTION: protective gloves should always be worn before handling detergents or acidic or alkaline solutions, to avoid serious injury to the hands.
-
Page 28: Assembling The Squeegee (Innova 60B Versions)
PREPARATION OF MACHINE 26. ASSEMBLING THE SQUEEGEE (Innova 60B versions) To assemble the squeegee, which for reasons of packaging, is supplied dismantled from the machine, proceed as follows: Block the machine in place by engaging the parking brake, press the pedal (01) and block it with the lever (02) at the rear of the steering column (read the section “PARKING BRAKE AND SERVICE BRAKE”). -
Page 29: Assembling The Squeegee (Innova 65B - Innova 75B - Innova 85B - Innova 100B - Innova 70S - Innova 70Bto Versions)
PREPARATION OF MACHINE 27. ASSEMBLING THE SQUEEGEE (Innova 65B - Innova 75B - Innova 85B - Innova 100B - Innova 70S - Innova 70BTO versions) To assemble the squeegee, which for reasons of packaging, is supplied dismantled from the machine, proceed as follows: Check that the squeegee attachment is raised from the floor, if not, use the switch on the instrument panel. -
Page 30: Assembling The Brush (Innova 60B Versions)
PREPARATION OF MACHINE Turn the main machine switch to "0" by turning the key (03) a quarter rotation to the left. Remove the key from the instrument panel. ATTENTION: users are advised to always wear protective gloves, to avoid the risk of serious injury to hands. -
Page 31: Assembling The Brushes (Innova 65B - Innova 75B - Innova 85B - Innova 100B - Innova 70S - Innova 70Bto Versions)
PREPARATION OF MACHINE 30. ASSEMBLING THE BRUSHES (Innova 65B - Innova 75B - Innova 85B - Innova 100B - Innova 70S - Innova 70BTO versions) To assemble the brushes, which for reasons of packaging are supplied dismantled from the machine, proceed as follows: 1. -
Page 32: Parking Brake - Service Brake
PREPARATION OF MACHINE 5. Insert the brush (the side with 5 teeth) in the tunnel until it couples with the drive hub on the opposite side of the tunnel. 6. Insert the idler wheel of the right brush head casing in the brush. 7. -
Page 33: Preparing To Work
PREPARING TO WORK PREPARING TO WORK (versions without CDS) Before beginning to work, it is necessary to: 1. Make sure the recovery tank is empty, otherwise empty it completely. 2. Check that the quantity of detergent solution in the solution tank is correct for the type of work to be carried out;... -
Page 34: Preparing To Work (Versions With Cds)
PREPARING TO WORK PREPARING TO WORK (versions with CDS) Before beginning to work, it is necessary to: 1. Make sure the recovery tank is empty, otherwise empty it completely. 2. Check that the quantity of water in the solution tank is sufficient for the type of work to be carried out;... - Page 35 PREPARING TO WORK 11. Make sure that the tap is fully open, the knob (05) should be completely down. 12. Make sure that the bypass tap (06) on the brush head is in the "dosing system" position. 13. Turn the main machine switch to "I", turn the key (07) a quarter rotation to the right. 14.
- Page 36 PREPARING TO WORK 17. Set the maximum amount of chemical in the detergent solution, by pressing the button (09) until the symbol shown on the side is completely full. 18. Select the “WASHING/ DRYING” program, by rotating the switch to “C”. 19.
-
Page 37: Work
(to visualise a different type - for instance partial - contact the specialist personnel or COMAC- trained personnel). The bottom line shows the “service” setting (in this case there is no setting). -
Page 38: Beginning To Work (Innova 65B - Innova 75B - Innova 85B - Innova 100B - Innova 70S - Innova 70Bto Versions)
WORK Lower the brush head until it comes into contact with the floor, rotating the lever (06) in an anti-clockwise direction. Remove the parking brake, turn the lever (07) clockwise. In the control panel the red indicator light pertaining to the parking symbol “P” will go out. ATTENTION: If you try to move forward with the parking brake engaged, the machine will not move because the motor wheel is disengaged electrically when the parking brake is active. - Page 39 WORK The lower part of the screen displays the program release inserted into the circuit board. The third screen (adjacent picture) displays the work panel. The symbols represent the following: Level of transfer or work speed. Level of the water in the machine's water system (versions with CDS). Level of the detergent in the machine's water system (versions with CDS).
- Page 40 WORK By selecting the "SCRUBBING - DRYING” program, the display screen will appear as in the adjacent figure. Both the brush head and the squeegee will position themselves in contact with the floor as soon as the forward movement pedal is pressed, in that moment both the brush motor and the vacuum motor will start working.
- Page 41 WORK This machine has the possibility of selecting three different forward speeds, by pressing the button (03), the passage from one to the other is continuous. The symbol (A) on the top left part of the control panel display shows the speed. ATTENTION: the reverse speed is lower than the forward speed to comply with current health and safety standards.
-
Page 42: Detergent Regulation (Version Without Cds)
WORK 38. DETERGENT REGULATION (VERSION WITHOUT CDS) To regulate the amount of detergent solution on the brushes, proceed as follows: 1. Fully open the flow coming from the tap on the front of the machine by moving the knob (01) on the rear of the steering column down. - Page 43 WORK 6. By pressing the button (02) for regulating the percentage of detergent in the water circuit once again, you can change the percentage. The percentage of detergent in the solution varies from a minimum of 0.5 % to a maximum of 3.5 % with 7 set dosing levels.
-
Page 44: Adjusting The Forward Working Speed (Innova 65B - Innova 75B - Innova 85B - Innova 100B - Innova 70S - Innova 70Bto Versions)
WORK 40. ADJUSTING THE FORWARD WORKING SPEED (Innova 65B - Innova 75B - Innova 85B - Innova 100B - Innova 70S - Innova 70BTO versions) This machine allows you to choose from three different forward speeds using the button (01) on the instrument panel. -
Page 45: Eco" Device (Innova 65B - Innova 75B - Innova 85B - Innova 100B - Innova 70S - Innova 70Bto Versions)
WORK Remove the plastic clamp that fixes the solution distribution tube to the solenoid valve Remove the solution distribution tube from the solenoid valve 10. If present, remove the solution choke bushing (06) and replace it with the more suitable one, or insert the more suitable choke bushing at the required working capacity (the choke bushings are included in the water management kit) 11. -
Page 46: Overflow Device (Innova 60B Versions)
WORK If, when working in "SCRUBBING - DRYING" mode, the extra pressure pedal is pressed, the control display will immediately undergo the change (02) shown in the image on the side. If, when working in "SCRUBBING" mode, the extra pressure pedal is pressed, the control display will immediately undergo the change (03) shown in the image on the side. -
Page 47: Overflow Device (Innova 65B - Innova 75B - Innova 85B - Innova 100B - Innova 70S - Innova 70Bto Versions)
WORK Raise the squeegee off the ground, turn the lever (02) clockwise. After about 15-25 seconds turn the key (03) 1/4 of a turn left, this will stop the machine. Turn the key (03) 1/4 of a turn right, this will start the machine. ATTENTION: During machine switch-on, do not keep the accelerator pedal pressed down. -
Page 48: At The End Of The Work
AT THE END OF THE WORK At the end of the work, and before carrying out any type of maintenance, perform the following operations: Take the machine to the designated place for draining off the dirty water. Bring the main machine switch to "0" by turning the key on the instrument panel a quarter rotation to the left. - Page 49 AT THE END OF THE WORK Remove the debris hopper and eliminate the impurities in it (read “CLEANING THE DEBRIS HOPPER (Innova 70S versions)”). 10. Engage the parking brake, rotating the lever on the rear of the steering column clockwise. 11.
-
Page 50: Daily Maintenance
DAILY MAINTENANCE PERFORM ALL MAINTENANCE OPERATIONS IN SEQUENCE 46. EMPTYING THE RECOVERY TANK Proceed as follows to empty the recovery tank: Take the machine to the designated machine maintenance area; use the switch on the instrument panel to select the “TRANSPORT” program (A). Block the machine in place by engaging the parking brake, press the pedal (01) and block it with the lever (02) at the rear of the steering column (read the section “PARKING BRAKE AND SERVICE BRAKE”). -
Page 51: Draining The Solution Tank (Innova 70S Versions)
DAILY MAINTENANCE Block the machine in place by engaging the parking brake, press the pedal (01) and block it with the lever (02) at the rear of the steering column (read the section “PARKING BRAKE AND SERVICE BRAKE”). Turn the main machine switch to "0" by turning the key (03) a quarter rotation to the left. Remove the key from the instrument panel. -
Page 52: Cleaning The Squeegee Body
DAILY MAINTENANCE Remove the drainage plug (04) of the solution tank, it is located on the left side of the machine. ATTENTION: The place this operation is carried out should comply with current environmental protection regulations. Repeat the operations in reverse order to reassemble all the parts. 49. -
Page 53: Cleaning The Disc Brushes (Innova 60B Versions)
DAILY MAINTENANCE First with a jet of water and then with a damp cloth, thoroughly clean the front rubber blade (08) of the squeegee body. 10. Check the wear of the front rubber blade (08) on the squeegee body; if the edge of the rubber in contact with the floor is worn, replace it. -
Page 54: Cleaning The Disc Brushes (Innova 65B - Innova 75B - Innova 85B - Innova 100B Versions)
DAILY MAINTENANCE Check that the brush head unit is raised from the floor, if necessary turn the lever (04) anti- clockwise. As soon as the brush head reaches the rest position it will stop working. Rotate the brush until it comes out of the housing of the brush-holder plate. Clean the brushes under a jet of water and remove any dirt in the brush bristles. -
Page 55: Cleaning The Cylindrical Brush (Innova 70S Versions)
DAILY MAINTENANCE you are advised to invert the right and left-hand brushes every day. If the brushes are not new however, and have deformed bristles, it is better to reassemble them in the same position (the right-hand one on the right, and the left-hand one on the left), to prevent the different inclination of the bristles producing an overload on the brush motor as well as excessive vibrations. -
Page 56: Cleaning The Debris Hopper (Innova 70S Versions)
DAILY MAINTENANCE Clean the splash guard rubber on the left side of the brush head unit well with a wet cloth and on the right casing. Repeat the operations in reverse order to reassemble all the parts. ATTENTION: In order to be assembled correctly, the brush should have the cusp shape facing the front of the machine. -
Page 57: Cleaning The Recovery Tank Filter
DAILY MAINTENANCE 54. CLEANING THE RECOVERY TANK FILTER Careful cleaning of the recovery tank filter guarantees better cleaning of the floor as well as a longer vacuum motor life. Proceed as follows to clean the recovery tank filter: Take the machine to the designated machine maintenance area; use the switch on the instrument panel to select the “TRANSPORT”... -
Page 58: Weekly Maintenance
WEEKLY MAINTENANCE 55. CLEANING THE RECOVERY TANK The careful cleaning of the recovery tank guarantees a longer machine life. Proceed as follows to clean the recovery tank: Take the machine to the designated machine maintenance area; use the switch on the instrument panel to select the “TRANSPORT”... -
Page 59: Cleaning The Solution Tank (Innova 70S Versions)
WEEKLY MAINTENANCE Block the machine in place by engaging the parking brake, press the pedal (01) and block it with the lever (02) at the rear of the steering column (read the section “PARKING BRAKE AND SERVICE BRAKE”). Turn the main machine switch to "0" by turning the key (03) a quarter rotation to the left. Remove the key from the instrument panel. -
Page 60: Cleaning The Water System Filter
WEEKLY MAINTENANCE Block the machine in place by engaging the parking brake, press the pedal (01) and block it with the lever (02) at the rear of the steering column (read the section “PARKING BRAKE AND SERVICE BRAKE”). Turn the main machine switch to "0" by turning the key (03) a quarter rotation to the left. Remove the key from the instrument panel. -
Page 61: Cleaning The Vacuum Tube (Innova 65B - Innova 75B - Innova 85B - Innova 100B - Innova 70Bto Versions)
WEEKLY MAINTENANCE Block the machine in place by engaging the parking brake, press the pedal (01) and block it with the lever (02) at the rear of the steering column (read the section “PARKING BRAKE AND SERVICE BRAKE”). Turn the main machine switch to "0" by turning the key (03) a quarter rotation to the left. Remove the key from the instrument panel. -
Page 62: Cleaning The Vacuum Tube (Innova 70S Versions)
WEEKLY MAINTENANCE Remove the vacuum hose (04) from the vacuum nozzle (05) on the squeegee body. Grip the handle on the right side of the recovery tank. Lift the recovery tank until it hooks to the end of the safety catch. Remove the vacuum hose (06) from the recovery tank. -
Page 63: Cleaning The Detergent Canister (Versions With Cds)
WEEKLY MAINTENANCE Remove the vacuum hose (04) from the vacuum nozzle (05) on the squeegee body. Remove the debris hopper vacuum hose (06) from the vacuum nozzle (07) on the brush head unit. Grip the handle on the right side of the recovery tank. Lift the recovery tank until it hooks to the end of the safety catch. - Page 64 WEEKLY MAINTENANCE Turn the main machine switch to "0" by turning the key (03) a quarter rotation to the left. Remove the key from the instrument panel. Open the hatch (04) on the front of the steering column. Remove the cap (05) of the detergent canister (06). Remove the machine's detergent canister (06).
-
Page 65: Extraordinary Maintenance
EXTRAORDINARY MAINTENANCE 62. REPLACING THE SQUEEGEE RUBBER BLADES (Innova 60B versions) Careful cleaning of the squeegee rubber guarantees better cleaning of the floor as well as a longer vacuum motor life. To replace the squeegee rubber blades, proceed as follows: Take the machine to the maintenance area. -
Page 66: Replacing The Squeegee Rubber Blades (Innova 65B - Innova 75B - Innova 85B - Innova 100B - Innova 70Bto Versions)
EXTRAORDINARY MAINTENANCE Proceed as follows for replacing the rear rubber blade of the squeegee body: 1. Turn the wing nuts (10) in the horizontal position. 2. Remove the front rubber-pressing blades (11). 3. Remove the rubber (12) and replace it. 4. -
Page 67: Adjusting The Squeegee (Innova 60B Versions)
EXTRAORDINARY MAINTENANCE Proceed as follows for replacing the rear rubber blade of the squeegee body: Turn the wing nuts (10) in the horizontal position. Remove the front rubber-pressing blades (11). Remove the rubber (12) and replace it. Proceed in reverse to replace the rubber. 64. -
Page 68: Adjusting The Squeegee (Innova 65B - Innova 75B - Innova 85B - Innova 100B - Innova 70S - Innova 70Bto Versions)
EXTRAORDINARY MAINTENANCE If you need to increase the inclination of the rubber blade in the centre, it is necessary to tighten the screw (06); to decrease it, just turn the screw (06) in the opposite direction. During working operation, the rear rubber blade should be slightly tilted backwards by about 30°- 45°... -
Page 69: Replacing The Disc Brush (Innova 60B Versions)
EXTRAORDINARY MAINTENANCE 66. REPLACING THE DISC BRUSH (Innova 60B versions) Brushes in a good condition guarantee better cleaning of the floor as well as a longer brush motor life. To replace the brush, proceed as follows: Take the machine to the maintenance area. ATTENTION: The place this operation is carried out should comply with current environmental protection regulations. -
Page 70: Replacing The Cylindrical Brush (Innova 70S Versions)
EXTRAORDINARY MAINTENANCE Block the machine in place by engaging the parking brake, press the pedal (01) and block it with the lever (02) at the rear of the steering column (read the section “PARKING BRAKE AND SERVICE BRAKE”). ATTENTION: users are advised to always wear protective gloves, to avoid the risk of serious injury to hands. -
Page 71: Replacing The Brush Head Carter (Innova 65B - Innova 75B - Innova 85B - Innova 100B Versions)
EXTRAORDINARY MAINTENANCE With the brush head in a high position remove the right brush head casing (04), uncoupling the retention hinges (05). Remove the brush to be replaced from the tunnel. Insert the brush (the side with 5 teeth) in the tunnel until it couples with the drive hub on the opposite side of the tunnel. -
Page 72: Washing The Dosing System (Versions With Cds)
EXTRAORDINARY MAINTENANCE 7. Remove the casing to be replaced (04) from the brush head unit, the casing is fixed to it by means of screws (05). The image on the side shows the left casing. 8. Secure the new casing to the brush head unit (read the section "ASSEMBLING THE BRUSH HEAD CASING"). - Page 73 EXTRAORDINARY MAINTENANCE Open the hatch (05) on the front of the steering column. Unscrew the cap (06) of the detergent canister (07). 10. Remove the machine's detergent canister (07). 11. Fill the canister with clean water. ATTENTION: Fill with clean water, at a temperature not higher than 50°C and not lower than 10°C .
- Page 74 EXTRAORDINARY MAINTENANCE 17. Turn the main machine switch to "I", turn the key (03) a quarter rotation to the right. 18. When the work screen appears on the control display, press the button (08). 19. Set the maximum amount of water in the detergent solution, by pressing the button (08) until the symbol shown on the side is completely full.
- Page 75 EXTRAORDINARY MAINTENANCE 24. Wait a few minutes, normally 2 – 4 minutes, to allow the dosing system to be washed. 25. Completely empty the solution tank and detergent canister. ATTENTION: The machine will dispense solution during this operation 26. Using the switch on the instrument panel, select the program “TRANSPORT" (A). 27.
-
Page 76: Troubleshooting
TROUBLESHOOTING 71. INSUFFICIENT WATER ON THE BRUSHES Check that there is water in the solution tank, the amount inside the tank can be seen by means of the level tube (01) on the front left of the seat. Make sure that the detergent solution tap is open, and check that the knob (02) on the back of the steering column is completely lowered. -
Page 77: The Brush Motor Doesn't Work (Innova 60B Versions)
TROUBLESHOOTING 76. THE BRUSH MOTOR DOESN'T WORK (INNOVA 60B VERSIONS) ATTENTION To avoid damaging the floor, the motor only starts up when the machine is moved forwards Check that the brush head is lowered during the forward movement, with the right lever (01) turned clockwise. -
Page 78: Electric Fuses And Thermal Cut-Outs
TROUBLESHOOTING 80. ELECTRIC FUSES AND THERMAL CUT-OUTS In addition to general 80 A fuses, the machine is also fitted with self-restoring safety fuses located on the boards in the electric system that interrupt the power supply to the brush and vacuum motor when the machine exceeds the predetermined load. -
Page 79: Disposal
DISPOSAL To dispose of the machine, take it to a demolition centre or an authorised collection centre. Before scrapping the machine it is necessary to remove and separate the following materials and send them to the appropriate collection centres in accordance with the environmental hygiene regulations currently in force: •... -
Page 80: Choosing And Using The Brushes
CHOOSING AND USING THE BRUSHES POLYPROPYLENE BRUSH (PPL) Used on all types of floors. Good resistance to wear and tear, and hot water (no greater than 60°C.). The polypropylene is non-hygroscopic and therefore retains its characteristics even when working in wet conditions. NYLON BRUSH Used on all types of floors. -
Page 81: Ec Declaration Of Conformity
EC DECLARATION OF CONFORMITY The undersigned manufacturer: COMAC S.p.A. Via Maestri del Lavoro, 13 37050 Santa Maria di Zevio (VR) declares under its sole responsibility that the products FLOOR SCRUBBING MACHINES mod. Innova 60B – Innova 65B – Innova 75B – Innova 85B – Innova 100B – Innova 70S - Innova 70BTO comply with the provisions of Directives: •... - Page 84 COMAC SpA Via Maestri del Lavoro, 13 - 37059 S.Maria di Zevio (Verona) Italy Tel. +39 045 8774222 r.a. - Fax +39 045 8750303 - E-mail:comac@comac.it - www.comac.it...
Need help?
Do you have a question about the INNOVA 60 B 2013 and is the answer not in the manual?
Questions and answers