
Subscribe to Our Youtube Channel
Summary of Contents for VTI Instruments EX2500A
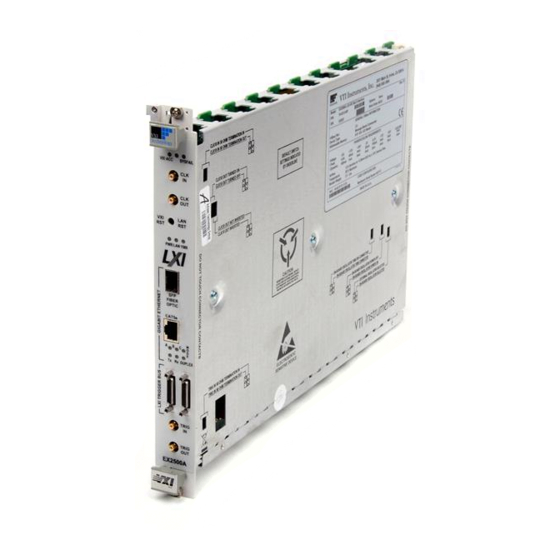
- Page 1 (217) 352-9330 | Click HERE Find the Ametek / VTI Instruments / VXI Technology EX2500A at our website:...
- Page 2 EX2500A LXI-VXI G IGABIT THERNET NTERFACE ’ ANUAL P/N: 82-0115-000 Released May 27, 2010 VTI Instruments Corp. 2031 Main Street Irvine, CA 92614-6509 (949) 955-1894 Artisan Technology Group - Quality Instrumentation ... Guaranteed | (888) 88-SOURCE | www.artisantg.com...
-
Page 3: Table Of Contents
Data Transfer Rates ............................11 Simplified Cabling and Connectivity ......................11 Familiar Software Interfaces ......................... 12 Embedded Resource Manager ........................12 Additional Features ............................12 EX2500A Specifications ............................ 13 TCXO/OCXO Option Specifications ......................... 14 2 .................................. 15 ECTION ............................15 REPARATION FOR Overview ................................ - Page 4 GILENT RIMARY VISA Installation ..............................26 EX2500A Driver Installation ..........................30 VXI Plug&Play Driver ..........................30 IVI Driver ..............................32 Add the EX2500A Interface to Agilent VISA ....................34 VISA VISA ........................39 GILENT ECONDARY VISA Installation ..............................39 EX2500A Driver Installation ..........................43 VXI Plug&Play Driver ..........................
- Page 5 ..............................81 ROUBLESHOOTING LED Error Codes ..............................81 Network Troubleshooting ........................... 82 Restore the EX2500A’s Default Network Settings ..................82 Determine PCs Network Settings ........................82 Set the EX2500A to Auto IP ......................... 83 Set theEX2500A to Static IP ......................... 84 Restore the Host PCs Network Settings ......................
-
Page 6: Certification
VTI Instruments Corp. shall not be liable for injury to property other than the goods themselves. Other than the limited warranty stated above, VTI Instruments Corp. makes no other warranties, express or implied, with respect to the quality of product beyond the description of the goods on the face of the contract. -
Page 7: Declaration Of Conformity
RODUCT ONFIGURATIONS VTI Instruments Corp. declares that the aforementioned product conforms to the requirements of the Low Voltage Directive 73/23/EEC and the EMC Directive 89/366/EEC (inclusive 93/68/EEC) and carries the “CE” mark accordingly. The product has been designed and manufactured... -
Page 8: Eneral Afety Nstructions
End-of-life product can be returned to VTI by obtaining an RMA number. Fees for take-back and recycling will apply if not prohibited by national law. EX2500A Preface Artisan Technology Group - Quality Instrumentation ... Guaranteed | (888) 88-SOURCE | www.artisantg.com... -
Page 9: Warnings
To avoid damage and potential loss of phone service, ensure that Connect Cables Properly the RJ-45 connector on the front panel of the EX2500A is not connected to a standard telephone jack. This should only be connected to a network interface card, network router, or network hub. -
Page 10: Support Resources
UPPORT ESOURCES Support resources for this product are available on the Internet and at VTI Instruments customer support centers. VTI Instruments Corp. World Headquarters VTI Instruments Corp. 2031 Main Street Irvine, CA 92614-6509 Phone: (949) 955-1894 Fax: (949) 955-3041... - Page 11 Artisan Technology Group - Quality Instrumentation ... Guaranteed | (888) 88-SOURCE | www.artisantg.com...
-
Page 12: Section 1
CPU for other tasks. With the introduction of the EX2500A, all eight of the VXI TTL trigger lines can now be extended across multiple mainframes and to other LXI devices through the LXI Trigger Bus compliant front panel connectors (Low-Voltage Differential Signal or LVDS). -
Page 13: Familiar Software Interfaces
The VXI Resource Manager is resident on the module and executed automatically at power up, all system resources are allocated without the need to run a separate utility. The EX2500A runs an embedded web interface and system status including installed VXI hardware, memory allocation, IP configuration, and logical address information can be viewed through an LXI-compliant web page. -
Page 14: Ex2500A Specifications
EX2500A S PECIFICATIONS ENERAL PECIFICATIONS HYSICAL TTRIBUTES Size 1-slot, C-size 2.5 lbs (1.1 kg) Weight APABILITY ESOURCE ANAGER Embedded DDRESS PACE CCESS A16, A24, and A32 VXI R EVISION OMPLIANCE 1.4, 2.0, 3.0 LXI R EVISION OMPLIANCE LXI 1.0 Class A... -
Page 15: Tcxo/Ocxo Option Specifications
VTI Instruments Corp. TCXO/OCXO O PTION PECIFICATIONS – U VXI 10 MH TANDARD SCILLATOR ERFORMANCE ±50 ppm TCXO O PTION ERFORMANCE High Performance GING ±1 x 10 /year EMPERATURE ±3 x 10 (0 °C to 50 °C) DJUSTMENT ANGE ±3 x 10... -
Page 16: Section 2
VMIP, SMIP, or other VXIbus cards which are part of the test system. OFTWARE NSTALLATION The fastest way to begin controlling an EX2500A is to discover the unit using Bonjour™. To do this, the following software must be installed on the host PC: •... -
Page 17: Hardware Installation
ARDWARE NSTALLATION Once the system is defined and the EX2500A has been installed in the leftmost slot (slot 0) of the mainframe, connect the network cable from the EX2500A to the LAN switch or directly to the PCs network interface card (NIC). The EX2500A is auto-MDIX capable, making crossover cables unnecessary. -
Page 18: Cabling Considerations
Consult your company’s Information Technology department for assistance. VXI-11 Device Discovery is also supported by the EX2500A. This allows all EX2500s on a local network to be found without knowledge of their MAC address or IP address with the use of a broadcast message. -
Page 19: Emi Environment
At a minimum, a switch with a gigabit fiber port is needed to connect fiber to the EX2500A. On the other hand, another Cat 5e UTP patch cord would be the only requirement to put the EX2500A on the existing network. -
Page 20: Multiple Mainframe Configurations
In general, the core diameter is segment length dependent. If the fiber segment between the EX2500A and the switch is 2 m to 300 m, use a 62.5/125 μm MMF cable. For segments greater than 300 m, use a 50/125 μm MMF cable. Finally, the proper fiber cable connectors must be specified when ordering X/125 μm MMF cable. - Page 21 VTI Instruments Corp. EX2500A Preparation for Use Artisan Technology Group - Quality Instrumentation ... Guaranteed | (888) 88-SOURCE | www.artisantg.com...
-
Page 22: Section 3
RONT ANEL ETAILS This section details each element found on the EX2500A front panel and describes the intended use of these elements. See Figure 3-1 below as a reference while the EX2500A front panel is discussed. LEDs • VXI ACC: the VXI access indicator, this LED will blink green for backplane accesses that terminate properly. -
Page 23: Connectors
VXI-11 Device Discovery (supported by the VISA IO-Libraries) is also supported by the EX2500A. This allows all EX2500A on a local network to be found without knowledge of their MAC address or IP address with the use of a broadcast message. -
Page 24: Power On Self-Test Led Error Codes
RROR ODES The EX2500A runs a power on self-test (POST) whenever it is powered up or reset. If a POST failure occurs, the link status LEDs on the front panel are used to display the error which has occurred. The table below provides a description of the LEDs behavior during an error event. -
Page 25: User Configurable Switches
• ON-BOARD OSCILLATOR TRIM DIS-CONNECTED/CONNECTED: when the EX2500A is loaded with the TCXO or OCXO option, this switch enables the 10 MHz output to be trimmed. When “connected” is selected, the clock trim is enabled for the TCXO/OCXO options. The position of this switch is irrelevant with the standard oscillator option. When “DIS-CONNECTED”, or in the up position, the TCXO/OCXO clock trim is disabled. -
Page 26: Section 4
If Agilent VISA revision 14.2 or later is installed on the PC that will be connected to the EX2500A, go to page 30. If a different version of Agilent VISA is installed on the host PC, go to page 26 to install revision 14.2. It is recommended that previous versions of Agilent VISA be removed before installing revision 14.2. -
Page 27: Agilent Visa As Primary Visa
2) At the License Agreement dialog box, click on the “I accept” radio button to accept the license agreement, and then click Next to continue. If this is not done, installation will cease. EX2500A Software Installation Artisan Technology Group - Quality Instrumentation ... Guaranteed | (888) 88-SOURCE | www.artisantg.com... - Page 28 4) At the Install Agilent VISA dialog box, a prompt appears asking if Agilent VISA will be installed as the primary VISA. Ensure that Install Agilent VISA as primary VISA is selected, and then click the Next button. EX2500A Software Installation Artisan Technology Group - Quality Instrumentation ... Guaranteed | (888) 88-SOURCE | www.artisantg.com...
- Page 29 Make certain that the Agilent VISA as primary VISA check box is selected. Once this has been verified, click the Next button to continue. EX2500A Software Installation Artisan Technology Group - Quality Instrumentation ... Guaranteed | (888) 88-SOURCE | www.artisantg.com...
- Page 30 8) Once Agilent VISA installation is complete, the InstallShield Wizard Complete dialog box will appear. As the EX2500A driver must be installed before the Agilent Connection Expert can be used, ensure that both check boxes on this dialog box are not selected. Click the Finish button to complete VISA installation.
-
Page 31: Ex2500A Driver Installation
NSTALLATION VXI Plug&Play Driver 1) From the VTI Instruments Corp. Drivers and Product Manuals CD, run the program Drvr_EX2500A_R2p1p0.msi (or later). At the Welcome dialog box, click the Next button. 2) From the Select Installation Folder dialog box, select an appropriate radio button according to host PC demands. - Page 32 3) At the Confirm Installation dialog box, click the Next button. 4) Click the close button and continue to Add the EX2500A Interface to Agilent VISA. EX2500A Software Installation Artisan Technology Group - Quality Instrumentation ... Guaranteed | (888) 88-SOURCE | www.artisantg.com...
-
Page 33: Ivi Driver
VTI Instruments Corp. IVI Driver 1) From the VTI Instruments Corp. Drivers and Product Manuals CD, run the program VTEX2500A_R2p0p0p0.msi (or later). At the Welcome dialog box, click the Next button. 2) At the End-User License Agreement dialog box, select the “I accept” radio button, then click Next to continue. - Page 34 3) At the Choose Setup Type dialog box, select Typical, then click Next. 4) After selecting the Typical setup, click on the Install button to begin driver installation. EX2500A Software Installation Artisan Technology Group - Quality Instrumentation ... Guaranteed | (888) 88-SOURCE | www.artisantg.com...
-
Page 35: Add The Ex2500A Interface To Agilent Visa
1) Open Agilent’s Connection Expert from the Start Menu via the path Start > All Programs > Agilent IO Libraries Suite > Agilent Connection Expert. EX2500A Software Installation Artisan Technology Group - Quality Instrumentation ... Guaranteed | (888) 88-SOURCE | www.artisantg.com... - Page 36 NOTE: If NI-VISA is installed and any MXI-2 devices may be used, a VISA Interface ID other than VXI0 must be assigned to the EX2500A, as NI-VISA reserves VXI0 for MXI-2 devices. To automatically search for the module, click on Search Local Network on the configuration window.
- Page 37 5) Connection Expert will display the IP address of all EX2500As discovered on the network. Clicking LEDs runs a test on the LEDs of the highlighted EX2500A causing the Link Status LEDs to blink in a “leap-frog pattern”. An additional dialog box will appear asking if this is the correct module.
- Page 38 If a MXI-2 interface will be installed into a mainframe after an EX2500A has been installed, the EX2500A should have its VISA interface ID reassigned if its ID is VXI0. If this is not done, it will cause the I/O software to perform improperly and make accessing the EX2500A impossible.
- Page 39 VTI Instruments Corp. 6) The Slot 0 interface to the EX2500A should now appear in the Instrument I/O on this PC field. The adjacent field contains buttons that allow for EX2500A properties to be changed and provide access to the built-in web interface.
-
Page 40: Agilent Visa As Secondary Visa
2) At the License Agreement dialog box, click on the “I accept” radio button to accept the license agreement, and then click Next to continue. If this is not done, installation will cease. EX2500A Software Installation Artisan Technology Group - Quality Instrumentation ... Guaranteed | (888) 88-SOURCE | www.artisantg.com... - Page 41 VISA. Ensure that Install Agilent VISA as primary VISA is not selected, and the click the Next button. The screenshot below is from a system with NI-VISA already installed. EX2500A Software Installation Artisan Technology Group - Quality Instrumentation ... Guaranteed | (888) 88-SOURCE | www.artisantg.com...
- Page 42 6) At the Select Features dialog box, a summary of features that will be installed is provided. Ensure that the Agilent VISA as primary VISA checkbox is not selected. EX2500A Software Installation Artisan Technology Group - Quality Instrumentation ... Guaranteed | (888) 88-SOURCE | www.artisantg.com...
- Page 43 8) Once Agilent VISA installation is complete, the InstallShield Wizard Complete dialog box will appear. As the EX2500A driver must be installed before the Agilent Connection Expert can be used, ensure that both check boxes on this dialog box are no selected. Click the Finish button to complete VISA installation.
-
Page 44: Ex2500A Driver Installation
NSTALLATION VXI Plug&Play Driver 1) From the VTI Instruments Corp. Drivers and Product Manuals CD, run the program Drvr_EX2500A_R2p1p0.msi (or later). At the Welcome dialog box, click the Next button. 2) From the Select Installation Folder dialog box, select an appropriate radio button according to host PC demands. - Page 45 3) At the Confirm Installation dialog box, click the Next button. 4) Click the close button and go to Configure NI-VISA for Use with Agilent VISA. EX2500A Software Installation Artisan Technology Group - Quality Instrumentation ... Guaranteed | (888) 88-SOURCE | www.artisantg.com...
-
Page 46: Ivi Driver
IVI Driver 1) From the VTI Instruments Corp. Drivers and Product Manuals CD, run the program VTEX2500A_R2p0p0p0.msi (or later). At the Welcome dialog box, click the Next button. 2) At the End-User License Agreement dialog box, select the “I accept” radio button, then click Next to continue. - Page 47 3) At the Choose Setup Type dialog box, select Typical, then click Next . 4) After selecting the Typical setup, click on the Install button to begin driver installation. EX2500A Software Installation Artisan Technology Group - Quality Instrumentation ... Guaranteed | (888) 88-SOURCE | www.artisantg.com...
-
Page 48: Configure Ni-Visa For Use With Agilent Visa
2) When the NI Passport Registry Editor dialog box appears, ensure that the NiVisaTulip.dll check box is selected. Click Apply, and then click OK. EX2500A Software Installation Artisan Technology Group - Quality Instrumentation ... Guaranteed | (888) 88-SOURCE | www.artisantg.com... -
Page 49: Add The Ex2500A Interface To Agilent Visa
Agilent IO Libraries Suite > Agilent Connection Expert. 2) From the Connection Expert main window, click the Add an interface link in the Task Guide field. EX2500A Software Installation Artisan Technology Group - Quality Instrumentation ... Guaranteed | (888) 88-SOURCE | www.artisantg.com... - Page 50 Search Local Network on the configuration window. This software utility will search for EX2500As. If the EX2500A is connected directly to the NIC in the host controller, the EX2500A software will automatically assign an IP address based on the MAC address of the module.
- Page 51 5) Connection Expert will display the IP address of all EX2500As discovered on the network. Clicking LEDs runs a test on the LEDs of the highlighted EX2500A causing the MODE LEDs to blink in a “leap-frog pattern.” An additional dialog box will appear asking if this is EX2500A Software Installation Artisan Technology Group - Quality Instrumentation ...
- Page 52 It this is the module of interest, click OK to establish the highlighted EX2500A as the target module The IP address field will now contain the IP of the target EX2500A. Clicking OK assigns the VISA interface ID shown to the target EX2500A.
- Page 53 If a MXI-2 interface will be installed into a mainframe after an EX2500A has been installed, the EX2500A should have its VISA interface ID reassigned if its ID is VXI0. If this is not done, it will cause the I/O software to perform improperly and make accessing the EX2500A impossible.
-
Page 54: Section 5
PERATION PENING THE To open the embedded web page, open Internet Explorer and double click on the EX2500A in the Bonjour toolbar. If the toolbar on the left does appear when Internet Explorer is opened, click on the Bonjour icon located in the IE command bar (see Figure 5-1). -
Page 55: Login Error Message
When an entry page is initially accessed, an Error Page will appear. These pages have the ability to change core functionality on the EX2500A module and are password protected as a result. To login, simply click on the login link that appears on the page. -
Page 56: Firmware Version
• DDR RAM Information: indicates RAM module information used in this device. • LXI Specification: indicates the version of the LXI Standard to which the EX2500A complies. • Device Description: indicates the user-configured device description. This may be useful in providing additional information about the module, such as, but not limited to, location, purpose, etc. -
Page 57: Ip Configuration
DHCP: a protocol that obtains an IP address automatically if the EX2500A is connected to a network with a DHCP server. By default, the EX2500A will attempt to locate a DHCP server. If one is found, the IP address assigned by the DHCP server will be assumed. -
Page 58: Module Options
Netmask: defines the range of IP addresses the EX2500A will attempt to connect to directly (255.255.255.0 means match all but the last number, etc.). Gateway Address: the IP address of a server that EX2500A can use to contact IP addresses external to its network. -
Page 59: Time
Time: allows the user to set the EX2500As time by entering the hour (HH), minute (MM), and second (SS), respectively. If the EX2500A is set as an IEEE 1588 Master, the hour should be entered in using the 24-hour format. -
Page 60: Lxi Synchronization
IEEE 1588 compliant devices are synchronized. PTP Parent Clock MAC: indicates the MAC address of the device to which the EX2500A is synchronized. On a LAN that consists of multiple subnets, this indicates the MAC address of the parent clock on that particular subnet. -
Page 61: Lxi Lan Events
• LXI Module to Module Parameters LXI Domain: an 8-bit number, 0 to 255, which indicates the domain the EX2500A is using for LAN events. All events sent by this device will include this data. Likewise, the device will only accept events that include the same LXI Domain data. -
Page 62: Lan Event Log
Get Next Line: clicking on this button displays the next line in the event log. • Clear Text Field button: clicking on this button will clear all information in the LAN Event Log. EX2500A Web Page Operation Artisan Technology Group - Quality Instrumentation ... Guaranteed | (888) 88-SOURCE | www.artisantg.com... -
Page 63: Device Status
If the Logical Address indicator is clicked for any of discovered module, the identification XML file can be viewed for that module. EX2500A Web Page Operation Artisan Technology Group - Quality Instrumentation ... Guaranteed | (888) 88-SOURCE | www.artisantg.com... -
Page 64: Module Information
• Capabilities: list indicating the reported capabilities of the selected module. • Servant Area: this field indicates the logical address above which the EX2500A’s servant area will begin. • Address Space: indicates the address space(s) available for the selected module. -
Page 65: Memory I/O
Size length) from the location provided in the Address Space field. If the Write button is clicked, the EX2500A will attempt to write the data provided in the Data Output field to the location specified by the Address Space. The data written will be Data Size in length. -
Page 66: Formatted I/O
Device Info: indicates the selected module’s manufacturer, model number, and logical address. • Return: clicking this button returns the user to the previous page. EX2500A Web Page Operation Artisan Technology Group - Quality Instrumentation ... Guaranteed | (888) 88-SOURCE | www.artisantg.com... -
Page 67: Resource Manager Control
This may be useful instruments have been added to an extended rack and need to be identified. There is no need to cycle power to the local rack containing the EX2500A. Start of A24 Space: to set the starting address of A24 space, enter an address in this field, click, then click the Run button. -
Page 68: Trigger Configuration
Current Assignment: indicates the location, size, and address space of added VME assignments. Remove: removes the assignment selected in the current assignment field. RIGGER ONFIGURATION The Trigger Configuration page allows the user to configure the EX2500A’s trigger mechanisms. 5-16: T – LXI T IGURE... - Page 69 For example, routing TTL trigger 1 to TTL trigger 1 will cause a high impedance to be driven, by the EX2500A, on the TTL trigger 1 backplane signal; resulting in no TTL trigger 1 signal state change produced by the EX2500A. Table 5-2 lists the typical trigger circuit propagation delays.
- Page 70 Enable is selected and Submit is clicked. TCP connection are closed once Enable is de-selected and Submit is clicked. EX2500A Web Page Operation Artisan Technology Group - Quality Instrumentation ... Guaranteed | (888) 88-SOURCE | www.artisantg.com...
-
Page 71: Interrupt Control
VTI Instruments Corp. NTERRUPT ONTROL From the Interrupt Control page, the user can test the EX2500A’s interrupt functionality. 5-19: I IGURE NTERRUPT ONTROL • Logical Address: this text field is used to enter the logical address that will be read when an interrupt is generated. -
Page 72: Led Test
LED T The LED Test page allows the user to change the state of the EX2500A’s front panel network LEDs. These tests may be used for identification or debugging purposes. 5-20: LED T IGURE • Normal: selecting this radio button will cause the selected LED to function in its typical mode, indicating status information about the network usage on the module. -
Page 73: Firmware Upgrade
PC (e.g. c:\ex2500\upgrade.img). If the Browse… button is clicked, a navigation dialogue box will appear. For information on how to perform the firmware upgrade, see Updating EX2500A Firmware. EX2500A Web Page Operation Artisan Technology Group - Quality Instrumentation ... Guaranteed | (888) 88-SOURCE | www.artisantg.com... -
Page 74: Report A Bug
• Send E-mail: clicking on this button send an e-mail to VTI Instruments Corp. with the bug report attached. This function will only work if the PC has the ability to access the Internet. Download File: clicking on this button allows the user to download the bug report as a file. This report can then be attached to an e-mail and sent manually. - Page 75 VTI Instruments Corp. EX2500A Web Page Operation Artisan Technology Group - Quality Instrumentation ... Guaranteed | (888) 88-SOURCE | www.artisantg.com...
-
Page 76: Section 6
ECTION RIGGER ECHANISMS VERVIEW The EX2500A triggering mechanisms are best explained through the web interface below. 6-1: T IGURE RIGGER ONFIGURATION EX2500A Trigger Mechanisms Artisan Technology Group - Quality Instrumentation ... Guaranteed | (888) 88-SOURCE | www.artisantg.com... -
Page 77: Lxi Trigger Controls
VXI trigger controls section allows the trigger to be pulled up in the case of the TTL and ECL triggers are driven high by the EX2500A in the case of the external trigger. The pulse button here creates a high-low-high transition on the corresponding trigger. -
Page 78: Vxi Legacy
The EX2500A is fully compatible with TTL and ECL trigger mechanisms which exists in VXI chassis. The functionality of these trigger lines is not affected by the EX2500A and any instrument synchronization currently established in a VXI chassis will remain when an EX2500A is used as a slot 0 controller. -
Page 79: Lxi Trigger Bus
Cat 5e cable can be used. Should an IEEE 1588 error occur, the 1588 LED on the EX2500A front panel will glow red (see LEDs in Section 3 for more information). -
Page 80: Section 7
Make certain that this image is appropriate to load based on the latest revision number and that the file was obtained from either the VTI Instruments User’s Manuals and Drivers CD or the VTI Instruments web site, as an improper version may corrupt the Flash memory and make the EX2500A non-responsive. - Page 81 Once the correct image file is selected, clicking the Submit button will begin the upgrade process. After the Flash ROM is re-programmed and EX2500A is rebooted, return to Firmware Revision page of the EX2500A web interface and verify that the FW Revision, FPGA Version, Bootloader Version, and OS Version have changed appropriately, indicating that the new firmware, and/or FPGA, and/or bootloader are programmed correctly.
-
Page 82: Troubleshooting
In the event that the module no longer functions after being shipped to the user, there are a few procedures to follow to determine the reason for malfunction. First, insert the EX2500A into the leftmost slot (slot 0) of the chassis and apply power to the chassis. As the power comes up, observe the EX2500A’s front panel LEDs. -
Page 83: Network Troubleshooting
ETWORK ROUBLESHOOTING If an error occurs when trying to discover the EX2500A (see Opening the Web Page in Section 5 for more information on discovery), it may be necessary to change the network settings for the EX2500A and the host PC. By using the following methodology, most network-related issues can be resolved: 1) Restore the EX2500A’s Default Network Settings... -
Page 84: Set The Ex2500A To Auto Ip
Wireless adapters should be disabled as well. 2) Apply power to the EX2500A and wait for the LAN LED to turn green. 3) Discover EX2500A using Bonjour as described in Opening the Web Page in Section 5. The steps taken previously should ensure that discovery works. -
Page 85: Set Theex2500A To Static Ip
5) Select the Static checkbox in the IP Source field and ensure that DHCP and AutoIP are not selected. Figure 8-5 shows the proper configuration. 6) In the IP Address field, enter an appropriate IP address for the EX2500A. Use the IP address obtained the Determine PCs Network Settings step to determine the network address. The network address is the first three digits of the IP address (10.1.0 in the example provided). -
Page 86: Restore The Host Pcs Network Settings
When multiple network cards exist in a single PC, it may be necessary to define a static IP address to both the host PC NIC card that will interface with the EX2500A as well as the EX2500A itself. This process is only necessary if a DCHP server is not connected to the network to which the device is connected and typically occurs when the NIC is connected directly to the device. - Page 87 9) Set a static IP address for the NIC card by doing the following: a) Navigate to Start → Settings → Network Connections. b) Right click on the NIC card that the EX2500A is connected to and select Properties. c) Select Internet Protocol (TCP/IP) and click Properties.
- Page 88 10) Add the NIC card to the Agilent Connection Expert again by searching for it. The NIC should now appear with the configured IP address (192.168.1.1). 11) Add the EX2500A to Agilent Connection Expert. This is described in Section 4. EX2500A Troubleshooting...
- Page 89 VTI Instruments Corp. EX2500A Troubleshooting Artisan Technology Group - Quality Instrumentation ... Guaranteed | (888) 88-SOURCE | www.artisantg.com...
-
Page 90: Appendixa
Acronym for Temperature Compensated Crystal (X) Oscillator Acronym for Test Program Set Acronym for Transistor-Transistor Logic Acronym for Unshielded Twisted Pair VISA Acronym for Virtual Instrument Standard Architecture EX2500A Glossary Artisan Technology Group - Quality Instrumentation ... Guaranteed | (888) 88-SOURCE | www.artisantg.com... - Page 91 VTI Instruments Corp. EX2500A Glossary Artisan Technology Group - Quality Instrumentation ... Guaranteed | (888) 88-SOURCE | www.artisantg.com...
-
Page 92: Index
LXI synchronization ............ 59 memory I/O ..............64 module information ............. 63 module options ............57 report a bug ..............73 resource manager control ..........66 EX2500A Index Artisan Technology Group - Quality Instrumentation ... Guaranteed | (888) 88-SOURCE | www.artisantg.com... - Page 93 VTI Instruments Corp. required equipment ............15 resource manager .............. 12 software installation ............ 15, 25 Agilent VISA as primary VISA ........26 Agilent VISA as secondary VISA ....... 39 Bonjour ................ 16 specifications ..............13 LXI required ..............13 support resources ..............
Need help?
Do you have a question about the EX2500A and is the answer not in the manual?
Questions and answers