
Summary of Contents for VWR Gel Imager
- Page 1 Gel Imager and Gel Imager Plus Installation and User Instructions Gel Imager 81-0317-01 Rev A...
-
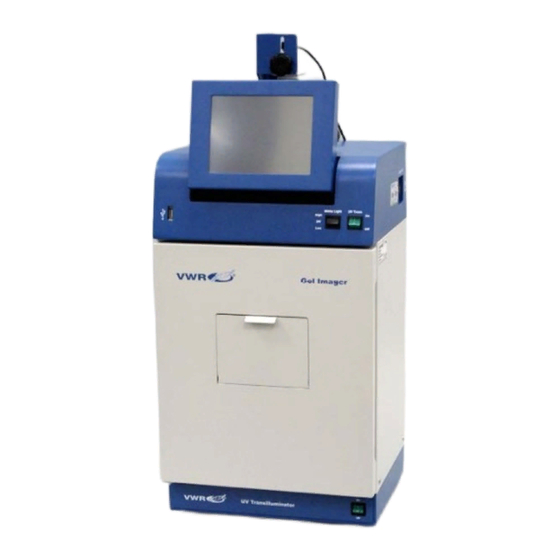
Page 2: System Introduction
Images are saved in 8-bit TIFF or JPEG formats allowing the images to be read by most PC or MAC programs. The Gel Imager system is a cost effective solution for archiving quality images in a compact standalone package. No computer is required. -
Page 3: System Specifications
Gel Imager, 0.3 Camera, 21 x 26cm Transilluminator, 302/365nm UV, 115V 89131-394 Gel Imager, 0.3 Camera, 21 x 26cm Transilluminator, 302/365nm UV, 230V 89131-396 Gel Imager Plus, 1.3 Camera, 20 x 20cm Transilluminator, 302nm UV, 115V 89131-398 Gel Imager Plus, 1.3 Camera, 20 x 20cm Transilluminator, 302nm UV, 230V 89131-400 Gel Imager Plus, 1.3 Camera, 21 x 26cm Transilluminator, 302nm UV, 115V... - Page 4 8-watt, single wavelength and single intensity to models with multiple wavelengths and high/low intensities. Note: For UV protection, there is a 10-minute timer installed in the Gel Imager. The timer shuts off the transilluminator after 10 minutes of operation. A switch on the front of the darkroom allows the user to reset the timer.
-
Page 5: Optional Equipment
UV/White Converter Plate Set-up Instructions Components Camera with zoom lens, bracket, filter, cables Gel Imager darkroom USB storage device, 1 GB (minimum) Transilluminator WARNING: DO NOT ATTEMPT TO CONNECT ANY WIRING WHILE THE EQUIPMENT IS CONNECTED TO ANY POWER SUPPLY CAUTION Do not install the system in places with high moisture, dust, or high temperature. -
Page 6: Installing The Filter
Gel Imagers Installing the Filter Systems include a 50mm sq Ethidium Bromide (EtBr) filter. To install the filter in the Gel Imager darkroom: Carefully remove the filter from the protective plastic case, holding the filter at the edges to prevent fingerprints. -
Page 7: Printer Setup
The screen is touch sensitive. Use the stylus included with the system to operate the software controls. For easy access to the stylus when operating the system, remove the tape from the back of the holder and adhere it to the Gel Imager. Slide the stylus into the holder. -
Page 8: Using The System
Gel Imagers Using the System Powering Up the System Power up the system by pushing once on the MAIN POWER button located on the right side of the unit. All internal components will now have power. Turn on the transilluminator and darkroom power switches. - Page 9 Gel Imagers Operating the Gel Imager Software The system will go through the boot-up process. When ready, the LCD will display the Gel Imager software screen similar to the one below: To shut down the Gel Imager software, touch the X on the bottom left corner of the screen.
- Page 10 Gel Imagers Using the Gel Viewing Window The Gel Viewer has a pressure-sensitive clasp. Press firmly to open the viewer. The glass is UV blocking while providing a clear view to the transilluminator surface for visibility of samples without opening the door. Image Focusing Prior to capturing any images, prepare the image focus capabilities of the system: Turn on the transilluminator and place a fluorescent gel on the transilluminator surface.
-
Page 11: Service Procedures
Gel Imagers Service Procedures Replacement Parts and Accessories To order accessories or replacement parts for the Gel Imager, contact VWR Customer Service at (800) 932-5000. Part Description Part Number Filter, 50mm, sq., SYBR Green and EGFP 82020-624 Filter, 50mm, sq., Ethidium Bromide... -
Page 12: Technical Support
Error Messages Pop Up on the Screen Messages appear on the screen that might be related to the Gel Imager software interface, or Microsoft Windows. If the message is related to Microsoft Windows, such as a reminder to activate or update your copy of Windows, please contact your system administrator for assistance.
Need help?
Do you have a question about the Gel Imager and is the answer not in the manual?
Questions and answers