Table of Contents
Advertisement
Advertisement
Table of Contents

Related Manuals for Supelco Reflectoquant RQflex 20

Summary of Contents for Supelco Reflectoquant RQflex 20
- Page 1 Analytical Reflectoquant ® RQflex ® Reflectometer Operating manual 10/2017...
-
Page 2: Table Of Contents
Table of contents 1 Intended use . . . . . . . . . . . . . . . . . .5 2 Getting started . -
Page 3: Getting Started
4 Result . . . . . . . . . . . . . . . . . . . . . . . . . .43 Intented use Result list . -
Page 4: Package Contents
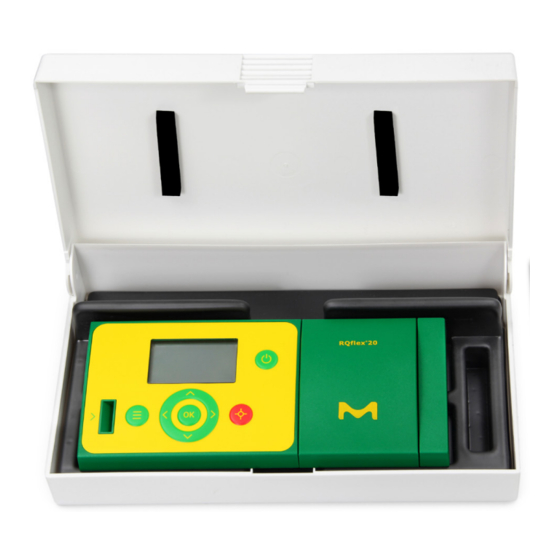
Package contents Inserting the batteries The standard contents of the Reflectoquant ® RQflex 20 Reflectometer package comprise the ® following items: Before operating the system for the first time, the batteries included in the package must be installed . 1 Reflectometer inclusive strip adapter, Cat . -
Page 5: Replacement Of Batteries
Operation buttons 2 .3 .1 Replacement of batteries and display Refer to page 7 for how to replace used batteries . Recommendation 2 .4 .1 Operation buttons Do not use rechargeable batteries! 2 .3 .2 Saving data - Important notes Display Before changing the batteries, please shut down the instrument first . -
Page 6: Display
Starting the 2 .4 .2 Display General structure RQflex ® the first time Battery Menu item Timer area Before working with the RQflex 20 insert the ® status batteries (delivery contents) . See chapter 2 .3 Time Method "Inserting the batteries" . number Switch on the reflectometer by pressing the [Power On/Off] button . -
Page 7: Settings
Settings 2 .6 .1 Overview The following items are displayed in the settings menu: Switch on the reflectometer by pressing the [Power On/Off] button . Languages for setting the desired language The unit runs an electronic self-check test . (EN - DE - FR - ES - PT - JP - CN) Date Format for setting the desired date format (yyyy-mm-dd - dd .mm .yyyy - mm/dd/yyyy) -
Page 8: Setting The Language
2 .6 .2 Setting the language 2 .6 .3 Setting the date format Select [Languages] using the [Up] and [Down] Select [Date Format] using the [Up] and buttons if necessary . [Down] buttons . The display shows: The display shows: Confirm your selection by pressing [OK] or Confirm your selection by pressing [OK] or [Right (Next)] . -
Page 9: Setting The Time Format
2 .6 .4 Setting the time format 2 .6 .5 Setting the date Select [Time Format] using the [Up] and Select [Date] using the [Up] and [Down] [Down] buttons . buttons . The display shows: The display shows: Confirm your selection by pressing [OK] or Confirm your selection by pressing [OK] or [Right (Next)] . -
Page 10: Setting The Time
2 .6 .6 Setting the time 2 .6 .7 Setting the auto power off time Select [Time] using the [Up] and [Down] buttons . Select [Auto Power Off Time] using the [Up] The display shows: and [Down] buttons . The display shows: Confirm your selection by pressing [OK] or [Right (Next)] . -
Page 11: Setting The Audible Signal (On Or Off)
2 .6 .8 Setting the audible signal 2 .6 .9 Setting the acoustical (ON or OFF) countdown warning Select [Audible Signal] using the [Up] and Select [Acoustic. Countdown Warning] using [Down] buttons . the [Up] and [Down] buttons . The display shows: The display shows: Confirm your selection by pressing [OK] or Confirm your selection by pressing [OK] or... -
Page 12: Initial Calibration
Initial calibration 2 .6 .10 Setting the memory capacity warning (ON or OFF) The instrument needs to be calibrated before the first measurement is performed . This is required Select [Memory Capacity Warning] using the to set the correct baseline for the reflectome- [Up] and [Down] buttons . - Page 13 Make sure that no test strip is inserted in the The display shows: test strip adapter, then press [OK] . The display shows: Pressing the [Left (Back)] button takes you back to [MAIN MENU] . Insert the calibration strip of the recalibration set (included in the scope of delivery of RQflex 20) into the strip adapter with the...
-
Page 14: Measurement
The display shows: Measurement Select the desired action using the [Up] and [Down] buttons: Method list No: return to [CALIBRATION] Switch on the reflectometer by pressing the Yes: return to [QUALITY ASSURANCE] [Power On/Off] button . The unit runs an electronic self-check test . Confirm your selection by pressing [OK] or [Right (Next)] . -
Page 15: Add A New Method
Confirm your selection by pressing [OK] or Remove the specific barcode strip from the [Right (Next)] . Reflectoquant pack . Certain tests require two ® barcode strips . The display shows for example: Insert the barcode all the way into the barcode scanner in the direction of the arrow in a smooth motion from left to right, and then remove it again . -
Page 16: Shortcut
Measuring with Abort: For abort press the [Menu] button . test kits The display shows: There are three ways to measure with test kits: 1 . Continue with last used method 2 . Choose from method list 3 . Shortcut Continue with last used method Select the desired action using the [Up] and The method number shows the last used... -
Page 17: Shortcut
Measurement procedures Select the desired method using the [Up] and [Down] buttons . There are two distinct measurement procedures . The both procedures are very similar and differ only in the first steps . Each measurement proce- Confirm by pressing the [START measurement] dure is test-specific . -
Page 18: Measurement Procedure B
Immerse the test strip into the sample as Abort: described in the Reflectoquant package insert For abort press the [Menu] button . ® (Reflectoquant pack) and at the same time ® press the [START measurement] button to start The display shows: the timer . - Page 19 Confirm your selection by pressing [START After the reaction time the display shows measurement] . The display shows: Carefully allow excess liquid to run off via the long edge of the strip onto an absorbent paper towel and press the [OK] button . Immerse the test strip into the sample as The display shows: described in the Reflectoquant...
-
Page 20: Skip The Timer
3 .2 .3 Skip the timer The measurement result is displayed and auto- matically stored . It is possible to interrupt the timer, to perform measurements directly without the countdown function of the instrument . The timer function can be skipped by pressing the [START measurement] button again while The save hint is shown only if memory space the timer is running . -
Page 21: General Notes On Measurement
3 .2 .5 General notes on For deletion the chosen method, select measurement [X Delete Method] using the [Up] and [Down] buttons . Don‘t change ambient temperatures during Confirm your selection by pressing [OK] or ongoing sample measurements . [Right (Next)] . If the instrument is taken to other temperature conditions start the test methods anew to reset The display shows:... -
Page 22: Delete All Methods
Delete all methods Select the desired method using the [Up] and [Down] buttons: Results The display shows: Result list Confirm your selection by pressing [OK] or Switch on the reflectometer by pressing the [Right (Next)] . [Power On/Off] button . The unit runs an electronic self-check test . -
Page 23: Result List
The display shows all results which are stored in The display shows: the instrument: Select the desired action using the [Up] and Pressing the [Left (Back)] button takes you back [Down] buttons: to [MAIN MENU] . No: return to [RESULT DETAILS] Yes: delete the result and return to [RESULT LIST] For details, select the desired method using the... -
Page 24: Quality Assurance
5 .1 .1 Procedure If necessary clean the strip adapter thoroughly (see section 7 .2, "Cleaning the strip Quality assurance adapter") . Take care that the internal standard has not changed color (if necessary exchange the internal standard, Strip adapter, Cat . -
Page 25: Calibration Results
The display shows: Make sure that no test strip ist inserted in the test strip adapter, then press [OK] . Pressing the [Left (Back)] button takes you back to [MAIN MENU] . The display shows: Select [Calibration] using the [Up] and [Down] buttons . -
Page 26: Checking The Instrument
Checking the The display shows: instrument 5 .2 .1 Analytical quality assurance (AQA) The objective of analytical quality assurance Select the desired action using the [Up] and (AQA) is to secure correct and precise measure- [Down] buttons: ment results . No: return to [CALIBRATION] Analytical quality assurance (AQA) can be carried out in two steps independent of each other:... -
Page 27: Rqcheck Procedure
5 .2 .2 RQcheck procedure The display shows for aprox . 1 second: Select [RQcheck] using the [Up] and [Down] buttons . The save hint is shown only if memory space warning is on (see section 2 .9 .10, “Setting the The display shows: memory capacity warning”) . -
Page 28: Rqcheck Results
5 .2 .3 RQcheck results Confirm your selection by pressing [OK] or [Right (Next)] . Select [RQcheck Results] using the [Up] and [Down] buttons . Pressing the [Left (Back)] button takes you back The display shows: to [RQCHECK RESULTS] . The display shows the RQcheck result boxes: Remission RQcheck Result: Confirm your selection by pressing [OK] or... -
Page 29: System Information
For deletion the results of the chosen date, select [X Delete RQcheck Result] using the [Up] and [Down] buttons . System information The display shows: Switch on the reflectometer by pressing the [Power On/Off] button . Confirm your selection by pressing [OK] or The unit runs an electronic self-check test . -
Page 30: Maintenance Of The Instrument
The display shows information about the software version of the instrument, the free memory space of the instrument, Maintenance of the the battery condition of the instrument, the serial number of the instrument, instrument the date, and the time: Pressing the [Left (Back)] or [Menu] button To obtain consistently exact measurement results takes you back to [MAIN MENU] . -
Page 31: Cleaning The Strip Adapter
Cleaning the strip adapter Troubleshooting The strip adapter should be thoroughly cleaned (dismantling the strip adapter into its individual components) at the end of each working day . The strip adapter must be cleaned imme- diately if an error message („E07 + E10: Internal Standard out of range“... -
Page 32: Error Messages
Display message Possible causes Remedy Display message Possible causes Remedy W19: Second Barcode not Wrong second barcode, invalid barcode Use a valid second W30: Measurement not The user tries to execute a measurement Please calibrate valid! (RQcheck, Calibration) inserted barcode strip possible! in the case, the measurement is locked and check device... -
Page 33: Other Faults
Other faults Display message Possible causes Remedy E08: Measurement not pos- Range check failed or remission calculation Please repeat the sible! failed - the ongoing strip measurement is measurement Repeat Measurement! aborted and the system is going to Method List Problem Remedy Display is frozen... -
Page 34: Technical Data
Technical data Accessories Dimension: 184 x 79 x 30 mm Reflectoquant Strip adapter 1 .16953 .0001 Replacement part for RQflex ® ® Weight: 253 g (including battery) Reflectoquant Recalibration Set 1 .16954 .0001 Replacement part for RQflex ® ® Memory: 50 test methods, 200 measurement results Reflectoquant RQcheck... -
Page 35: Service / Warranty
Service / Warranty Our instruments are 100% quality-controlled, which means that each individual instrument has been tested before leaving the factory . In addition to the descri- bed cleaning and calibration of RQflex ® 20, the device is maintenance-free . The detailed instruction should allow for problem-free operation . - Page 36 We provide information and advice to our customers on application technologies and regulatory matters to the best of our knowledge and ability, but without obligation or liability . Existing laws and regulations are to be observed in all cases by our customers . This also applies in respect to any rights of third parties .
Need help?
Do you have a question about the Reflectoquant RQflex 20 and is the answer not in the manual?
Questions and answers