Table of Contents
Advertisement
Quick Links
Advertisement
Table of Contents

Related Manuals for Kele KCO-NO2


Summary of Contents for Kele KCO-NO2
- Page 1 KCO-NO2 Sensor User’s Manual 90-0201-01 PRELIMINARY...
-
Page 2: Revision History
KCO-NO2 User’s Manual Revision History Revision Date Changes 90-0201-00 3/18/21 Original Issue 90-0201-01 4/12/21 Change CO sensor ToS to 200 ppm from 100 ppm. Kele • 3300 Brother Blvd. • Memphis, TN 38133 90-0201-01 Page: 2 WWW.KELE.COM... -
Page 3: Table Of Contents
Warranty ............................15 7.1 Duration ........................... 15 7.2 Limited Warranty and Remedies ..................... 15 Disclaimers ..........................16 8.1 Inspection and Maintenance ....................16 8.2 Life Safety ..........................16 Kele • 3300 Brother Blvd. • Memphis, TN 38133 90-0201-01 Page: 3 WWW.KELE.COM... -
Page 4: Specifications
4mA to 20mA (corresponds to 0 to 10ppm) Analog Output Range Accuracy ± 0.75 ppm (typical) 6 Months; factory calibrated when new Calibration Interval Sensor Life 2 Year typical Calibrated Field-Replaceable Sensor KMOD-NO2 Kele • 3300 Brother Blvd. • Memphis, TN 38133 90-0201-01 Page: 4 WWW.KELE.COM... -
Page 5: Mechanical Installation
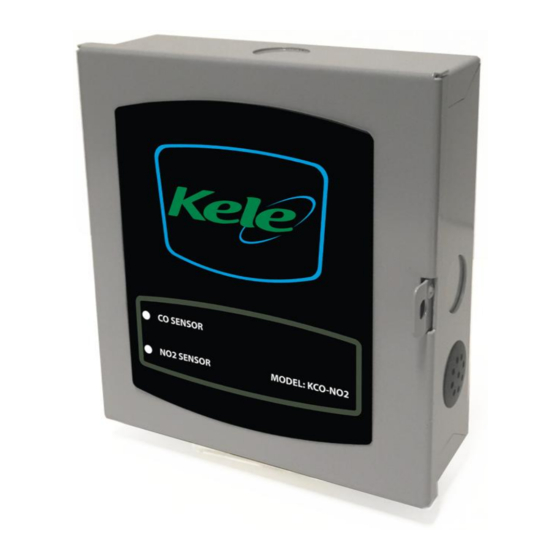
KCO-NO2 User’s Manual Mechanical Installation The Model KCO-NO2 is available in two versions of a gray, powder-coated, 18 Gauge steel enclosure. The removable, lockable, hinged-cover version is shown in and the screw-down Figure 2 . All electronics are attached to the front cover. There are ½”... -
Page 6: Electrical Installation
COM terminal while the relay output is deactivated: the voltage attached to the NC terminal is removed when the relay output is activated. Kele • 3300 Brother Blvd. • Memphis, TN 38133 90-0201-01 Page: 6... -
Page 7: Power Connection
It is recommended that all wired connections are connected prior to providing power to the controller: see the following sections for details on making these connections. FIGURE 6: Location of Power Connector Kele • 3300 Brother Blvd. • Memphis, TN 38133 90-0201-01 Page: 7 WWW.KELE.COM... -
Page 8: Operational Description
Table 3: Front panel status LED Indications. Sensor Concentration Concentration at 4 mA at 20 mA 0 ppm 200 ppm 0 ppm 10 ppm Table 4: Sensor Analog Output Scaling Kele • 3300 Brother Blvd. • Memphis, TN 38133 90-0201-01 Page: 8 WWW.KELE.COM... -
Page 9: Startup
Illuminate both the CO and NO status LEDs green Output the minimum value of 4mA for both CO and NO2. Analog outputs. Deactivate both the Alarm and Warning relay outputs. Kele • 3300 Brother Blvd. • Memphis, TN 38133 90-0201-01 Page: 9 WWW.KELE.COM... -
Page 10: Setting Warning And Alarm Threshold
Table 2 lists the operational conditions that force the analog outputs to their limits regardless of ambient gas concentrations. 4.5 Abnormal operation Both of these conditions will put the KCO-NO2 into ‘Sensor Error’ mode (see Table 2). Setting Warn & Alarm Set points FIGURE 8:... -
Page 11: Sensor Calibration
5.1 Calibration Gases The table below shows the calibration gases required to calibrate the KCO-NO2. Calibration Kele Order... - Page 12 KCO-NO2 User’s Manual FIGURE 10: Calibration Flowchart This procedure must be done twice (first as Zero then as Span) for each sensor Kele • 3300 Brother Blvd. • Memphis, TN 38133 90-0201-01 Page: 12 WWW.KELE.COM...
-
Page 13: Calibration Procedure
At the conclusion of a successful Span calibration the sensitivity of the sensor is compared to its sensitivity during initial factory calibration. If its sensitivity has fallen below manufacturer’s end-of-life specification, the KCO-NO2 goes into Sensor Expired mode with the front cover LED slowly blinking RED, the analog output at a constant 20 mA and the warning/ventilation relay activated. -
Page 14: Sensor Module Replacement
5. Plug in the controllers power connector. 6. Observe that the front panel indicator is no longer flashing red, and then close the controller’s enclosure. Kele • 3300 Brother Blvd. • Memphis, TN 38133 90-0201-01 Page: 14 WWW.KELE.COM... -
Page 15: Warranty
1 years 7.2 Limited Warranty and Remedies Kele warrants to Buyer that for the duration stated in the “Duration” section above from the date of shipment of Products to the Buyer that Products will substantially conform to the product specifications agreed to by DCS. This warranty is not transferable. -
Page 16: Disclaimers
6 months. During calibration the sensitivity of the sensor is compared to its sensitivity during initial factory calibration. If the sensitivity has fallen below the manufacturer’s specification, the sensor has reached the end of its operating life and must be replaced. Contact Kele for a calibrated replacement module.
Need help?
Do you have a question about the KCO-NO2 and is the answer not in the manual?
Questions and answers