Table of Contents
Advertisement
Quick Links
Green Energy
SUPER
SOLAR RECYCLER
SOLAR RECYCLER
Manual
Assembly
Instruction
&
Product Introduction
Think twice before discarding that 1985 CD-ROM, don't throw away that aluminum can, and pick up that
plastic bottle left under the couch. We can use them with our state-of-the-art, eco-friendly educational toy kit
that will stretch your child's imagination while allowing them to take part in the joy of recycling. The Super
Solar Recycler Kit is powered completely by natural light so you never have to worry about batteries!
In addition to your newly discovered treasures, all you need to get started is included in this kit (solar panel,
motor and instruction). Your children can recycle a can of their favorite soft drink to create Street Roller and
Walking Robot, create Bottle Yacht, Drummer Robot and Flying Bird using a plastic water bottle, and even
turn your old scratched CD's into the super cool CD Racer.
Let's have our children play in an eco-friendly way, and learn to harness a new green solar energy source
as well as implement the use of recycled materials. We invite you to participate in the creation of a
sustainable future.
Advertisement
Table of Contents

Summary of Contents for Green Energy Super Solar Recycler Kit
- Page 1 Green Energy SUPER SOLAR RECYCLER SOLAR RECYCLER Manual Assembly Instruction & Product Introduction Think twice before discarding that 1985 CD-ROM, don’t throw away that aluminum can, and pick up that plastic bottle left under the couch. We can use them with our state-of-the-art, eco-friendly educational toy kit that will stretch your child’s imagination while allowing them to take part in the joy of recycling.
- Page 2 Tools You May Need Diagonal Cutter Scissors Pencil Recycled Parts Required Same size is required Paper Soda Can 330~355ml Plastic Bottle 500~600 ml (Tube Body) Mechanical Parts List 1 pc 1 pc 3 pcs Pinion Gear Gear With Shaft Gear(Orange) (Yellow) (Green) 2 pcs...
- Page 3 2 pcs 1 pc 2 pcs Eyes Wing Rubber Band 1 pc 1 pc Colored Box Rubber Belt Plastic Parts Hints Cut off the burrs before assembly. burr burr...
- Page 4 Assembly Gear Box PUSH Black...
- Page 5 Black Top View Side View...
- Page 6 P3x3...
- Page 7 Completed...
- Page 8 Assembly Solar Module White Side View Green Completed...
- Page 9 How To Work The Gear Box Notice: Find and make sure correct direction of " " on gearbox first, it would help you to install the parts correctly. GEAR Solar Green Module White GREEN WIRE WHITE WIRE CONNECT CONNECT PUSH PUSH Green White...
- Page 10 Completed Wires should not touch each other. White Green Assembly & Play CD Racer Recycled Parts Required...
- Page 12 Part GEAR Solar Module White Green...
- Page 13 Green White GREEN WIRE CONNECT WHITE WIRE CONNECT Part...
- Page 14 Part Part Part Part...
- Page 15 Part Part...
- Page 16 Running Disassemble CD & Plastic Parts “Disassemble” This portion is a little unclear to me because I have yet to put it to practice but can we change the text to, “Remove the plastic bushings from the CDs as illustrated below. Release A4 from the front wheel and remove A15 or A6 +A14 from rear wheels”...
- Page 17 Assembly & Play Walking Robot Recycled Parts Required Soda Can 330~355ml GEAR...
- Page 18 Front View...
- Page 20 Soda...
- Page 21 Side View Part Side View Green White GREEN WIRE CONNECT WHITE WIRE CONNECT...
- Page 22 Part...
- Page 23 Part...
- Page 24 Part Part Part Running...
- Page 25 Disassemble PUSH PUSH PUSH PUSH...
- Page 26 Assembly & Play Drummer Robot Recycled Parts Required Plastic Bottle Soda Can...
- Page 27 Part...
- Page 28 GEAR White Solar Module Green Part WHITE WIRE CONNECT GREEN WIRE CONNECT...
- Page 29 Part Part...
- Page 30 B19x6 B19x6...
- Page 31 Running Plastic Bottle Soda Can Adjust Robot's arm to have strong/or weak of drumbeat Weak-Beating Strong- Beating...
- Page 32 Make your own unique tempo Install B19 with different quantity and position as below figure. B19x3 B19x4 B19x2 B19x3 Disassemble Push down Open...
- Page 33 Assembly & Play Bottle Yacht Recycled Parts Required Plastic Bottle 500~600 ml Tube Body Square Body GEAR Solar Module WHITE WIRE CONNECT GREEN WIRE CONNECT White Green...
- Page 34 Back View...
- Page 35 Side View Plastic Bottle Back View...
- Page 39 Top View : Insert coins Fill up with coins completely !! Loose space is not allowed, or it may have coins spread out. Running...
- Page 40 Assembly & Play Flying Bird Recycled Parts Required Plastic Bottle Part...
- Page 41 Part GEAR Bottom View...
- Page 43 Right Wing Left Wing Left Wing Right Wing P8x2 Solar Module Part...
- Page 44 WHITE WIRE CONNECT GREEN WIRE CONNECT White Green Bottom View Green White Part Sliding...
- Page 45 Add water Plastic Bottle Insert coins...
- Page 46 Adjust Part 2 to balance the lever. Running...
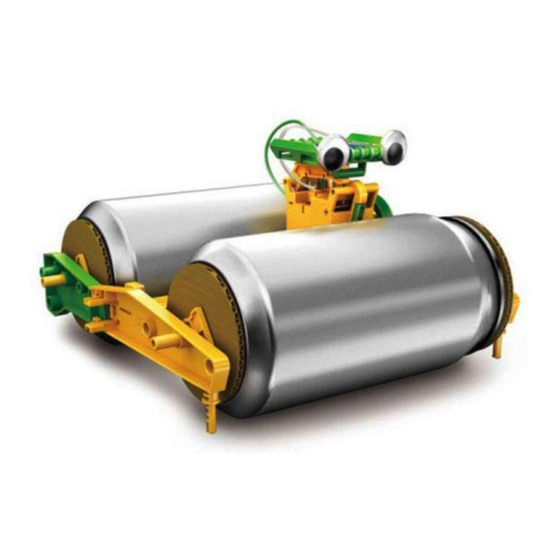
- Page 47 Street Roller Assembly & Play Recycled Parts Required Paper Same size is required Soda Can 330ml~355ml Solar Module GEAR GREEN LINE WHITE WIRE CONNECT GREEN WIRE WHITE LINE CONNECT...
- Page 48 Part Part...
- Page 49 Measure the size of the top of the can using the diagram below. Can’s Part Soda can’s top size 5.3cm 5.8cm Small size Large size Notice: If your’re using a large size can If your’re using a small size can 5.3cm), make sure to install 5.8cm), make sure to install into "...
- Page 50 Unfold colored gift box Trace around the top of the can to create two circles in the colored gift box. Can’s top Using scissors cut out the two circles Part A Using any sheet of paper, trace around the top of the can to create a circle and cut it out as shown below.
- Page 51 Locate a central point from paper A Center Paper A Push Paper A (green) Center Part A Push A1 through the circle’s central point (as illustrated above) Adhesive Tape Part A P8 x2 Center Part A + A1 Part A Center Sponge Part A + A1...
- Page 52 Trace around the bottom of the can to create two circles in the colored gift box. (See Below) (green) Can’s Can’s top bottom Part B bottom Using any sheet of paper, trace around the of the can to create a circle and cut it out (See Below) Paper B Can’s...
- Page 53 Locate a central point from paper B Center Paper B Push (yellow) Paper B Center Part B Push B10 through the circle’s central point (as illustrated above) Adhesive Tape P8 x2 Part B Center Part B + B10 Part B Center Adhesive Tape P8 x6...
- Page 54 Can’s bottom (yellow) (green) (green) Can’s bottom Part Refer to Step in order to install A1 in the correct opening (“S” Hole or “L” Hole) Part...
- Page 55 Part Part Running...
- Page 56 1. Take outside under direct sunlight. Best results are obtained when operated on a sunny day. 2. For indoor fun, use a 50 watt halogen light. The product will not run on a cloudy day, shaded locations, indirect sunlight, or under a Fluorescent light. Green Energy SUPER SOLAR SOLAR...
Need help?
Do you have a question about the Super Solar Recycler Kit and is the answer not in the manual?
Questions and answers