Table of Contents
Advertisement
Advertisement
Table of Contents

Summary of Contents for HUR 3110
- Page 1 HUR Analog Machines Owner’s manual...
-
Page 2: Read This First
HUR products. We recommend that HUR authorized personnel carry out the installation, maintenance and repairs actions. Your local HUR dealer is happy to help you if you need technical support or have HUR product-related questions. For other than normal, equipment-related use, it is recommended that the instructions below are followed: •... -
Page 3: Introduction
INTRODUCTION In this User Manual You will find general instructions for use of HUR products. Information covers basic safety instructions, instructions for use of each machine, technical information of the machine and everyday routines as well as scheduled maintenance procedures. -
Page 4: Table Of Contents
READ THIS FIRST ..........................2 INTRODUCTION ..........................3 TABLE OF CONTENTS .......................... 4 SAFETY PRECAUTIONS ........................6 SAFETY PRECAUTIONS AND WARNINGS FOR OWNERS OF HUR DEVICES ..........7 INSTALLATION ..........................8 WARRANTY ..........................9 Warranty terms of HUR Oy ......................9 Generally about the products ...................... - Page 5 9310 Abdomen / Back Easy Access ..................... 31 4.26. 9330 Twist Easy Access ....................... 32 4.27. HUR Pulleys ..........................33 MAINTENANCE ......................... 35 5.11. HUR Cleaning wipes ........................36 5.12. HUR Disinfection wipes ......................36 TECHNICAL DATA ........................38 6.1. Operation environment ......................... 40 6.2.
-
Page 6: Safety Precautions
SAFETY PRECAUTIONS Do not adjust or use HUR equipment without the proper guidance of trained staff. Before use, please carefully read warning signs, instructions for use and safety instructions that may be attached to the device. For safe operation of the equipment, a safety zone of at least one meter is required in front of and a 0.6-meter safety zone on both sides and behind the... -
Page 7: Safety Precautions And Warnings For Owners Of Hur Devices
HUR safety instructions and warnings for users are to be placed close to the equipment in a prominent location. Safety instructions, warnings and possible dangers should be pointed out to each user of the equipment. The manufacturer assumes no responsibility for injury or damage caused to people or property. -
Page 8: Installation
The HUR equipment is intended for indoor use. The equipment must not get wet and contact with moisture must be avoided. If the transportation or storage has taken place in subzero temperatures, all models with electrical components must be allowed a period of about one hour to adjust to room temperature before installation or use. -
Page 9: Warranty
HUR’s quality control system is specially designed for the manufacturing process of fitness and rehab equipment and it is a part of HUR’s certified ISO 9001, ISO 13485 Quality Management System. Despite continuous quality control, defects or malfunctions may occur in a single product or component. -
Page 10: Restrictions
Product, component or part. If the defective Product, component or a part of Product will be transported to HUR, by HUR’s will, for repair or replacement, HUR will also bear the cost and the risk of the transportation of the device from the Purchaser to HUR. -
Page 11: Consumer's Rights
Warranty Terms, these Warranty Terms do not affect or prejudice the statutory rights of a consumer. 2.10 Revisions of the Warranty HUR reserves the right to change these Warranty Terms at any time. 2.11 Applicable law These Warranty Terms shall be governed and interpreted in accordance with the laws of Finland. -
Page 12: Basic Functionality
Some of the HUR devices are dual functioning, i.e. one device can be used to exercise opposing muscle groups. The dual function selector switch is used to select which one of the movement directions is to be used. -
Page 13: Range Limiters
3.2.3. Safety belt Some HUR equipment has a safety belt, which helps the user to stay in the device during exercising. Fasten the safety belt by pressing the belt buckles against each other until you hear a clicking sound. Tighten the belt by pulling the free end of the belt. Open the safety belt by pressing the quick release on both sides. -
Page 14: Equipment Functionality
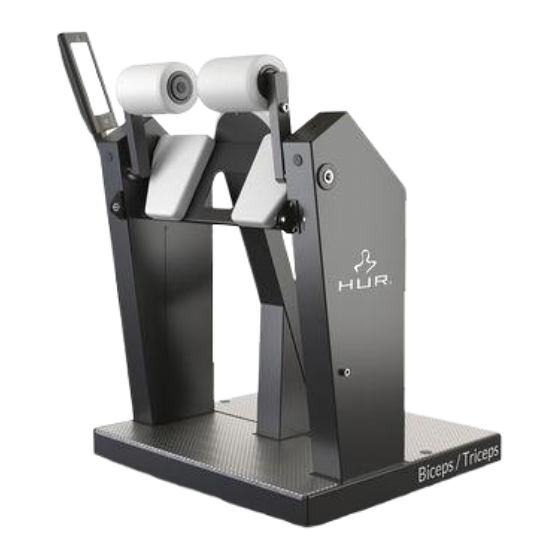
4. EQUIPMENT FUNCTIONALITY NOTE! The pictures of the machines in this section are directive. 4.1. 3110 Biceps / Triceps Equipment adjustment: Grasp the front sections of the side edges of the seat with both hands and lift the seat to the desired height. To lower the seat, grab the rear side edges of the seat, tilt the front up slightly and lower the seat so that your chest rests against the cushion. -
Page 15: 3120 / 5120 Push Up / Pull Down
4.2. 3120 / 5120 Push Up / Pull Down Equipment adjustment: Set the height of the seat by lifting the rear part of the seat with both hands so that when the lever arm is in its lowered position, handles are at shoulder level. The seat locks into place automatically. -
Page 16: 3125 Dip / Shrug
4.3. 3125 Dip / Shrug Set the height of the seat by lifting the rear part of the seat with both hands so that when the lever arm is in its lowered position, the arms are fully extended. The seat locks into place automatically. -
Page 17: 3140 / 5140 Chest Press
4.4. 3140 / 5140 Chest Press Equipment adjustment: Set the height of the seat by lifting the rear part with both hands so that the lever arm handles are at armpit level. The seat locks into place automatically. Chest Press exercise: Exercise by pushing the lever arms forwards. -
Page 18: 3160 / 5160 Pec Deck
4.6. 3160 / 5160 Pec Deck Equipment adjustment: Set the height of the seat by lifting the rear part of the seat with both hands so that the lower edge of the lever arm cushion is at chest level. The seat locks into place automatically. -
Page 19: 3310 / 5310 Abdomen/Back
4.8. 3310 / 5310 Abdomen/Back Equipment adjustment: The distance between the seat and the rollers can be adjusted, allowing for a suitable exercising position for all users. Lift up the rear foot of the seat by the black handles and move the seat to the desired position. Lower the seat to lock it in place. -
Page 20: 3320 Back Extension
Abdomen Right exercise: Place yourself sideways on the seat facing right. Work with your abdominal by pushing the lever arm downwards and maintain resistance on the return movement. Back exercise: Sit so that the lever arm is up against your shoulder blades and the back support supports your abdomen. -
Page 21: 3330 Twist
4.11. 3330 Twist Twist exercise: To the right : Stand in the machine in such a way that the right support cushion is between the thighs. Put your left arm behind the back of the roller, and the right arm flexed on the left side of the roller in front. -
Page 22: 3510/5510 Body Extension
Sit down and place your feet on the foot supports. Twist exercise: Right: Exercise by twisting legs to the right, with your back straight. Return to the starting position slowly. Left: Exercise by twisting legs to the left, with your back straight. Return to the starting position slowly. -
Page 23: 3520 / 5520 Adduction / Abduction
4.14. 3520 / 5520 Adduction / Abduction Equipment adjustment: Sit down and place your feet on the foot supports. If necessary, adjust the range limiters (5520) on the foot support by turning the handles so that the levers do not open wider than desired during exercise. The range limiter handle is loosened by turning it counter-clockwise like a screw, to tighten it turn it clockwise. -
Page 24: 3530 / 5530 Leg Extension / Curl
4.15. 3530 / 5530 Leg Extension / Curl Equipment adjustment: If necessary, adjust the range limiters by turning the handles on the side so that the knee joint can not be bent or extended more than desired during exercise. The range limiter handle is loosened by turning it counterclockwise like a screw, to tighten it turn it clockwise. -
Page 25: 3540 / 5540 Leg Press
4.16. 3540 / 5540 Leg Press Equipment adjustment: Adjust the back support from the handle at the back so that your legs are a an angle of 90 degrees in the starting position. The machine has leg straps, with which the feet can be attached to the foot supports. Some machines have a locking device to determine the desired movement starting point. -
Page 26: 9110 Biceps / Triceps Easy Access
Equipment exercises 1. Adjust the resistance with ‘+’ and ‘-’ buttons. 2. After exercise, release the resistance of the machine with the ‘-’ button. 4.18. 9110 Biceps / Triceps Easy Access Equipment adjustment: 1. With wheelchair: Adjust yourself at the machine so that you are able to place your elbows on the support cushion. -
Page 27: 9120 Push Up / Pull Down Easy Access
4.19. 9120 Push Up / Pull Down Easy Access Equipment adjustment 1. With wheelchair: Adjust yourself at the machine so that you are also leaning on the back support of the machine. 2. With EA chair: Set the chair so that you lean also against the back support of the machine. -
Page 28: 9125 Dip / Shrug Easy Access
4.20. 9125 Dip / Shrug Easy Access Equipment adjustment 1. With wheelchair: Adjust yourself at the machine so that you are also leaning on the back support of the machine. 2. With EA chair: Set the chair so that you lean also against the back support of the machine. -
Page 29: 9140 Chest Press Easy Access
4.21. 9140 Chest Press Easy Access Equipment adjustment 1. With wheelchair: Adjust yourself at the machine so that you are also leaning on the back support of the machine. 2. With EA chair: Set the chair so that you lean also against the back support of the machine. -
Page 30: 9160 Pec Deck Easy Access
WARNING! The chest support is not rigid. When entering or leaving the machine, do not lean on the chest support. The machines have a release function, making it possible to move the handles closer to the user when beginning the exercise, making it easier to reach the handles. Press the button in the middle of the device to move the handles closer. -
Page 31: 9175 Optimal Rhomb Easy Access
4.24. 9175 Optimal Rhomb Easy Access Equipment adjustment: 1. With wheelchair: Adjust yourself at the machine so that you are also leaning on the chest support of the machine. 2. With EA chair: Set the chair so that you lean also against the back support of the machine. -
Page 32: 9330 Twist Easy Access
Abdomen exercise: Sit so that the lever arm is up against your chest. Exercise by gently holding on to the roller with your hands and pushing the lever arm down using your abdominal muscles. Return to the starting position slowly. Abdomen Left exercise: Place yourself sideways on the seat facing left. -
Page 33: Hur Pulleys
8823 3 in 1 Pulley 20 kg 8833 3 in 1 Pulley 30 kg WARNING! Floor mounted equipment shall be installed on a stable and levelled base. Hur Pulley floor mounted models MUST BE ATTACHED TO FLOOR Wall-mounted model. Floor mounted model. - Page 34 Incorrect use may remove the manufacturer's responsibility and void the warranty. Incorrect use means all actions that are against the intended use of HUR products, and all actions against or failure to follow instructions in this User Manual.
-
Page 35: Maintenance
Weekly Wipe the handle grips, It is recommended that you use HUR Cleaning upholstery and adjusting products and disinfectants. Use only a small amount buttons. Disinfect if of water. Do not use products containing alcohol. -
Page 36: Hur Cleaning Wipes
Of course, your name and company information are required. NOTE! The HUR device can be identified by the serial number. The serial number can be found on the device frame in connection with the type plate. Some basic points regarding problem situations: ... - Page 37 HUR equipment. Using a cleaning product or wipe that is not compatible with the surface material of the equipment can cause damage to the surfaces and padding of the equipment. If cleaning and disinfection has been done using a product other than the cleaning and disinfection products recommended by HUR, damage is excluded from warranty.
-
Page 38: Technical Data
6. TECHNICAL DATA In the table below, the technical data of analog HUR machines can be found. Targeted Size (WxLxH Weight Cylin- Code Name musculature cm/in) (kg/lbs) Resistance ders (kg) 100 x 150 x 181 5120 Push Up / Pull Down Rehab... - Page 39 106 x 131 x 109/ 3175 Optimal Rhomb Upper Body 67/148 43 x 52 x 43 84 x 90 x 121/ 3310 Abdomen / Back Middle Body 63/139 33 x 35 x 48 86 x 111 x 115/ 3320 Back Extension Middle Body 68/150 34 x 47 x 45...
-
Page 40: Operation Environment
Storage environment Ambient temperature: 0-60 C, 32-140 Relative humidity: 30-75 % Atmospheric pressure: 70,0-106,0 kPa 6.4. Power supply Power supply: 24VDC/150W, 100-240VAC/50-60Hz. Ab HUR OY Patamäentie 4 67100 Kokkola SUOMI – FINLAND Tel. +358 6 832 5500 Email: sales@hur.fi, service@hur.fi...
Need help?
Do you have a question about the 3110 and is the answer not in the manual?
Questions and answers