
Related Manuals for Gainsborough TALANO

Summary of Contents for Gainsborough TALANO
- Page 1 Gainsborough Bathrooms Gainsborough House Brickyard Road Aldridge WS9 8SR United Kingdom Tel: +44 (0)1527 400022 email: service@gainsboroughbaths.com www.gainsboroughbaths.com TALANO & ALERA INSTALLATION MANUAL Talano & Alera Installation v2.6...
-
Page 2: Installation
Prepare the floor area and ensure it is flat, level and structurally sound and that there are NO SERVICES BURIED within the floor fixing area. Bath Moving IMPORTANT – Do not move the bath by the bath shell. Only use the metal support legs. Talano & Alera Installation v2.6... - Page 3 • Check for leaks and operation. Check temperature set up on the TMV control(s) • Attach SWL and labels as required. • Fully test sequence Tap End Foot Base of Bath Bath Plate Frame Figure 1.0 Talano & Alera Installation v2.6...
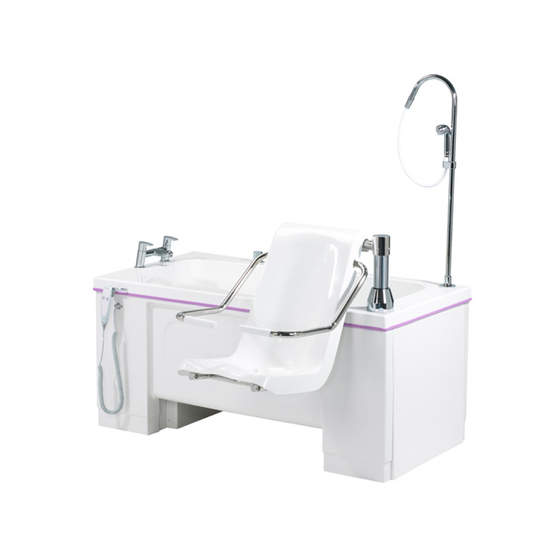
- Page 4 Battery Backup : Yes. Water Supply : Hot & Cold water at 1 bar minimum. RIGHT HAND SHOWN (Diagram shows fixed seat with hoist access panels.) Figure 2.0 Fixed Seat Height 460mm Transfer Seat Height 500mm Talano & Alera Installation v2.6...
- Page 5 Power Supply : Mains 230V to be supplied via 30mA RCD. Operating Voltage : 24V Battery Backup : Yes. Water Supply : Hot & Cold water at 1 bar minimum RIGHT HAND SHOWN (Diagram shows fixed seat with hoist access panels.) Figure 3.0 Talano & Alera Installation v2.6...
-
Page 6: Fitting Instructions
‘tap end’ of the bath to ensure bath is level in all aspects. Floor finish, (i.e. Altro / Tiling etc.) must be in place prior to installation. 1700 bath Right Hand 1500 bath Right Hand Figure 4.1 Talano & Alera Installation v2.6... - Page 7 6) Place the bath into its final location and fix it to the floor. Use a spirit level to ensure the foot plate is vertical in both planes. This is the most common cause of issues with incorrect installation. Use shims if required. Talano & Alera Installation v2.6...
- Page 8 Fit the handset Jack into the socket connector. Fit the circlip into place around Jack ensuring that the two lugs locate correctly. There is a cable tie on the inside of the panel where spare wire can be looped. Talano & Alera Installation v2.6...
- Page 9 13) Offer up panels into place and screw to battens and wall as needed. 14) Attach labels as required and fully test sequence prior to handover. Talano & Alera Installation v2.6...
- Page 10 Head End Base Plate Figure 7.0 Please take note of the floor fixing locations illustrated on the base plate diagram. Precautions should be taken to investigate floor integrity, paying particular attention to the locations marked above. Talano & Alera Installation v2.6...
- Page 11 Installation Addendum Talano & Alera Installation v2.6...
- Page 12 Installation Addendum Talano & Alera Installation v2.6...
-
Page 13: Troubleshooting
Mains power has failed to the unit- see section titled ‘Seat does not move’. The handset ‘battery’ symbol should be illuminated when the ‘Seat in’ button is pressed. Bath Leaking: Look for source of leak-typically caught flexi-hose on feed or waste. This can usually be remedied by your own maintenance contractor. Talano & Alera Installation v2.6...
Need help?
Do you have a question about the TALANO and is the answer not in the manual?
Questions and answers