
Related Manuals for Grandin LD32CVB16


Summary of Contents for Grandin LD32CVB16
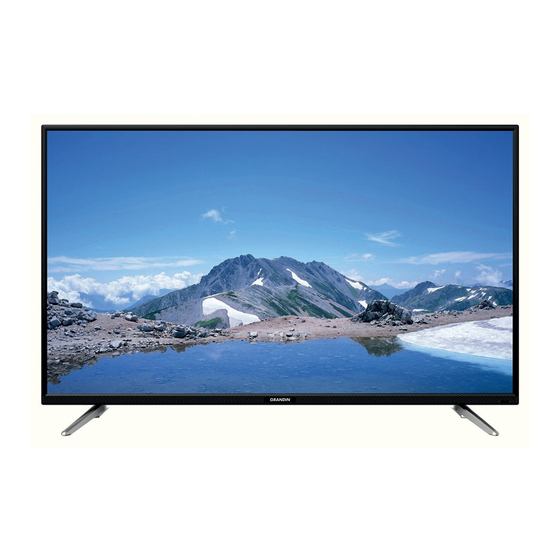
- Page 1 80cm M A N U E L D ' U T I L I S A T I O N TÉLÉVISEUR LED Modèle n° LD32CVB16 (LED32BCE2100E(T))
- Page 2 AVERTISSEMENT L'appareil ne doit pas être exposé à des égouttements d'eau ou des éclaboussures. Aucun objet rempli de liquide tel que des vases ne doit être placé sur l'appareil. Distance minimale autour de l'appareil pour une aération suffisante: 5cm. L'aération ne doit pas être gênée par l'obstruction des ouvertures d'aération par des objets tels que journaux, nappes, rideaux, etc…...
- Page 3 -15°C à 45 °C information sur l'énergie Marque - GRANDIN Référence du modèle - LD32CVB16 Classe d'efficacité énergétique - A Diagonale d'écran visible en pouces et centimètres - 31.5inch/80cm Consommation électrique en fonctionnement normal - 36 W Consommation d'énergie annuelle - 5 3 kWh/annum <0.5W / <0.5W...
-
Page 4: Table Of Contents
Table des matières Consignes de sécurité……………………………………………………….…..………….1 ACCESSOIRES……………………………………………………….…..…..……………..4 Commandes du téléviseur……………………………………………..…………..……5 Panneau Face AV……………………………………………….……..…………………..5 Panneaux Face AR et côté………………………………………………………………..6 Branchement………………………………….……………………………………………..7 Mise en service…………………………...…………………….………..……..…………….8 Utiliser la télécommande…………………………………………….…………….……….8 Installer les piles dans la télécommande……………………………..…………...……..8 Mise en service………………………...……….……..……………………….………….8 Connexion et mise en place……………….………...…………………………………..10 Installer le câble ………………………………………………...……..…………………10 Télécommande…………………………..………………………………………………….11 Fonctions de base……………....………………………………...………………...13 Allumer et... -
Page 5: Consignes De Sécurité
Consignes de sécurité ATTENTION RISK OF ELECTRIC SHOCK DO NOT OPEN Avertissement: AFIN DE REDUIRE LES RISQUES DE CHOC ELECTRIQUE, N’OUVREZ JAMAIS LE CORPS (OU LE DOS) DE L’APPAREIL. AUCUNE PIECE INTERNE NE PEUT ETRE REPAREE PAR L’UTILISATEUR. S’ADRESSER A UN TECHNICIEN DE SERVICE QUALIFIE. - Page 6 Consignes de sécurité CONSIGNES DE SECURITE IMPORTANTE 1. Lisez ces instructions. 7. Ne pas obstruer les orifices d’aération. 2. Conservez ces instructions. Installez l’appareil en respectant les 3. Tenez compte de tous les instructions du fabricant. avertissements. 4. Suivez toutes les instructions. 5.
- Page 7 Consignes de sécurité 13. Déb r anchez l’appa r eil en cas Protégez le cordon d’alimentation d’orage ou si vous ne l’utilisez pas contre les piétinements ou les pendant une période prolongée. coincements tout particulièrement au niveau de la prise secteur et du point de sortie de l’appareil.
-
Page 8: Accessoires
ACCESSOIRES ACCESSOIRES: 1. LED TV 1 pc 1 pc 2. Télécommande Support(pied) 2 pcs 4. Notice d’utilisation 1 pc 5. Vis de fixation 4 pcs 6. Notice de montage support 1 pc 7. l'étiquette énergie 1 pc... -
Page 9: Commandes Du Téléviseur
Commandes du téléviseur Panneau Face AV Capteur: Capteur infrarouge Témoin lumineux d'alimentation Changer de chaîne. Ajustez le niveau de volume. La touche de navigation. viseur / Mise en marche ou mise en veille du t é lé Affiche ou ferme le menu . Appuyez sur le bouton pour ouvrir le menu de fonctionnement rapide : SOURCE : Pour ouvrir le mode de source d'entrée. -
Page 10: Panneaux Face Ar Et Côté
Commandes du téléviseur Panneaux Face AR et côté N° Connecteur Description HDMI 1/2 Entrées HDMI SCART Péritel PC/DV I AUDIO-PC Monitor PC DIGITAL AUDIO OUT Sortie audio numérique Entrée antenne Entrée signal audio vidéo COMMON INTERFACE Connection PCMCIA Component(YPbPr) Entrée signal composantes Port USB Sortie casque... -
Page 11: Branchement
Main Unit Control Branchement Casque Equipements avec sortie Video composante Support USB/M DIA É Vert Bleu Pb/Cb Rouge Pr/Cr Blanc Audio G Rouge Audio D Blanc Audio G Rouge Audio D Jaune Video Carte CI Equipements avec sortie AV RCA Câble RF (75 ohm) SPDIF... -
Page 12: Mise En Service
Mise en service Utiliser la télécommande Lorsque vous utilisez la télécommande, dirigez-la vers le capteur de télécommande du téléviseur. S’il y a un objet entre la télécommande et le capteur, l’appareil pourrait ne pas se mettre en service. Dirigez la télécommande vers le CAPTEUR DE TELECOMMANDE sur le téléviseur. Lorsque vous utilisez ce téléviseur dans une zone très éclairée, le CAPTEUR DE TELECOMMANDE infrarouge pourrait ne pas fonctionner correctement. -
Page 13: Mise En Service
Mise en service ATTENTION Les piles doivent être mises au rebut de façon sûre. Les déposer dans des bacs de collecte prévus (renseignez -vous auprès de votre revendeur) afin de protéger l'environnement. -
Page 14: Connexion Et Mise En Place
Connexion et mise en place Installer le câble Lisez attentivement les informations correspondantes dans la «Note d’entretien et de sécurité» avant l’installation et l’utilisation. 1. Veuillez sortir la télévision de son emballage, et la placer dans un endroit plat et ventilé. -
Page 15: Télécommande
Télécommande Les touches de la télécommande d’origine se présentent comme ci-dessous : Allumer ou éteindre la télévision. INFO: Appuyer pour afficher sur l'écran l'information du programme en cours. : Aller à la page d’index. : Appuyer pour activer ou désactiver l'émission de son. - Page 16 Télécommande Allumer / éteindre la liste de programmes préférés. 19. TOUCHES COLOREES: touche de navigation rouge/ verte / jaune / bleue. : Recul rapide (en mode m dia). é m dia : Avance rapide (en mode é : Précédent (en mode m dia é...
-
Page 17: Fonctions De Base
Fonctions de base Allumer et éteindre la TV • Allumer la TV Branchez la prise du câble d’alimentation de la TV à une prise électrique. Pour mettre la TV en marche lorsqu'elle est en mode de veille, appuyez sur le bouton de la télécommande. - Page 18 Fonctions de base Troisième étape: Emplacement de la TV : Utilisez les boutons ◄/►pour sélectionner le mode Domicile le mode Magasin. Puisappuyez sur le bouton ENTER pour accéder à l'étape suivante. Appuyez sur le bouton MENU pour retourner à l'étape précédente. Si le mode Domicile est sélectionné, le mode Magasin sera désactivé...
-
Page 19: Sélection Des
Fonctions de base Sélection des chaînes • Utilisation des boutons du panneau de la TV ou des boutons CH+/CH- de la télécommande. Appuyez sur le bouton CH-/ ∨pour diminuer les numéros des chaînes. Appuyez sur le bouton CH+/∧pour augmenter les numéros des chaînes. •Utilisation des boutons numériques 0 à... -
Page 20: Navigation De Menu
Fonctions de base Navigation du menu Avant d'utiliser le téléviseur, suivez les étapes ci-dessous pour apprendre à naviguer dans le menu afin de sélectionner et régler différentes fonctions. Les étapes d'accès peuvent varier selon le menu sélectionné. 1. Appuyez sur le bouton MENU pour afficher le menu d'accueil. Image Chaîne Réglages... -
Page 21: Configuration Du Menu Image
Fonctions de base Configuration du menu Image • Mode Image Image Réglez le mode d'image pour modifier l'apparence de 1 / 10 l'image. Standard Mode Image Appuyez sur les boutons ◄/►pour sélectionner (Modes Image disponibles : Standard, Dynamique, Contraste Léger, Utilisateur). -
Page 22: Configuration Du Menu Audio
Fonctions de base Configuration du menu Audio • Mode Audio Sélectionnez un mode sonore pour obtenir un son Audio idéal. Appuyez sur les boutons ◄/►pour 1 / 8 sélectionner (Modes sonores disponibles: Standard Mode Audio Standard / Musique / Film / Utilisateur). Graves REMARQUE : ... -
Page 23: Configuration Du Menu Des Chaînes
Fonctions de base Configuration du menu des Chaînes Avant que votre téléviseur commence à mémoriser les chaînes disponibles, vous devez spécifier le type de source de signal qui est connecté au téléviseur (par exemple une antenne ou un système de câble). Si le type de signal spécifié... - Page 24 Fonctions de base Chaîne: Règlez les numéros de chaînes. Système de couleurs: Sélectionnez le système de couleurs. Système sonore: Sélectionnez le système sonore. Rechercher: Appuyez sur le bouton ◄ pour rechercher vers le bas à partir de la fréquence en cours, et appuyez sur le bouton ► pour rechercher vers le haut. •...
- Page 25 Fonctions de base • Langue des Menus Fonctions Choisissez votre langue préférée pour l'affichage sur 6 / 6 l'écran. Langue des Menus Français • Langues Télétexte Appuyez sur les boutons ◄/►pour sélectionnerla Langues Télétexte Europe de l'Ouest langue du télétexte. Réglages PC •...
- Page 26 Fonctions de base • Arrêt Automatique Sélectionnez la durée après laquelle le téléviseur se mettra automatiquement en mode de veille. Le téléviseur passe automatiquement en mode de veille lorsqu'aucun bouton du panneau de contrôle ou de la télécommande n'est actionné pendant la durée définie. •...
- Page 27 Fonctions de base • Enregistrement en une touche (en mode DTV seulement) REMARQUE: Avant de pouvoir enregistrer avec ce téléviseur (y compris l'enregistrement en décalage temporel), vous devez avoir inséré un périphérique de stockage USB formaté en FAT32 dans le port USB. •...
- Page 28 Fonctions de base 1. Dans le sous-menu du “ Menu Enregistrement ”, appuyez sur les boutons◄/► pour sélectionnerla fonction "Décalage temporel". Le menu de décalage temporel apparaîtra. 2. Pour arrêter le décalage temporel, appuyez sur le bouton (Arrêter) de la télécommande pour afficher une boîte de dialogue, puis sélectionnez "Oui"...
-
Page 29: Configuration Du Menu Des R
Fonctions de base Configuration du menu des RÉGLAGES • Minuteur OSD RÉGLAGES Vous pouvez régler le temps d'affichage du menu OSD. 1 / 6 Minuteur OSD 10 s • Écran Bleu Appuyez sur les boutons ◄/► pour activerou désactiver Écran Bleu Marche l'écran bleu. -
Page 30: Liste Des Favoris
Fonctions de base Appuyez sur le boutonCH+/-pour afficher la page suivante desinformations sur le programme. Appuyez sur le bouton EXIT/EPG pour quitter ce mode. Liste des Chaînes (en mode ATV / DTV) Appuyez sur le bouton LIST pour afficherla liste des Liste des Chaînes chaînes.Appuyez sur les boutons ▲/▼... -
Page 31: Lecture Média
Fonctions de base Lecture média • Tout d'abord, insérez un périphérique de mémoire USB dans le port USB. • Appuyez sur le bouton SOURCE pour accéder au menu de sélection de la source. Utilisez les boutons ▲/▼pour sélectionner MÉDIA, et appuyez sur le bouton ENTER pour accéder au mode MÉDIA (alternativement, appuyez sur le bouton DMP de la télécommande pour accéder au mode MÉDIA). - Page 32 Fonctions de base Résolution max:6500x6500 Profondeur des pixels:1/4/8/16/24 .bmp /32 bpp Non-entrelacé Résolution max:3000x3000 .png Entrelacé Résolution max:1500x1500 REMARQUES : • Les documents d'algorithmes spéciaux peuvent ne pas être lus ou compatibles par le port USB. • Le port USB est compatible avec les formats indiqués ci-dessus; si le format de fichier ne peut être lu, changez de format.
- Page 33 Fonctions de base Lecture des fichiers photo : Menu Rapide 1 / 5 IMAGE Audio RÉGLAGES 5sec Durée d'intervalle Répéter Arrêt Play Music Sortie Retour *Appuyez sur le bouton EXIT pour cacher la barre d'outils en bas de l'écran. *Appuyez de nouveau sur le bouton ENTER pour afficherla barre d'outils sur l'écran. Utilisez les boutons ◄/►puisappuyez sur le bouton ENTER pour sélectionner une fonction comme Lecture, Pause, Précédent, Suivant, Rotation, Elargir ouLecture musicalede la barre d'outils sur l'écran.
- Page 34 Fonctions de base *Utilisez les boutons ◄/►puisappuyez sur le bouton ENTER pour sélectionner une fonction comme Précédent, Suivant, Lecture, Pause, Avance rapide, Retour rapide ou Mode de répétition de la barre d'outils sur l'écran. *Appuyez sur le bouton INFO pour voir les informations détaillées sur les fichiers de musique en cours de lecture.
-
Page 35: Télétexte
Télétexte Fonction télétexte • Affichage télétexte 1. Sélectionnez une station TV avec fonction télétexte. 2. Appuyez sur pour accéder au mode télétexte. 3. Appuyez de nouveau sur pour accéder au mode mixte. Cette fonction vous permet d'afficher la page télétexte par dessus le programme de télévision. 4. -
Page 36: Guide De Dépannage
Guide de dépannage Dépannage Avant de contacter le technicien de service, effectuer les vérifications de base suivantes. Si le problème persiste, débrancher le téléviseur et contacter le réparateur. PROBLEME SOLUTION POSSIBLE -Vérifiez que la fiche d'alimentation soit bien branchée à une prise. -Vérifiez que vous avez appuyé... -
Page 37: Entretien
Guide de dépannage Pas de sortie de l'un des - Réglez la balance dans l'option du menu. hautparleurs NOTE: Il y a problème en mode VGA (seulement le mode VGA appliqué). PROBLEME SOLUTION POSSIBLE - Réglez la résolution, la fréquence horizontale ou la fréquence verticale. - Page 38 CONFORAMA France SA 80 Boulevard du Mandinet LOGNES 77432 Marne la Vallée Cedex 2 FRANCE...
- Page 39 80cm I N S T R U C T I O N M A N U A L LED COLOR TELEVISION Model No. LD32CVB16 (LED32BCE2100E(T))
- Page 40 WARNING The apparatus shall not be exposed to dripping or splashing. No objects filled with liquids, such as vases, shall be placed on the apparatus. Minimum distance around the apparatus for sufficient ventilation is 5cm. The ventilation should not be impeded by covering the ventilation openings with items, such as newspapers, table-cloths, curtains, etc…...
- Page 41 5°C to 35° C Operating Temperature Storage Temperature -15 °C to 45 °C Energy information brand - GRANDIN 32CVB16 reference of the model - LD energy efficiency class - A visible screen diagonal in inches and centimeters - 31.5inch/80cm on-mode power consumption in Watts - 36 W...
- Page 42 Contents Safety instructions……………………………………………………….…..…….……1 ACCESSORIES……………………………………………………….…..…..……………..4 Main Unit Control……………………………………………..……………………..…….5 Front Panel……………………………………………………………..…………………..5 Side & Rear Panel…………………………………………………………………………..6 Connection…………………………………………………………………………………..7 Getting Started…………………………...…………………….………..……..…………….8 Using the remote control…………………………………………….…………….……….8 Installing Batteries in the Remote Control……………………………..…………. ……..8 Battery replacement………………………...…………..……………………….………….8 Connection and setup……………….………...…………………………………………..10 Cable Installation………………………………………………..…………………………10 Remote Control…………………………..………………………………………………….11 Basic Operation……………...……………………………………………………………...13 QUICK SETUP....……………….…………………………………….………….….13 Turning on and off the TV…………………………………………………..……………..13 Channel Selection..…………….……………………………………………………….15 Volume adjustment………………………………………………………………………...15...
-
Page 43: Safety Instructions
Safety instructions CAUTION RISK OF ELECTRIC SHOCK DO NOT OPEN WARNING: TO REDUCE THE RISK OF ELECTRIC SHOCK DO NOT REMOVE COVER (OR BACK). NO USER SERVICEABLE PARTS INSIDE. REFER TO QUALIFIED SERVICE PERSONNEL. The lightning flash with arrowhead symbol, within an equilateral triangle, is intended to alert the user to the presence of uninsulated "dangerous voltage"... - Page 44 Safety instructions IMPORTANT SAFETY INSTRUCTIONS 1. Read these instructions. 7. Do not block any of the ventilation 2. Keep these instructions. openings. Install in accordance with 3. Heed all warnings. the manufacturer's instructions. 4. Follow all instructions. 5. Do not use this apparatus near water. 8. Do not install near any heat source such as radiators, heat registers, stoves, or other apparatus (including amplifiers) that produce heat.
- Page 45 Safety instructions 10. Protect the power cord from being 13. Unplug this apparatus during walked on or pinched particularly at lightning storms or when unused for plugs, convenience receptacles, long periods of time. and the point where they exit from the apparatus.
-
Page 46: Accessories
ACCESSORIES ACCESSORIES: 1. LED TV 1 pc 1 pc 2. Remote Control 2 pcs 3. Stand 4. User Manual 1 pc 5. Screw 4 pcs 6. Stand mounting guide 1 pc 7. Energy label 1 pc... -
Page 47: Main Unit Control
Main Unit Control Front Panel Infrared sensor / Power Indicator Change channels. Adjust the volume level. The navigation key. It turns on and off the TV. / Opens and closes the menu. Press the button to open the quick operation menu: SOURCE:Open the input source menu. -
Page 48: Side & Rear Panel
Main Unit Control Side & Rear Panel Name Description HDMI 1/2 HDMI input SCART SCART input/output PC/DVI AUDIO-PC PC input DIGITAL AUDIO OUT Digital audio output Antenna input AV audio/video signal input COMMON INTERFACE Insert CI card Component(YPbPr) Component input USB port Ear phone output... -
Page 49: Connection
Main Unit Control Connection Earphone The equipment with Component output function USB/MEDIA Drive Green Blue Pb/Cb Pr/Cr White Audio L Audio R White Audio L Audio R Yellow Video CI card The equipment with AV output function (such as VCR, DVD, set-top boxes, etc.) RF Coaxial SPDIF... -
Page 50: Getting Started
Getting Started Using the remote control When using the remote control, aim it at remote sensor on the television. If there is an object between the remote control and the remote sensor on the unit, the unit may not operate. Point the remote control at the REMOTE SENSOR located on the television. - Page 51 Getting Started CAUTION: Remove the batteries if consumed or if product is to be left unused for a long time E xhausted batte ries a re to b e removed from the product.Batteries shall be disposed of in a sa fe way. On ly d isp ose of batteries in specific collection conta iners ( contact the your TV reta iler fo r more information) in order to protect the environment.
-
Page 52: Connection And Setup
Connection and setup Cable Installation Please read the relevant content in "Notice for Maintenance and Safety" carefully before the installation and use. 1. Take out the TV from the package and put it in a drafty and flat place. NOTE: When you plug or unplug the TV, computer or other equipments, you must make sure that the AC power has been already shut down;... -
Page 53: Remote Control
Remote Control The buttons of the original remote control are as following: : Power, switch on or off TV set. INFO: Press to display the current program information on the screen. : Go to the index page. : Press to mute or restore sound. NUMBER BUTTONS: Choose channels or password importation. - Page 54 Remote Control 18. : Switch on/off the favorite programs list. 19. COLOR BUTTONS: Red/ green/ yellow/ blue key navigation link. : Fast reverse (in media mode). : Fast forward (in media mode). : Previous (in media mode). : Next (in media mode). 20.
-
Page 55: Basic Operation
Basic Operation Turning on and off the TV • Turn on the TV Connect the TV set to the mains. To switch on the TV from standby mode, you must press the button on the remote control. • Turn off the TV Press the button on the remote control to enter standby mode. - Page 56 Basic Operation Quick setup Location Home Enter Exit Return Step four: Subtitle and Audio Language: User the ◄/► buttons to select the Subtitle and Audio Language and then press the ENTER button to go to the next step. Press MENU button to go to previous step.
-
Page 57: Channel Selection
Basic Operation Channel Selection • Using the on the panel of TV or CH+/CH- on the remote control. Press CH+/∧ to increase channel number. Press CH-/ ∨ to decrease channel number. • Using 0- 9 digital buttons. You can select the channel number by pressing 0 to 9. (In ATV, DTV mode) •... - Page 58 Menu Operation Menu Navigation Before using the TV follow the steps below to learn how to navigate the menu in order to select and adjust different functions. The access step may differ depending on the selected menu. 1. Press the MENU button to display the main menu. 2.
-
Page 59: Configuring The Picture Menu
Menu Operation Configuring the Picture menu • Picture Mode Adjust picture mode to change picture appearance. Press ◄/► buttons to select. (Available Picture Mode: Standard, Dynamic, Mild, User). NOTE: The Contrast, Brightness, Colour, Tint, Sharpness and Contrast Booster are only available in User mode, you can adjust as you like. -
Page 60: Configuring The Sound Menu
Menu Operation Configuring the Sound menu • Sound Mode Select a sound mode to achieve ideal sound. Press ◄/►buttons to select. (Available Sound mode: Standard / Music / Movie/ User). NOTE: The Bass and Treble setting are only available in User mode, you can adjust as you like. -
Page 61: Configuring The Channel Menu
Menu Operation Configuring the Channel menu Before your TV can begin memorizing the available channels, you must specify the type of signal source that is connected to the TV (i.e. an Antenna or a Cable system). If the set signal type is wrong, it is possible that no channel can be found. - Page 62 Menu Operation • DTV Manual Tuning (in DTV mode): Manual store for DTV channels. Signal Strength: Display the strength of the signal of the channel. Quality: Display the quality of the signal of the channel. Channel: Press the◄/► buttons to select the channel number. Frequency: Press the ◄/►...
-
Page 63: Configuring The Function Menu
Menu Operation • DTV Settings (Only available when there is signal under DTV) Local Time Setting: Press the◄/► buttons to select. DTV Setting Summer time: Press the ◄/► buttons to select on or 1 / 10 off. Auto Local Time Setting TIPS: When "Local Time Setting"... - Page 64 Menu Operation • System Lock The feature can prevent unauthorized operating the TV set, unless entering 4-digit password. Press 0000 using Direct Channel Selection Buttons (0-9). (This is default password.) NOTE: If you forget your password, use the super password of 1225 still is valid.
- Page 65 Menu Operation • Auto Power Down Select the time after which the TV will automatically switch to standby mode. The TV will automatically switch to standby when there is no remote control or control panel key operation for the set amount of time. •...
- Page 66 Menu Operation When watching a program in DTV mode: 1. Press the (RECORD) button on the remote control to start recording directly. will appear the recording menu. 2. Press the EXIT button to minimize the information bar at the bottom of the screen. Press the (REC) button again to display information about the current recording.
-
Page 67: Configuring The Setup Menu
Menu Operation NOTE: You should use a USB disk with at least 4GB capacity. The connected USB device must support 2.0 speeds. If the recording on the inserted USB disk failed, please format the disk. Warning: do not disconnect the device while formatting is in progress. If you format the device, all files will be deleted. -
Page 68: Channel List
Menu Operation EPG (for DTV mode only) Press EPG button on the remote control to display the EPG programmers list, and then press◄/►buttons to display different channel EPG info. As follows: Hot Key Description: Guide Press RED button to switch the TV or Radio Ch 1 YLE TV1 channel. -
Page 69: Media Playback
Menu Operation Media playback • First, insert a USB memory device into the USB port. • Press the SOURCE button to call up the signal source selection menu. Use the ▲/▼ to highlight MEDIA, and the press ENTER button to access the MEDIA mode. (Alternatively, Press the DMP button on the remote control to enter the MEDIA mode) •... - Page 70 Media Operation NOTE: Special algorithm documents may not be or well be supported by the USB. The USB supports the format mentioned above, if the file format is not supported, change it to the given format. • Main Operating Interface Root: Music Movie...
- Page 71 Media Operation *Press the EXIT button to hide the toolbar at the bottom of the screen. *Press the ENTER button again to display the on-screen toolbar. Use the◄/►keys, then press ENTER to select a function such as Play, Pause, Previous, Next, Rotate, Enlarge, Music play from the on-screen toolbar.
- Page 72 Media Operation - Movie Press the◄/►buttons to select Movie in the main menu, then press ENTER to enter. Movie files can only be played in this menu category. Use the◄/►/▲/▼buttons to select the desired folder or file, and then press ENTER to select and press ENTER button for playback.
-
Page 73: Using The Teletext Feature
Teletext Using the teletext feature • Display teletext 1. Select a TV station with a teletext signal. 2. Press the button to enter teletext mode. 3. Press the button again to enter Mix mode. This function enables you to display the teletext page over the TV programme. -
Page 74: Troubleshooting Guide
Troubleshooting Guide Troubleshooting Before contact the service technician, perform the following simple checks. If any program still persists, unplug the TV and calling for serving. PROBLEM POSSIBLE SOLUTION - Check whether the main plug has been connected to a wall let. No sound and picture - Check whether you have pressed the POWER button on the front of TV set. -
Page 75: Maintenance
Troubleshooting Guide NOTE: There is a problem in VGA mode (Only VGA mode applied). PROBLEM POSSIBLE SOLUTION - Adjust resolution, horizontal frequency, or vertical frequency. The signal is out of range. - Check it whether the signal cable is connected or loose. - Page 76 CONFORAMA France SA 80 Boulevard du Mandinet LOGNES 77432 Marne la Vallée Cedex 2 FRANCE...
Need help?
Do you have a question about the LD32CVB16 and is the answer not in the manual?
Questions and answers