Table of Contents
Advertisement
Quick Links
Advertisement
Table of Contents

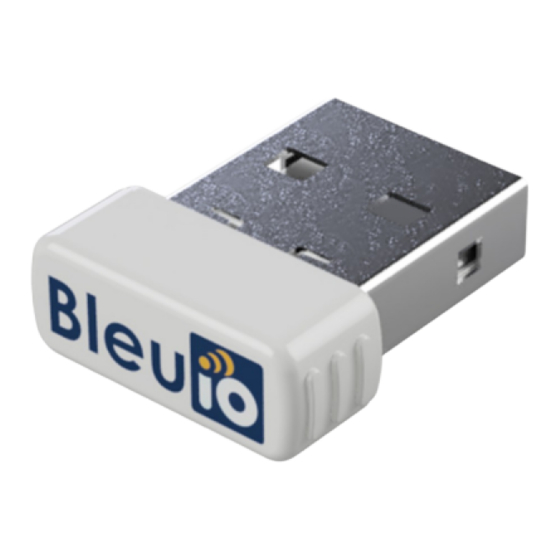
Summary of Contents for Smart Sensor BleuIO
-
Page 2: Table Of Contents
Table of Contents How it works ..............................3 How to use ..............................4 Windows ..............................4 Linux / Raspberry Pi ..........................7 Mac OS X .............................. 10 Issues ................................14 Firmware Updates ............................ 15 Troubleshooting ............................17 AT COMMANDS............................18 Scripts &... -
Page 3: How It Works
How it works Introduction Thank you for purchasing the Smart USB Dongle 2.0! In this user manual we will show you how to start using the Smart USB Dongle 2.0, what it can do and how to use it. Smart USB Dongle 2.0 is a Bluetooth Low Energy (BLE) capable USB Dongle that, with simple AT-Commands, can easily be used to create new BLE applications. -
Page 4: How To Use
How to use Windows Step 1 Figure 1: Connect the dongle to your computer. - Page 5 Step 2 Figure 2: Open Device Manager and check under Ports (COM & LPT) that a new COM port has popped up. You can open up Device Manager to see that the dongle is properly connected. The Smart USB Dongle 2.0 includes a bootloader which allows you to easily update the firmware (or flash your own application to the dongle, more on that HERE).
- Page 6 Step 4 Figure 4: Try typing an AT-Command, for example AT. If you get an OK response that means the dongle is working. Done Great job! You are now ready to start using Smart USB Dongle 2.0! Now check out the different AT Commands available or how to get started using...
-
Page 7: Linux / Raspberry Pi
Linux / Raspberry Pi Step 1 Figure 1: Connect the dongle to your Linux / RaspberryPi. - Page 8 Step 2 Figure 2: Run: ls /dev. To identify which device name the dongle is connected to, you will need to run: ls /dev You might need to do it twice, once before you connect the dongle and once after to be able to identify which one is the device name.
- Page 9 It should list a device with the ID: 2dcf:6001 when the bootloader is active but change to 2dcf:6002 after 10 seconds when the application is running. NOTE: The device name may vary and may not be the same as in the picture above. Step 3 You will need a serial communication program to communicate with the dongle.
-
Page 10: Mac Os X
Mac OS X Step 1 First connect the dongle to your Mac. Step 2 To identify which device name the dongle is connected to, you will need to run: ls /dev/cu.* You should see something like: $ ls /dev/cu.* /dev/cu.Bluetooth-Modem /dev/cu.iPhone-WirelessiAP /dev/cu.Bluetooth-PDA-Sync /dev/cu.usbmodem123456781... - Page 11 Figure 1: Terminal and screen. Simply type: screen /dev/cu.usbmodem123456781 9600 With Minicom: If you have Homebrew* you can get Minicom by simply running: sudo brew install minicom (If you don't have Homebrew click here to find out how to install Now you need to setup Minicom by running: minicom -s...
- Page 12 Figure 2: Minicom settings. Go to Serial port setup > Serial Device and type in: /dev/cu.usbmodem123456781 in the field and press enter. Then Save setup as dfl. Now, to start using the dongle just run: minicom...
- Page 13 Figure 3: Minicom ready to use. Step 4 Now try typing an AT-Command. For example AT . If you get an OK response that means the dongle is working. Done Great job! You are now ready to start using Smart USB Dongle 2.0! Now check out the different AT Commands available or how to get started...
-
Page 14: Issues
Issues Showing advertising and/or response data, either when setting or querying, has been temporarily disabled. -
Page 15: Firmware Updates
Firmware Updates Introduction The Smart USB Dongle 2.0 comes with a bootloader to allow you to update the firmware or flash your own application to the dongle. To flash the dongle you will need a image file containing the new firmware or your own application and a host USB loader application (that you can get HERE for Windows (host_usb_updater.zip) or... - Page 16 How to update your firmware Linux side Run with sudo ./host_usb_updater /dev/ttyACM0 ./example_firmware.img means USB-CDC driver of Linux. It can be changed according to test machine. Sometimes a modemmanager in Linux system like Ubuntu might interrupt the USB-CDC communication.
-
Page 17: Troubleshooting
Troubleshooting General issues The Smart USB Dongle 2.0 is connected but doesn't show up. Try another USB port. Unplug all other devices connected to your USB ports and try connecting the dongle again. On older machines: Make sure that you have the correct CDC drivers installed. ... -
Page 18: At Commands
AT COMMANDS Basic AT-Command. Command Syntax Example: Executing 'AT'... Device information query. Returns firmware version, hardware type and unique organization identifier. Command Syntax Example: Executing 'ATI'... SSD005 Dongle DA14683 v 1.0.1 Trigger platform reset. Command Syntax... - Page 19 Example: Executing 'ATR'... AT+ADVDATA Sets or queries the advertising data. Data must be provided as hex string. The content will take effect only after advertising is restarted. If you want to send several data types separate it with a space. Command Syntax AT+ADVDATA...
- Page 20 AT+ADVSTART Starts advertising. Advertising interval can optionally be specified in milliseconds (100 to 3000ms). Time_ms controlls how for how long the dongle will advertise. Set to 0 for unlimited. Returns ERROR if advertising is already active or if the device is in central role. Command Syntax AT+ADVSTART...
- Page 21 Stops advertising. Returns ERROR if not already advertising. Command Syntax AT+ADVSTOP AT+ADVSTOP Example: AT+ADVSTOP Executing 'AT+ADVSTOP'... STOPPING ADVERTISING... ADVERTISING STOPPED. AT+ADVRESP Sets or queries scan response data. Data must be provided as hex string. Changes to take effect after restart of advertising. Command Syntax AT+ADVRESP...
- Page 22 Command Syntax AT+CENTRAL AT+CENTRAL Example: AT+CENTRAL Executing 'AT+CENTRAL'... AT+GAPCONNECT Initiates a connection with a specific slave device. Upon succesfully connecting atempts to display device name, advertising and response data and the services of the peripheral. The local device must be in central role. Command Syntax AT+GAPCONNECT...
- Page 23 AT+GAPDISCONNECT Executing 'AT+GAPDISCONNECT'... DISCONNECTED AT+GAPSCAN Starts a Bluetooth device scan with or without timer set in seconds. Only accepted when device is in central role and not connected. The scan will continue indefinitly in no parameters set or until amount of time set is reached. Scan will abort if user presses CTRL+C.
- Page 24 AT+GAPSTATUS Reports the Bluetooth role. Command Syntax AT+GAPSTATUS AT+GAPSTATUS Example: AT+GAPSTATUS Executing 'AT+GAPSTATUS'... PERIPHERAL AT+GATTCREAD Read attribute of remote GATT server. Can only be used in Central role and when connected to a peripheral. Command Syntax AT+GATTCREAD AT+GATTCREAD=handle param Example: AT+GATTCREAD=001B Executing 'AT+GATTCREAD=001B'...
- Page 25 Example: AT+GATTCWRITE=001B Executing 'AT+GATTCWRITE=001B HELLO'... DATA WRITTEN: HELLO AT+GATTCWRITEB Write attribute to remote GATT server in Hex. Can only be used in Central role and when connected to a peripheral. Command Syntax AT+GATTCWRITEB=(handle param) AT+GATTCWRITEB (msg) Example: AT+GATTCWRITE=001B Executing 'AT+GATTCWRITE=001B 0101'...
- Page 26 AT+SCANTARGET Scan a target device. Displaying it's advertising data as it updates. Command Syntax AT+SCANTARGET=(slave AT+SCANTARGET address) Example: AT+SCANTARGET=00:00:00:00:00:01 Executing 'AT+SCANTARGET=00:00:00:00:00:01'... SCANNING... [01] Device Data: DataXYZ [01] Device Data: DataXYZ [01] Device Data: DataXYZ [01] Device Data: DataXYZ [01] Device Data: DataXYZ AT+SPSSEND Send a message or data via the SPS profile.
- Page 27 Shows all AT-Commands. Command Syntax Example: [A] Basic AT-Command. [A] Device information query. AT+ADVDATA...
-
Page 28: Scripts & Tutorials
Scripts & Tutorials Getting Started To use these scripts you will need to have Python installed. Both Python2 and Python3 should work but the scripts are made with Python3 in mind. But there are comments where the script need to be edited to work with Python2. You will also need to install the module pySerial. The easiest way to install it is through (which you should already have after installing Python) by running:... -
Page 29: Ibeacon
iBeacon Introduction iBeacon technology allows Mobile Apps to understand their position on a micro-local scale, and deliver content to users based on location. It is a Bluetooth Low Energy technology. BLE Advertising uses a one-way communication method. Beacons that want to be discovered can Advertise self-contained packets of data in set intervals. - Page 30 How to use Connect the Bluetooth USB Adapter to your computer. It opens a virtual serial port (COM port) that you can use to send commands to and from the Bluetooth USB Adapter. Control Bluetooth USB Adapter using predefined commands. List of AT Commands The Smart USB Dongle 2.0 includes a bootloader which allows you to easily update the firmware (or flash your own application to the dongle)
- Page 31 import serial import time connecting_to_dongle = print("Connecting dongle...") # Trying connect dongle until connected. Make sure the port baudrate the same your dongle. # You can check the device manager see what port then right- click choose properties then the Port Settings # tab see the other settings while...
- Page 32 Youtube Tutorial Follow the Youtube tutorial. https://www.youtube.com/watch?v=CixqMR3leGs...
-
Page 33: Eddystone Beacon
Eddystone Beacon Getting started Copy the following script and save it as eddystone_example.py on your local directory. You can also download the source code from our GitHub page. import serial import time connecting_to_dongle = print("Connecting dongle...") # Trying connect dongle until connected. - Page 34 out = " " Then go to the directory you saved the script and open a command propt. Then run the script by typing: python eddystone_example.py The script will now ask you for a eddystone url hex string. I will now show you how to prepare one. Eddystone url hex string Let's say we want to send http://google.com...
- Page 35 Description Service Data data type value (No need to change this) 16-bit Eddystone UUID (No need to change this) 16-bit Eddystone UUID (No need to change this) Frame Type = URL (No need to change this) Description TX Power. https:// (Eddystone has a list of 1 byte codes for popular prefixes and sufixes) hex for 'g' hex for 'o' hex for 'o'...
- Page 36 Supported prefix list Expansion http://www. https://www. http:// https:// Supported sufix list Expansion .com/ .org/ .edu/ .net/ .info/ .biz/ .gov/ .com .org .edu...
- Page 37 Expansion .net .info .biz .gov 0e to 20 Reserved for Future Use 7F to FF Reserved for Future Use Full source also available on GitHub.
-
Page 38: Scan Example
Scan Example Scan example In this tutorial, we're going to set up the dongle using Python script to scan for nearby Bluetooth devices. For a quick setup, copy the following script and save it on your local directory. You can also get the source code from our GitHub. - Page 39 input_time = input("Please select amount time the scanning should continue: ") while not input_time.isdigit(): input_time = input("Sorry, unacceptable time.\n" "Please select amount time the scanning should continue: ") console.write(str.encode("AT+GAPSCAN=")) console.write(input_time.encode()) console.write('\r'.encode()) elif new_input == "3": time.sleep(0.1) # sends the commands the dongle.
- Page 40 Option 3 will show the full advertising and response data of 31 bytes from the selected device. And that is how we scan for Bluetooth devices. If you want to stop the script, you can simply press control C. Youtube Tutorial Follow the Youtube tutorial.
-
Page 41: Scan And Store Example
Scan and Store Example Scan and Store example In this tutorial, we're going to set up the dongle using Python script to scan for nearby Bluetooth devices with a specific Manufacturer Specific (MFS) ID and then store the results together with a timestamp and the MAC Address in a simple text file. - Page 42 You should now be prompted to enter what you want to scan for. For example a Manufacturer Specific ID (if you want to scan for Smart Sensor Devices products for example you enter the Flag for MFS Data FF and then our MFS ID: 5B07).
- Page 43 The script will then generate a *.txt file in the same directory with the name entered as the file_name variable in the script. For example: "SavedData.txt". The script will run until you stop it. You can then have a look in the text file... Note that the script will not work if the text file is open or altered during runtime.
-
Page 44: Sps Script
SPS Script SPS Echo example In this tutorial, we're going to set up two dongles a using Python script to send data back and forth between them. In short: 1. One dongle will take on the Central role and the other will take on the Peripheral role. 2. - Page 45 print("\nWelcome the Serial Port Service (SPS) example!\n\n") print("\nRemember setup the Peripheral dongle first so Central has something connect to.\n\n ") # Python users # input = raw_input("Choose \n1) Peripheral... role_input = input("Choose: \n1) Peripheral Role\n2) Central role\n>> ") while not (role_input == "1"...
- Page 46 counter += 100. dongle_output2 = " " 101. while connected == "1": 102. dongle_output3 = console.read(console.in_waiting) 103. # Let's wait seconds make sure we have had a chance receiving anything before proc eeding 104. time.sleep(2) 105. if not dongle_output3.isspace(): 106. # Here we check we receive a message.
- Page 47 You can get the MAC address by scanning for the other dongle while it's advertising. To learn more about how to scan check out our scanning tutorial. Open up the command prompt, on both computers, in the directory where the script is located. Start the script by typing python sps_example.py and press Enter.
Need help?
Do you have a question about the BleuIO and is the answer not in the manual?
Questions and answers