
Subscribe to Our Youtube Channel
Summary of Contents for Starblitz SRC-FREQUENCIA
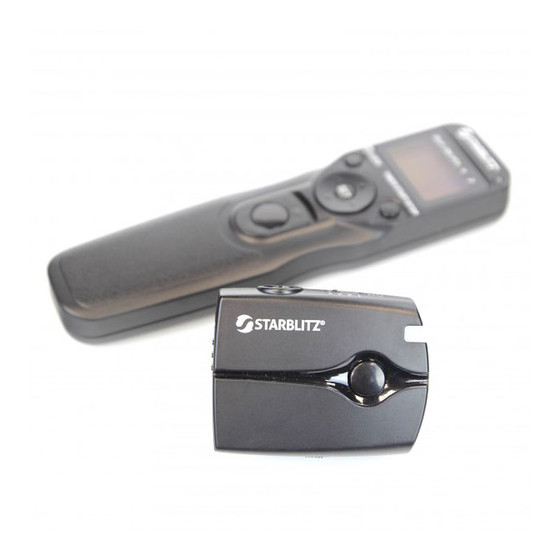
- Page 1 Wireless Timer/Trigger SRC-FREQUENCIA User guide / Mode d’emploi / Manual de instrucciones www.starblitz.fr...
-
Page 3: Table Of Contents
Remote ................4 Wireless Timer/Trigger Display Panel ..............5 Inserting Batteries .............5 STARBLITZ® SRC-FREQUENCIA Replacing Batteries ...........5 When SRC-FREQUENCIA Is Not in Use ....5 Lighting /Lock Button ..........6 User guide Connecting SRC-FREQUENCIA ........6 Using SRC-FREQUENCIA ...........7 Timed Photography ..........7 Manual Release ............14 Precautions for Use .......... -
Page 4: For Your Safety
For Your Safety (1/2) To prevent damage to your product or injury to your- Do not disassemble or modify Keep out of reach of children self or to others, read the following safety precautions Failure to observe this precaution could result in This device contains small parts which may pose a in their entirety before using this equipment. - Page 5 For Your Safety (2/2) Do not expose to high temperatures Use only batteries listed in this manual. Do not Batteries are prone to leakage when fully Do not leave the device in a closed vehicle under mix old and new batteries or batteries of different discharged.
-
Page 6: Introduction
Thank you for your purchase of Timer/Trigger RECEIVER Please see the back of the cover illustrations. Starblitz® SRC-Frequencia. REMOTE CONTROL The Timer/Trigger Starblitz® SRC-Frequencia is Connector (More models available) equipped with an interval timer suited to a wide variety of tasks, including astronomical photogra- Cord phy. -
Page 7: Display Panel
)indicators are not displayed. LR03 alkaline batteries (available separately) Lock indicator LEASE” ( )indicators are not displayed. of SRC-Frequencia and insert two AAA 1.5V LR03 1 . Check that the TIMER ACTIVE ( ) and RELEASE as shown. Timer display... -
Page 8: Lighting/Lock Button
Manual release active (p. 14); release release shutter-release button the lock icon is no longer displayed. After checking that the “TIMER ACTIVE” ( ) and ‘RE- camera off and disconnect the SRC-Frequencia . shutter-release button( ); if button is in ACTIVE not RELEASE ( 9 ;... -
Page 9: Using Src-Frequencia
An automatic timer (pp.7-13).Choose the de- An automatic timer (p. 7-13). Choose the delay 1.1 Connect the 1.1. Connect the SRC-Frequencia (p. 6) and turn SRC-ALBA (pg.6) and turn 2.1 Press the SET button ( 6 ). “SET” will flash in 2.1. - Page 10 Timed Photography (2/7) Timed Photography (2/7) Timed Photography (2/7) Timed Photography (2/7) Timed Photography (2/7) 2.2. Réglez les paramètres suivants : 2.2 Adjust the following settings: 2.2 Adjust the following settings: 2.2 Adjust the following settings: 2.2 Adjust the following settings: Option Description Supported settings...
- Page 11 Timed Photography (3/7) med Photography (3/7) Setting the timer Delay (time until shooting starts) Setting the Timer Delay Use the arrow button to set the timer. Use the arrow button to set the Minute Second Hour Minute Second Hour Press left or right to select, up or down timer.
- Page 12 Timed Photography (4/7) Timed Photography (4/7) Exposure time Interval Number of shots Speaker Interval Number of shots Speaker Exposure time Minute Second Hour Minute Second Minute Second Hour Minute Second DELAY LONG INTVL N DELAY LONG INTVL N DELAY LONG INTVL N DELAY LONG INTVL N DELAY LONG INTVL N DELAY LONG INTVL N...
- Page 13 Timed Photography (5/7) Timed Photography (5/7) 2.3 After adjusting all settings as desired, press 3.Start the Timer Setting the Timer Setting the Timer 2.3. After adjusting all settings as desired, press the 3. Start the Timer the SET button ( 6 )to put the new settings into Press the TIMER START/STOP button ( 5 ).The To ensure correct operation, choose an interval at SET button (...
- Page 14 Timed Photography (6/7) Timed Photography (6/7) Timed Photography (6/7) 4. End Shooting 4. End Shooting When that did not open the Show Panel Display (Timer Active) Show Panel Display Shooting will end automatically when the selected When shutter is not open: Shooting will end automatically when the se- 4.
- Page 15 Number of shots Timed Photography (7/7) *The illustration inside the front cover shows the control panel with all elements lit. In the 5. Using the camera to select Shutter Speed 6. Using the Timer other illustrations throughout this manual, To take photographs at the shutter speed selected with the camera, adjust settings as follows: Before using the timer for extended periods, check elements relevant to the explanation in the that the batteries have enough charge.
-
Page 16: Manual Release
The show open. lease the shutter manually while the timer is Connect SRC-Frequencia (p. 6) and turn the came- To keep the shutter- release button fully panel will remain off and no beep will sound. -
Page 17: Precautions For Use
Check the camera battery level and number of expo- Do not drop: The product may malfunction if A note on electronically-controlled devices: sures remaining before using the SRC-Frequencia subjected to strong shocks or vibration. In extremely rare instances, unusual characters (see the camera manual for details). -
Page 18: Specifications
Specification Supported cameras Canon, Nikon, Sony, Olympus, Pentax, Samsung, Konica Minolta, etc. Timer delay 0s to 99 hrs 59 min 59s in one-second increments Exposure time 0s to 99 hrs 59 min 59s in one-second increments Interval 1s to 99 hrs 59 min 59s in one-second increments Number of shots 1 to 399,--(unlimited) Power source... - Page 19 Composants du SRC-Frequencia ......4 Panneau de commande ...........5 Wireless Timer/Trigger Insertion des piles .............5 Remplacement des piles ..........5 STARBLITZ® SRC-FREQUENCIA Lorsque vous n’utilisez pas le SRC-Frequencia ..5 Bouton de rétro-éclairage/verrouillage ....6 Connexion du SRC-Frequencia .......6 Mode d’emploi Utilisation du SRC-Frequencia ........7 Photographie programmée........7 Déclenchement manuel ........
-
Page 20: Pour Votre Sécurité
Pour votre sécurité (1/2) Pour ne pas risquer d’endommager votre matériel ou Ne pas démonter ni modifier le produit Ne pas laisser le produit à la portée des enfants de vous blesser, vous ou d’autres personnes, prenez Le non-respect de cette précaution peut causer Cet équipement contient de petites pièces qui soin de lire attentivement les recommandations sui- une décharge électrique ou un dysfonctionnement... - Page 21 Pour votre sécurité (2/2) Ne pas exposer le produit à des températures Lisez et respectez tous les avertissements et ins- Si le liquide des piles entre en contact avec la élevées tructions fournis par le fabricant. peau ou les vêtements, rincez immédiatement Ne laissez pas l’équipement dans un véhicule fermé...
-
Page 22: Introduction
Introduction Composants du SRC-Frequencia (1/3) RÉCEPTEUR Nous vous remercions d’avoir fait l’acquisition du Merci de vous reportez aux illustrations au verso de la Wireless Timer/Trigger Starblitz® Frequencia. couverture. Le Wireless Timer/Trigger Starblitz® Frequencia TÉLÉCOMMANDE est équipé d’un retardateur à intervalles adapté à... -
Page 23: Panneau De Commande
SRC-ALBA and insert two AAA 1.5V Show time 1 Check that the “TIMER ACTIVE” ( ) and “RE- l’arrière du SRC-Frequencia et insérez deux piles LR03 alkaline batteries (available separately) Lock indicator LEASE” ( )indicators are not displayed. -
Page 24: Bouton De Rétro-Éclairage/Verrouillage
ACTIVE not ACTIVE not ( 9 ; if button is in HOLE position, ( 9 ; if button is in HOLE position, tez le SRC-Frequencia. Remettez le volet du termi- Instructions p.14 ; si la commande est Disconnecting the MC-36b... -
Page 25: Utilisation Du Src-Frequencia
à l’aide du déclencheur du Interval timer Vitesse the SRC-ALBA, Photographs can be taken SRC-Frequencia. La prise de vue manuelle est pos- Bulb d’obturation Focus mode AF-C (continuous-wervo autofo- Le SRC-Frequencia peut être connecté à l’appa- manually even when the timer is running. - Page 26 Photographie programmée (2/7) Timed Photography (2/7) Timed Photography (2/7) Timed Photography (2/7) Timed Photography (2/7) 2.2. Réglez les paramètres suivants : 2.2 Adjust the following settings: 2.2 Adjust the following settings: 2.2 Adjust the following settings: 2.2 Adjust the following settings: Option Description Description...
- Page 27 Photographie programmée (3/7) med Photography (3/7) Réglage du retardateur Delay (time until shooting starts) Setting the Timer Retardement Use the arrow button to set the timer. Réglez le retardateur à l’aide du Minute Second Heures Minutes Secondes Hour Press left or right to select, up or down pavé...
- Page 28 Photographie programmée (4/7) Timed Photography (4/7) Temps d’exposition Intervalle Nombre de prises Haut-parleur Interval Number of shots Speaker Exposure time Minutes Secondes Heures Minutes Secondes Minute Second Hour Minute Second DELAY LONG INTVL N DELAY LONG INTVL N DELAY LONG INTVL N DELAY LONG INTVL N DELAY LONG INTVL N DELAY LONG INTVL N...
- Page 29 Timed Photography (5/7) Photographie programmée (5/7) 2.3 After adjusting all settings as desired, press 3.Start the Timer Setting the Timer Réglage du retardateur 2.3. Après avoir réglé tous les paramètres, appuyez 3. Démarrage du retardateur the SET button ( 6 )to put the new settings into Press the TIMER START/STOP button ( 5 ).The To ensure correct operation, choose an interval at sur le bouton SET (...
- Page 30 Photographie programmée (6/7) Timed Photography (6/7) Timed Photography (6/7) 4. Arrêt de la prise de vue 4. End Shooting When that did not open the Lorsque cela n’a pas ouvert l’obturateur : Show Panel Display (Timer Active) Affichage du panneau La prise de vue s’arrête automatiquement lorsque (entre deux vues) temps restant jusqu’à...
- Page 31 AF-C (autofocus continu)* ou M (manuel) Mode de prise de vue S (une vue) Temps d’exposition SRC-Frequencia Intervalle Supérieur à la vitesse d’obturation de l’appareil photo** * Sélectionnez « release priority » (priorité au déclenchement) si cette option est disponible.
-
Page 32: Déclenchement Manuel
Manual Release Déclenchement manuel And the display will show the shutter has SRC-ALBA shutter-release button( 9 ) Le déclencheur du SRC-Frequencia peut être SRC-ALBA shutter-release button can Le déclencheur du SRC-Frequencia ( ) fonc- L’indicateur RELEASE ( ) clignote et l’écran de opened the time. -
Page 33: Précautions D'utilisation
à de violents par des équipements tels que des émetteurs radio d’utiliser le SRC-Frequencia (reportez-vous à la chocs ou à de fortes vibrations. peuvent interférer avec l’équipement. -
Page 34: Caractéristiques
Caractéristiques Appareils pris en charge Canon, Nikon, Sony, Olympus, Pentax, Samsung, Konica Minolta, etc. Retardement 0 s à 99 h 59 min 59 s (par incréments d’une seconde) Temps d’exposition 0 s à 99 h 59 min 59 s (par incréments d’une seconde) Intervalle 1 s à... - Page 35 Wireless Timer/Trigger Pantalla de visualización ..........5 Insertar las pilas ............5 STARBLITZ® SRC-FREQUENCIA Reemplazar las pilas..........5 Cuando el SRC-Frequencia no esté en uso ...5 Botón de iluminación / bloqueo ......6 Manual de instrucciones Conectar el SRC-Frequencia ........6 Cómo usar el SRC-Frequencia .........7 Fotografía programada ..........7...
-
Page 36: Para Su Seguridad
Para su seguridad (1/2) Para evitar daños al producto y lesiones al usuario o No desarme ni modifique el producto. Mantenga el producto fuera del alcance de a terceros, lea íntegramente las siguientes recomen- No respetar esta precaución podría ocasionar un los niños. - Page 37 Para su seguridad (2/2) No exponga el producto a una temperatura No combine pilas usadas y nuevas, ni pilas de En el caso de que el líquido de las pilas entre en elevada, como podría ser la de un coche cerrado distintos tipos.
-
Page 38: Introducción
Introducción Componentes del SRC-Frequencia (1/3) Le agradecemos la adquisición del Wireless RECEPTOR Revise las ilustraciones del reverso de la primera de Timer/Trigger Starblitz® Frequencia. cubierta. El Wireless Timer/Trigger Starblitz® Frequencia CARCASA cuenta con un temporizador de intervalos diseña- Conector (Más modelos disponibles) do para un amplio abanico de tareas, tal como la fotografía astronómica. -
Page 39: Pantalla De Visualización
“TIMER ACTIVE” ( ), “SET” ( ),and las pilas cuando el SRC-Frequencia no esté en uso, activados. En las otras ilustraciones que acompañan los “RELEASE” ( ) indicators are not accompanying text are shown in black. Indi- “RELEASE”... -
Page 40: Botón De Iluminación / Bloqueo
Sin que se active el testigo TIMER cámara y desconecte el SRC-Frequencia. Vuelva a RELEASE ACTIVE not ACTIVE not ( 9 ; if button is in HOLE position, ( 9 ;... -
Page 41: Cómo Usar El Src-Frequencia
An automatic timer (pp.7-13).Choose the de- Un temporizador automático (véanse pp. 7-13) 1.1 Connect the 1.1. Conecte el SRC-Frequencia (véase p. 6) y en- SRC-ALBA (pg.6) and turn 2.1 Press the SET button ( 6 ). “SET” will flash in 2.1. - Page 42 Fotografía programada (3/7) Timed Photography (2/7) Timed Photography (2/7) Timed Photography (2/7) Timed Photography (2/7) 2.2. Configure los siguientes parámetros: 2.2 Adjust the following settings: 2.2 Adjust the following settings: 2.2 Adjust the following settings: 2.2 Adjust the following settings: Opción Description Descripción...
- Page 43 Fotografía programada (3/7) med Photography (3/7) Ajustar el temporizador Delay (time until shooting starts) Setting the Timer Retardador (Tiempo de espera antes de que se dispare el obturador) Use the arrow button to set the timer. Use el botón direccional para Minute Second Horas...
- Page 44 Fotografía programada (4/7) Timed Photography (4/7) Tiempo de exposición Intervalo Número de disparos Altavoz Interval Number of shots Speaker Exposure time Minutos Segundos Horas Minutos Segundos Minute Second Hour Minute Second DELAY LONG INTVL N DELAY LONG INTVL N DELAY LONG INTVL N DELAY LONG INTVL N DELAY LONG INTVL N DELAY LONG INTVL N...
- Page 45 Fotografía programada (5/7) Timed Photography (5/7) Configurar el temporizador 2.3. Después de configurar todos los nuevos pará- 3. Iniciar el temporizador 2.3 After adjusting all settings as desired, press 3.Start the Timer Setting the Timer metros como lo desee, pulse el botón SET ( Asegúrese de un funcionamiento óptimo, eligiendo Pulse el botón TIMER START/STOP ( ).
- Page 46 Fotografía programada (6/7) Timed Photography (6/7) 4. Poner fin a los disparos 4. End Shooting When that did not open the Cuando está cerrado el obturador: (Dispa- Show Panel Display (Timer Active) Visualizar el temporizador Timed Photography (6/7) Partsof De forma automática, la cámara dejará de disparar ros) tiempo que queda antes del siguiente Shooting will end automatically when the se- shutter: shots: Time remaining...
- Page 47 AFC (Enfoque automático continuo)* o M (Manual) Modo de disparo S (Fotograma sencillo) Tiempo de exposición SRC-Frequencia Intervalo Más largo que la velocidad de obturación de la cámara** * Seleccione la función «Release priority» (Prioridad de disparo) si está disponible.
-
Page 48: Modo De Disparo Manual
(pg.6) and turn the dirección opuesta a la que se usa para activar el El botón disparador de obturador podrá usarse Conecte el SRC-Frequencia (p.6) y encienda la opposite direction to release the lock. shutter manually while the timer is active. Timer count- bloqueo. -
Page 49: Precauciones De Uso
SRC-Frequencia (véase el manual de la cámara para vibraciones fuertes. Observación sobre los equipos de control mayor información). El temporizador seguirá funcio- electrónico. -
Page 50: Especificaciones
Especificaciones Cámaras compatibles Canon, Nikon, Sony, Olympus, Pentax, Samsung, Konica Minolta, etc. Retardador (Tiempo de espera) Desde 0 s hasta 99 h 59 min 59 s en incrementos de un segundo Tiempo de exposición Desde 0 s hasta 99 h 59 min 59 s en incrementos de un segundo Intervalo Desde 1 s hasta 99 h 59 min 59 s en incrementos de un segundo Número de disparos... - Page 52 Printed in P.R.C www.starblitz.fr...
Need help?
Do you have a question about the SRC-FREQUENCIA and is the answer not in the manual?
Questions and answers