Table of Contents

Subscribe to Our Youtube Channel
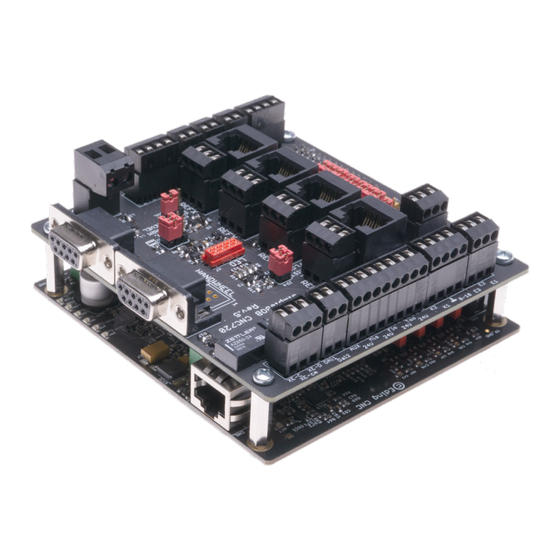
Summary of Contents for Sorotec Simple BOB CNC720
- Page 1 Installation Manual Simple BOB CNC720 Breakoutboard EIF.SIMPLEBOB.720 SOROTEC GmbH Tel.: +49 (0) 7227-994255-0 Withig 12 Fax: +49 (0) 7227-994255-9 77836 Rheinmünster E-Mail: sorotec@sorotec.de Version 1.0.0 Web: www.sorotec.de...
-
Page 2: Table Of Contents
Installation Manual Simple BOB CNC720 Breakoutboard Table of contents 1. Revision history..........................3 2. Safety notice ............................. 4 3. Connections ............................4 3.1 Graphical overview of the connections ..................4 3.2 Tabular overview of the connections .................... 5 4. Functional description ........................7 4.1 Power supply (X-PWR) ........................ -
Page 3: Revision History
Installation Manual Simple BOB CNC720 Breakoutboard 1. Revision history File-Version Date Modification Author 1.0.0 14.07.2020 Initial version Sorotec GmbH (SS) www.sorotec.de Seite 3/18 V 1.0.0... -
Page 4: Safety Notice
Simple BOB CNC720 Breakoutboard 2. Safety notice The Simple BOB CNC720 may only be installed and put into operation by electro- tecnical qualified personnel. Please read the operating instructions carefully and follow all instructions exactly. Improper installation or operation of the device can damage the electronics or the machine and endanger the health of the operating personnel. -
Page 5: Tabular Overview Of The Connections
Installation Manual Simple BOB CNC720 Breakoutboard 3.2 Tabular overview of the connections X2 – SUB-D 9-pole female X-PRBEXT – SUB-D 9-pole female (Connection for handwheel) (Tool length sensor) PIN Description PIN Description IN RUN - Start signal input IN PAUSE - Pause... - Page 6 Installation Manual Simple BOB CNC720 Breakoutboard X1 – Connection terminal 3-pole X-EXTERR – Connection terminal 3-pole (Voltage tap) (Relay External Error - potential-free) No Description No Description XE-O - Normally open contact (NO) 5V - Supply voltage +5 V/DC XE-CM - Common connection...
-
Page 7: Functional Description
Installation Manual Simple BOB CNC720 Breakoutboard 4. Functional description 4.1 Power supply (X-PWR) The Simple BOB 720 is supplied with a DC voltage at the terminal X-PWR. By placing the Simple BOB 720 correctly on the EdingCNC720 controller board, the controller is supplied directly by the Simple BOB 720. -
Page 8: Watchdog (X-Ena)
Installation Manual Simple BOB CNC720 Breakoutboard 4.5 Watchdog (X-ENA) With the Simple BOB 720, the watchdog functionality of the EdingCNC CPU720 can be used to switch off motor drivers, holding brakes and other actuators as long as the EdingCNC is not in the „Ready-state“. -
Page 9: External Drive Error (X-Alm-Ext)
Installation Manual Simple BOB CNC720 Breakoutboard 4.10 External drive error (X-ALM-EXT) In addition to the inputs via the RJ45 socket of the axes, the X-ALM-EXT connection terminal offers a con- nection option for drive monitoring. Depending on the jumper setting JP2 on the Simple BOB 720, either GND or 5V/DC is switched. -
Page 10: External Status Leds
Installation Manual Simple BOB CNC720 Breakoutboard 4.17 External status LEDs The red Micro-Match connector LED can be used to connect external LEDs with the appropriate mating connector and a ribbon cable to display the different stages and errors. LED status boards with the mat- ching mating connector are available in our shop ready for connection. -
Page 11: Installation
Installation Manual Simple BOB CNC720 Breakoutboard 5. Installation Note: Check the configuration of your EdingCNC CPU720 and set the jumpers as described in section 5.3.1 Jumper settings EdingCNC CPU720 before installing the Simple BOB 720 on the controller. Wiring: Make sure there is a sufficient cable cross-section when wiring. When using stranded wires, end sleeves must be used! 5.1 Installation on the EdingCNC CPU720... -
Page 12: Jumper Settings Edingcnc Cpu720
Installation Manual Simple BOB CNC720 Breakoutboard 5.3.1 Jumper settings EdingCNC CPU720 JP6, JP7, JP8, JP9 JP16 JP15 JP14 JP10, JP11, JP12 JP13 JP4, JP5 Jumper Description Mode Setting / Annotation Output speed control signal 0-10V / PWM 0-10V, control VFD... -
Page 13: Jumper Settings Simple Bob 720
Installation Manual Simple BOB CNC720 Breakoutboard 5.3.2 Jumper settings Simple BOB 720 Jumper Description Mode Setting / Annotation all ON, Axis 1 - 4 activated, Drive Alarm settings (DRVALM) ON / OFF depending on the connected (see Adjustment of the drive alarm) - Page 14 Installation Manual Simple BOB CNC720 Breakoutboard Adjustment of the drive alarm (JP1) The alarms of the drives can be detected and evaluated with the inputs of the RJ45 sockets (PIN 7 + 8) or via the additional terminal X-ALM-EXT, provided the used driver has an alarm output. Depending on the connected driver, its output is either a normally closed or a normally open, which can be set using the jum- per strip JP1 Jumper 1 - 10.
- Page 15 Installation Manual Simple BOB CNC720 Breakoutboard Equivalent circuit diagram alarm connection jumper JP1 www.sorotec.de Seite 15/18 V 1.0.0...
-
Page 16: Technical Specifications
Installation Manual Simple BOB CNC720 Breakoutboard 6. Technical specifications 6.1 Electrical connection values Parameter min. max. Unit Operating voltage (nominal 24V) 22,8 24,3 Power consumption (without external consumers) Ambient temperature °C 5V additional power supply 5V current additional power supply... -
Page 17: Connection Examples
Installation Manual Simple BOB CNC720 Breakoutboard 7. Connection examples Component Terminal Connection Inductive reference sensor Mechancal reference switch Emergency stop Coupling relay www.sorotec.de Seite 17/18 V 1.0.0... -
Page 18: Start-Up And Troubleshooting
8.1 Start-up check list Check the following points again before switching on: Are the EdingCNC CPU720 and the Simple BOB CNC720 correctly plugged together and the spacer bolt screwed correctly? • Are all terminal blocks correctly aligned in their slots? •...
Need help?
Do you have a question about the Simple BOB CNC720 and is the answer not in the manual?
Questions and answers